Silicone Soap Mold Care: Prevention, Cleaning & Storage
A practical, evidence-based guide to cleaning, drying, and storing silicone soap molds to prevent mold growth and extend mold life. Learn safe cleaners and a step-by-step routine from Mold Removal Lab.

With proper care, silicone soap molds stay clean and mold-free. This quick guide shows practical steps to clean, disinfect, dry, and store molds after use, plus strategies to prevent future mold growth through airflow, humidity control, and routine maintenance. Follow recommended cleaners, avoid harsh chemicals, and inspect seams for wear.
Why silicone soap mold care matters
Silicone soap molds are popular for their flexibility and easy release, but damp conditions can lead to mildew and musty odors if not cared for properly. According to Mold Removal Lab, leaving a silicone item wet for extended periods creates an environment where mold and mildew can begin to grow on residue. This section explains why routine care matters and how staying proactive protects soap quality, extends mold life, and reduces the risk of allergens in your kitchen or bathroom. You will learn how moisture, soap residue, and storage environment contribute to mold risk, and how a simple care routine can prevent problems before they start.
Safe cleaners and tools for silicone molds
Choosing the right cleaners is key to preserving the silicone's integrity while effectively removing soap residue and any visible mold. Use mild dish soap and warm water as the baseline cleaner. For stubborn mildew, a white vinegar solution (1 part vinegar to 3 parts water) can be effective without harsh chemicals. For disinfection, 3% hydrogen peroxide applied briefly is generally safe for silicone; rinse well afterward. Avoid abrasive pads, acetone, or bleach, which can degrade silicone over time. Mold Removal Lab's analysis indicates that gentle cleaning preserves elasticity and prevents clouding or cracking of the silicone surface. Have a soft-bristled brush and a non-abrasive sponge ready to lift residue from crevices.
Cleaning routine: a practical workflow
A consistent cleaning routine minimizes soap buildup and reduces the risk of mold growth. Start by rinsing molds under warm, running water to remove loose residue. Use a mild soap solution or a vinegar mix for deeper cleaning, then scrub gently with a soft brush to reach crevices. Rinse thoroughly until no soap or vinegar scent remains. Inspect for cracking or clouding; these can harbor residue that invites mold. Dry the molds completely with a lint-free cloth, then air-dry on a rack or silicone mat before storing.
Drying and storage strategies to prevent recontamination
Drying is the most critical step to prevent mold symptoms from returning after cleanup. After drying with a towel, place molds in a well-ventilated area where air can circulate freely. Avoid stacking while still damp, and use a drying rack or silicone mat to promote even evaporation. Store molds in a cool, dry place away from direct sunlight and heat sources, which can degrade silicone over time. Regularly check for moisture pockets in creases and corners and dry them completely.
Troubleshooting: signs you need a new mold
Even with careful cleaning, silicone molds may wear out. Look for deep cracks, tears, persistent odor, or a sticky feel that soap residue doesn’t wash away. If the mold shows significant wear, it can harbor bacteria or mildew in micro-crevices, making it harder to sanitize effectively. In such cases, consider replacing the mold to maintain safe soap production and hygiene.
Maintenance habits for busy kitchens
Create a simple weekly routine to keep silicone molds mold-free: quick wipe-down after each use, a deeper clean every other week, and a full inspection monthly. Keep your cleaners handy, and ensure your drying area remains dry and well-ventilated. According to Mold Removal Lab analysis, routine maintenance reduces the risk of mold recurrence and preserves silicone integrity over time.
Care in humid environments
Humid environments increase mold risk even with silicone molds. If your kitchen or bathroom is prone to moisture, use a dehumidifier or a fan to reduce ambient humidity, especially during storage. Store molds in a cabinet that stays dry, or elevate them off surfaces to promote air flow. Regularly re-check stored molds for any signs of moisture and re-clean if needed.
Tools & Materials
- Mild dish soap(Fragrance-free preferred.)
- White vinegar(Use for mildew as an optional stronger cleaner.)
- Hydrogen peroxide 3%(Briefly for disinfection if needed.)
- Warm water(Not boiling; comfortable to touch.)
- Soft-bristled brush(Reach crevices and seams.)
- Non-abrasive sponge(Prevent scratching the silicone.)
- Lint-free cloth(For drying and wiping.)
- Drying rack or silicone mat(Promotes complete air-drying.)
- Gloves(Skin protection if desired.)
Steps
Estimated time: 25-40 minutes
- 1
Gather supplies and prepare workspace
Lay out all cleaners and tools in a clean, dry area. This minimizes cross-contamination and ensures you can work efficiently without leaving damp surfaces.
Tip: Prepare a basin or tray to catch splashes and keep the workspace organized. - 2
Rinse to remove loose residue
Rinse the mold under warm running water to wash away soap scum and loose debris before applying cleaners.
Tip: Use warm water, not hot, to prevent silicone warping. - 3
Apply cleaner and scrub gently
Apply a mild soap solution or vinegar mix, then scrub with a soft brush to lift residue from crevices without scratching.
Tip: Avoid abrasive pads that can dull the silicone surface. - 4
Rinse thoroughly and inspect
Rinse until no soap or vinegar remains. Inspect for residual residues, clouding, or cracks that could trap moisture.
Tip: Pay attention to inner corners and channels. - 5
Dry completely
Pat dry with a lint-free cloth and then place on a rack or mat to air-dry fully before storage.
Tip: Do not rush drying; moisture pockets invite mold. - 6
Store properly and inspect regularly
Store in a dry, ventilated area; check monthly for signs of wear or moisture and repeat cleaning if needed.
Tip: Elevate from surfaces and away from direct heat.
FAQ
Can silicone soap molds harbor mold growth if left damp?
Yes. Moisture and soap residue can invite mold; clean and dry promptly after use.
Yes, damp silicone molds can harbor mold if not dried thoroughly after cleaning.
Is it safe to use bleach or acetone on silicone soap molds?
Bleach and acetone can degrade silicone over time; opt for mild soap, vinegar, or hydrogen peroxide instead.
Bleach can damage silicone; use gentler cleaners instead.
How often should I sanitize silicone molds?
Sanitize after each use if possible; otherwise, do a deep clean weekly to reduce buildup.
Sanitize after each use for best results.
What is the best way to dry silicone molds?
Air-dry on a rack in a ventilated area until completely dry; avoid stacking while damp.
Air-drying in a well-ventilated area is best.
When should I replace a silicone mold?
Replace if you notice deep cracks, tears, persistent odors, or if cleaning no longer restores safety.
Replace if damaged or if cleaning no longer helps.
Watch Video
The Essentials
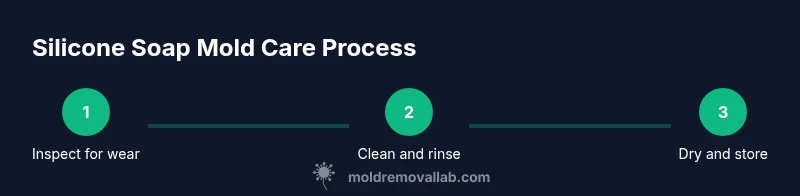
- Inspect for wear after each use.
- Use mild cleaners to protect silicone.
- Dry completely before storing.
- Keep molds in a dry, ventilated area.
- Maintain a routine to prevent mold growth.