How to Fix Mold on Drywall: A Complete Step-by-Step Guide
Learn how to safely fix mold on drywall with a thorough, moisture-focused remediation plan. This guide covers assessment, containment, cleaning, patching, priming, and prevention to protect your home and health.

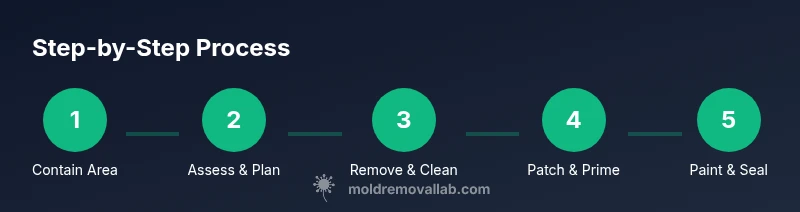
This guide shows you how to fix mold on drywall from assessment to finish, emphasizing moisture control, containment, cleaning, patching, and prevention. According to Mold Removal Lab, start by stopping the moisture source, contain the area, and follow a step-by-step remediation plan using mold-resistant materials and proper PPE. You’ll restore drywall integrity and reduce future mold risk.
What mold on drywall looks like and why it matters
Mold on drywall is more than a cosmetic issue. It signals ongoing moisture intrusion, and if ignored, can weaken the wall assembly and release spores that irritate the eyes, nose, throat, and lungs. Common indicators include fuzzy patches, dark or discolored blotches, and a persistent musty odor in damp areas. Because drywall is porous, mold growth can start beneath a fresh coat of paint or behind wallpaper, making surface scrubbing ineffective. The first step in remediation is identifying and stopping the moisture source—leaks, condensation, or poor ventilation—before pulling away damaged material. Mold on drywall often travels behind studs and into wall cavities, where it’s harder to detect. Quick action saves money and reduces health risks. Mold Removal Lab’s guidance emphasizes moisture control as the foundation of effective remediation and the importance of containment to prevent spores from spreading during cleanup.
Safety first: assessment, PPE, and when to call a pro
Handling mold safely protects your health and avoids spreading contamination. Always start by turning off affected HVAC and isolating the room with plastic sheeting. Wear an N95 respirator (preferably without an exhale valve), impermeable gloves, eye protection, and disposable coveralls. Avoid disturbing large patches of growth or cleaning behind finished surfaces until you understand the extent. If you suspect hidden mold behind walls, or if the mold covers a large area, or if you have health concerns, contact a qualified mold remediation professional. Some weather conditions, like high humidity, can worsen mold growth, so plan cleanup on dry days when possible. Mold Removal Lab emphasizes safety as the cornerstone of any remediation project and warns that improper cleaning can release spores and worsen indoor air quality. Always document moisture sources and remediation steps in case you need to discuss options with your insurer or landlord.
Containment and assessment: preparing the space
Containment helps prevent spores from spreading during cleanup. Use heavy-duty plastic sheeting to seal off the affected area and create a one-way flow by disabling intake vents if possible. Lift damp drywall slightly with a scraper to gauge moisture behind it, and use a moisture meter if available to assess how deep the problem runs. Document visible growth with photos to track progress and build a remediation plan. A quick assessment should also check for leaks, condensation routes, and ventilation adequacy. By preparing the space and understanding the scope, you reduce the likelihood of recontamination after cleanup.
Cleaning vs replacement: salvageable drywall
Drywall damaged by mold is sometimes salvageable, but porous material often requires removal and replacement when the paper facing is harboring growth or moisture has penetrated deeply. If the backing board shows staining that cannot be treated, or if there are soft, crumbling areas, plan to cut out and replace those sections. Surface cleaning with a mold-killing solution can be used on non-porous areas, but drywall itself usually needs patching and sealing after drying. Remember: dry time is critical; moisture must be eliminated before any painting or sealing to prevent regrowth.
Cleaning methods and mold-killing strategies
Use a two-step approach: (1) remove loose mold with a stiff brush or scraper, (2) clean the surface with a detergent solution and a non-abrasive sponge. A separate mold-killing agent can be applied following manufacturer directions, and surfaces should be allowed to dry completely between steps. Vacuuming with a HEPA-filter vacuum helps remove spores from the air and surfaces. Avoid over-wetting drywall; moisture left behind invites new growth. After cleaning, inspect for any remaining staining and repeat cleaning if necessary.
Patching and finishing: drywall repair and paint
For patches, cut out damaged drywall with a utility knife, then install new drywall to match thickness. Secure with drywall screws, apply drywall tape, and cover with joint compound. Sand smooth once dry, then prime with a mold-resistant primer before painting with mildew-resistant paint. Ensure the surrounding area remains dry during this process, and seal any edges where moisture could re-enter. A proper finish not only looks good but also helps inhibit future mold growth by reducing micro-environments where moisture can linger.
Prevention: maintaining a mold-free environment
Effective prevention focuses on moisture control and ventilation. Repair leaks promptly, run bathroom and kitchen exhaust fans during moisture-producing activities, and avoid excessive humidity by using a dehumidifier in damp spaces. Regularly inspect walls, ceilings, and basements for signs of moisture intrusion, and address issues before they become large-scale mold problems. Consider applying mold-resistant primer or paint to newly repaired areas to provide an added layer of protection. By maintaining appropriate humidity and improving airflow, you greatly reduce the chances of mold returning.
Tools & Materials
- N95 respirator (preferably without an exhale valve)(Fit-tested if possible; ensure seal around nose and mouth)
- Nitrile gloves(Single-use where possible)
- Safety goggles or face shield(Eye protection against splashes and spores)
- Disposable coveralls or old clothing(Keeps mold from spreading to personal clothing)
- Plastic sheeting (6 mil) and painter’s tape(Containment of the work area)
- Heavy-duty trash bags(For disposing of moldy drywall and debris)
- Mild detergent and warm water(For initial surface cleaning)
- Isopropyl alcohol (70%)(Optional surface disinfectant)
- Stiff-bristled brush or scraper(To remove surface mold)
- Putty knife and drywall tape(For patching holes and seams)
- Joint compound and sanding block(For patching and finishing)
- Mold-resistant primer(Before repainting)
- Mildew-resistant paint(Final finish)
- HEPA vacuum or vacuum with HEPA filter(Helps capture spores during cleanup)
- Dehumidifier or desiccant(Assists in drying quickly)
Steps
Estimated time: 8-16 hours plus drying time
- 1
Stop moisture and contain the area
Identify the moisture source and shut off the water or fix leaks. Seal the contaminated zone with plastic sheeting, creating a one-way flow to minimize spore spread.
Tip: Keep doors and vents sealed; avoid fans that pull air from the clean areas into the mold zone. - 2
Put on PPE and ventilate the space
Don the N95, gloves, goggles, and coveralls before touching moldy surfaces. Open windows if outdoor air quality is good to help with ventilation, but ensure the mold area remains contained.
Tip: Do a fit-check on your respirator and avoid touching moldy areas with bare skin. - 3
Assess extent and plan removal
Determine whether damaged drywall can be saved or must be removed. Document mold patches with photos and note moisture sources for the remediation plan.
Tip: If uncertainty exists about wall cavities, consult a professional before cutting into walls. - 4
Remove severely damaged drywall
Carefully cut out damaged sections with a utility knife and pry bar. Place removed material in labeled bags for disposal and prevent contamination of clean areas.
Tip: Work gradually to minimize dust and avoid scattering mold spores. - 5
Clean and dry the area
Wipe surfaces with detergent solution, rinse, and dry thoroughly. Vacuum with a HEPA-filter vacuum and use a dehumidifier to reduce humidity levels in the space.
Tip: Do not oversaturate drywall while cleaning; moisture slows drying and invites regrowth. - 6
Patch, mud, and sand
Install new drywall patches, tape seams, apply joint compound, and sand smooth once dry. Ensure the patched area is flush with surrounding walls before priming.
Tip: Apply thin coats of compound; multiple light coats prevent cracking. - 7
Prime, paint, and seal
Apply a mold-resistant primer, then finish with mildew-resistant paint. Seal edges and ensure good ventilation during painting to speed drying and reduce odor.
Tip: Consider using a mold-preventive coating on newly repaired areas.
FAQ
Can I fix mold on drywall myself?
Yes for small, localized growth if you can safely contain the area and thoroughly dry it afterward. For larger areas or mold behind walls, hire a professional.
Yes for small, localized growth if you can safely contain and dry it. For larger areas, hire a professional.
Is bleach effective for drywall mold?
Bleach is not ideal for porous drywall because it can’t kill mold inside the material and can create a damp environment that encourages regrowth. Use approved mold cleaners and thorough drying.
Bleach isn’t ideal for drywall; use proper cleaners and dry thoroughly.
When should drywall be replaced rather than cleaned?
Replace drywall when damage is widespread, the paper facing is compromised, or you can’t dry the material completely. Patching may not prevent future mold if the underlying moisture isn’t addressed.
Replace when damage is widespread or you can't dry it completely.
How can I prevent mold from returning?
Address moisture sources, improve ventilation, and keep humidity under control. Use mold-resistant primers and finishes on repaired walls to add a protective barrier.
Fix moisture, improve ventilation, and control humidity.
Do I need a professional inspector?
If mold recurs after cleaning, moisture issues persist, or you’re unsure about the extent, a qualified inspector can assess and guide next steps.
If it keeps coming back or you're unsure, call an inspector.
Watch Video
The Essentials
- Identify and fix the moisture source before cleanup.
- Contain the work area and wear proper PPE during remediation.
- Choose patching or replacement based on drywall damage depth.
- Finish with mold-resistant primer and proper ventilation to prevent recurrence.