How to Detox from Mold: A Practical Home Guide
A practical, evidence-based guide to reducing mold exposure at home. Learn what detox really means, how to safely address moisture, clean effectively, and decide when to call in professionals for mold remediation.

Detoxing from mold means reducing exposure and creating a safer indoor environment by controlling moisture, cleaning safely, and improving air quality. This guide provides practical steps you can take now, clarifies what detox realistically entails, and helps you decide when professional remediation is needed.
What detox from mold actually means
Detox in the context of mold remediation refers to two linked goals: lowering exposure to mold spores and toxins, and creating conditions that prevent regrowth. It is not a medical detox or a quick fix; rather, it’s a practical program of environmental management and safe cleaning. If you're asking how to detox from mold, the answer lies in reducing moisture, improving airflow, and removing sources of contamination while keeping your living space safe during the process. This section introduces core principles: moisture control, ventilation, cleaning with appropriate products, and monitoring progress with simple tools like a hygrometer. Throughout, remember that the body’s reaction to mold varies from person to person—some people experience mild irritation, others may have more pronounced symptoms. The goal is to minimize exposure and support a healthier indoor environment, rather than chasing instant cures. Mold is a biological issue that thrives in damp spaces; addressing those damp spaces is the most effective long-term detox strategy. The Mold Removal Lab team emphasizes practical steps backed by environmental health guidance: fix leaks promptly, dry affected areas within 24-48 hours if possible, and keep relative humidity below about 50-60% where feasible. By focusing on environment rather than pills, you lay the foundation for safer living while you plan any professional remediation if needed.
wordCountBonus:0},
toolsMaterials
stepByStep
tipsList
keyTakeaways
videoEmbed
faqSection
mainTopicQuery
Tools & Materials
- N95 respirator mask(Snug fit; replace if damp or worn.)
- Disposable gloves (nitrile or latex-free)(Use for cleaning and handling contaminated items.)
- Safety goggles(Eye protection when scrubbing moldy surfaces.)
- Protective coveralls or old clothing(Prevent cross-contamination to other areas.)
- Mild detergent or surface cleaner (non-ammonia)(Use on non-porous surfaces; avoid mixing with bleach.)
- Hydrogen peroxide 3% or white vinegar(Alternative cleaners for porous vs non-porous surfaces.)
- HEPA vacuum with sealed motor and attachments(For dry debris; do not use while remediation in dusty conditions unless sealed.)
- Microfiber cloths(Reusable after washing at high temperature.)
- Spray bottle(For applying cleaners evenly.)
- Moisture meter or hygrometer(Track humidity levels in treated areas.)
- Dehumidifier with drain option(Reduces ambient humidity to safer levels.)
- Plastic sheeting and tape(Containment to prevent spread during cleanup.)
- Trash bags (heavy-duty)(Seal and dispose of contaminated materials.)
- Bucket and mop with wringer(For floor cleaning and to minimize splashes.)
Steps
Estimated time: 4-8 hours (plus drying time as needed)
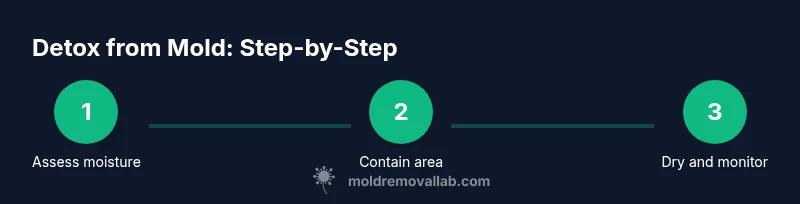
- 1
Inspect and document moisture sources
Begin by identifying visible leaks, condensation hotspots, and any signs of moisture intrusion. Photograph affected areas and note dates of any water exposure. This helps prioritize repairs and provides a baseline for progress. Why: addressing the root causes prevents mold from returning after cleanup.
Tip: Take clear photos from multiple angles; mark areas with tape to track changes over time. - 2
Contain the affected area
Close doors to the room and shut off HVAC to prevent spores from traveling. Use plastic sheeting to create a temporary containment zone if the mold is widespread. Why: containment limits cross-contamination and makes cleanup safer.
Tip: Seal gaps with painter’s tape and avoid disturbing moldy materials before proper containment is in place. - 3
Isolate and remove porous contaminated items
Carefully bag and seal porous materials (drywall, insulation, textiles) that are moldy and structurally compromised. Avoid shaking items to reduce airborne spores. Why: porous materials often harbor mold that is difficult to clean adequately.
Tip: Double-bag items in two trash bags before removal. - 4
Clean non-porous and semi-porous surfaces
Wipe and scrub surfaces with a non-ammonia cleaner; for non-porous surfaces, hydrogen peroxide or a diluted bleach solution (if safe for the surface) can be used per product label. Rinse, then dry thoroughly. Why: surface cleaning reduces spore load and discourages regrowth.
Tip: Never mix cleaners; bleach and ammonia can produce harmful gases. - 5
Dry thoroughly and monitor humidity
Use a dehumidifier and fans to drive moisture out of the area. Keep relative humidity below 50-60% and run the dehumidifier for 24-48 hours after cleaning, or longer in humid climates. Why: moisture is the main driver of mold recurrence.
Tip: Use a hygrometer to confirm stable humidity before final clearance. - 6
Reassess and prevent recurrence
Re-inspect in 1-2 weeks to ensure no new signs of moisture or mold appear. Repair leaks, improve ventilation, and maintain routine cleaning to sustain a healthier environment. Why: prevention is cheaper and safer than repeated remediation.
Tip: Establish a maintenance routine for humidity and air quality.
FAQ
Is detoxing from mold a medical treatment?
Detox, in this context, refers to reducing exposure and improving the indoor environment rather than a medical detox. People may experience symptom relief as exposure decreases, but there is no standardized medical detox for mold. Consider medical advice if you have health concerns.
Detox here means environmental cleanup, not a medical procedure.
Can I detox a home myself, or do I need professionals?
For small, isolated mold growth on non-porous surfaces, a careful cleaning plan may be enough. Widespread growth, hidden moisture, or mold behind walls usually requires professional remediation and moisture control to prevent recurrence.
Small problems can be tackled at home, but bigger issues usually need experts.
How long does it take to complete a detox process?
Time varies with area size, moisture level, and access to cleanup. Initial cleanup can take hours to a couple of days; full remediation and drying may extend over days to weeks depending on moisture sources and repairs.
It depends on size and moisture, but plan for several days to weeks.
Are household remedies effective against mold?
Household cleaners can reduce visible mold on non-porous surfaces, but they won’t reach mold hidden behind walls. Avoid relying on home remedies alone for extensive growth; professional assessment is recommended for hidden mold.
Remedies help surface mold, but hidden mold needs professional evaluation.
What signs indicate I should call a professional?
Persistent moisture, visible growth in multiple rooms, musty odor, or health symptoms linked to mold exposure warrant professional assessment and remediation. A professional can identify moisture sources and guarantee proper drying and containment.
If mold keeps coming back, call a pro.
Watch Video
The Essentials
- Reduce moisture to stop mold growth.
- Prioritize containment and safe cleaning over DIY myths.
- Document conditions and repairs for prevention.
- Know when to seek professional remediation.
- Maintain humidity and airflow to prevent recurrence.