How to Clean Mold Off Car Seats Safely: Step-by-Step Guide
Learn how to safely remove mold from car seats with practical steps, safe cleaners, and thorough drying tips. Mold Removal Lab shares expert guidance to protect upholstery and health, plus prevention tips for future mold growth.

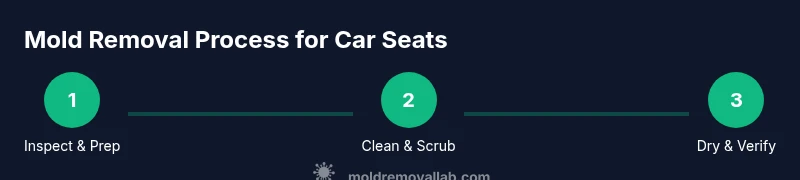
You can safely remove mold from a car seat by following a thorough, step-by-step cleaning method that targets the mold, uses appropriate cleaners, and ensures complete drying. Start with safety gear and ventilation, vacuum loose spores, treat the fabric, scrub affected areas, and finish with thorough drying to prevent regrowth. Always test a hidden area first.
Why Mold in Car Seats Demands Attention
Mold growth inside a car seat is more than a nuisance. It can compromise air quality, trigger allergic reactions, and create persistent odors that linger in the upholstery, padding, and seams. Vehicles provide a unique, moisture-prone environment: spills, humidity, and temperature fluctuations can drive mold spores into the fabric and foam layers beneath. When spores take root in folds and stitching, they can colonize deep into padding, making removal harder over time. Understanding the risk helps homeowners and renters act promptly. According to Mold Removal Lab, car-seat mold is a health concern that requires a thoughtful cleaning and drying plan, not just a quick wipe. Look for signs such as a musty smell, visible staining at seams, and damp or sticky areas after a spill. Early action reduces the chance of spores continuing to flourish in hidden pockets beneath the upholstery.
Safety First: PPE, Ventilation, and Prep
Before you touch any mold, equip yourself with a proper set of safety gear: an N95 respirator, disposable gloves, and eye protection. Work in a well-ventilated area by opening doors and windows and using a fan to move air outward. If possible, remove floor mats or seat covers to reduce surface area and prevent cross-contamination. Place towels or a tarp under the seat to catch drips and position a small air purifier if available. This phase lowers exposure risk and sets the stage for effective cleaning. Remember, fresh air and eye protection are your first line of defense against airborne spores.
Pre-Cleaning Assessment: Spot Test and Zone Strategy
Plan your approach by testing a small, inconspicuous area of the upholstery for colorfastness before applying any cleaner. Identify high-risk zones including seat seams, under cushions, headrests, and the backs of the seats where moisture tends to pool. Create a simple zone map in your mind or on paper: treat the worst-affected areas first, then move to the less affected parts to limit cross-contamination. This method helps you gauge how the fabric reacts to cleaners and ensures you do not over-wet delicate materials. With a careful appraisal, you reduce the chance of color bleed or foam damage while still addressing the mold.
Cleaning Methods for Fabric Upholstery
Fabric upholstery responds differently to cleaners. A common starting approach is a white vinegar solution—one part white vinegar to one part water—applied lightly to the affected areas and allowed to sit briefly before blotting. For disinfection, use a spray containing hydrogen peroxide (3 percent) in a test-friendly area first, and never saturate foam under the fabric. Enzyme-based upholstery cleaners can help break down organic material that mold feeds on, especially in dense upholstery. Always avoid chlorine bleach on dyed fabrics, as it can cause color loss and fabric damage. After applying cleaners, gently scrub with a soft brush in small circular motions, then blot with clean towels to lift moisture. Mold Removal Lab emphasizes using mild, fabric-safe cleaners and avoiding aggressive scrubbing that can fray fibers.
Rinse, Wipe, and Dry: Getting Moisture Out
Rinse the treated areas with a clean, damp cloth to remove any cleaner residue, then blot dry with fresh towels. Do not let the foam or cleaning solution pool in folds; excess moisture creates a breeding ground for new mold. Repeat as needed until the fabric looks and feels clean, and the odor begins to fade. After blotting, allow the seat to air-dry in a well-ventilated space. If possible, move the car to a sunny spot with doors open to speed evaporation, while avoiding direct sun that could fade fabrics. The goal is to remove surface moisture and prevent lingering dampness in the foam.
Drying Techniques to Prevent Regrowth
Thorough drying is essential for preventing mold return. Use a combination of airflow, dehumidification, and time. A portable fan positioned to blow across the seat and a dehumidifier in the car can help reduce humidity quickly. If you can, use a car sunshine to passively dry the interior, but avoid prolonged exposure that could damage materials. Keep the interior dry for at least 24 to 48 hours, checking periodically for any residual damp spots. Once the upholstery feels dry to the touch, perform a quick odor check and a light wipe to confirm freshness. Mold may reappear if damp pockets were missed, so patience during this phase is critical.
When to Call a Professional and How to Prevent Future Mold
If mold covers a large area, you notice recurring dampness, or you suspect hidden mold in padding or foam, professional remediation may be required. Deep-set mold can require specialized equipment and encapsulation techniques to ensure safe removal. To prevent future mold growth, maintain a dry interior, promptly clean spills, and use moisture absorbers or a dehumidifier in humid environments. Regularly inspect seat seams and under cushions for signs of moisture after trips in rainy weather. Consistent maintenance reduces the likelihood of mold returning and helps preserve the life and comfort of your car interior.
Quick Troubleshooting and Brand Insight: What Mold Removal Lab Recommends
The Mold Removal Lab team recommends a measured approach that combines safe cleaners, proper drying, and ongoing vigilance. For most fabric car seats, start with a colorfastness test, apply mild cleaners, and prioritize complete drying over aggressive scrubbing. If a spill occurs, address it promptly and avoid layering moisture in the foam. If odors persist, repeat the cleaning cycle and consider a professional assessment for hidden mold. The Mold Removal Lab approach emphasizes documentation of steps and using only fabric-safe products designed for vehicle interiors.
Tools & Materials
- HEPA-rated vacuum cleaner(Helps remove spores from fabric and foam; use with attachment to reach seams)
- Soft-bristle brush(Gentle scrubbing to avoid tearing fabric)
- Clean microfiber cloths(For applying cleaners and drying; prefer multiple lines of cloths)
- White vinegar(Used diluted to neutralize odors and loosen residues)
- Distilled water(For diluting cleaners and rinsing )
- Hydrogen peroxide 3%(Disinfects surfaces after cleaning; test first)
- Enzyme-based upholstery cleaner(Helpful for organic stains and odors; not always necessary)
- Spray bottles(Label each bottle with its cleaner to avoid cross-contamination)
- Gloves(Protect skin from cleaners and mold spores)
- N95 respirator(Better filtration of mold spores than a simple mask)
- Goggles or eye protection(Shield eyes from splashes)
- Tarp or old towels(Contain drips and protect carpets if cleaning inside the car)
- Portable fan or air mover(Speed up drying by increasing airflow)
Steps
Estimated time: 60-90 minutes active cleaning + 24-48 hours drying
- 1
Prepare and protect
Put on PPE and open the car doors to create a ventilated workspace. Move items away from the seat and place towels to catch drips. This reduces exposure and keeps the workspace organized.
Tip: Keep a trash bag handy for any disposable cleaning materials. - 2
Vacuum loose spores
Use a HEPA vacuum to remove visible mold spores from the seat surface and seams. Focus on folds, seams, and under cushions. Do not skip this step; removing surface spores lowers contamination risk.
Tip: Vacuum slowly to pick up small spores that can become airborne. - 3
Apply cleaner and test
Lightly mist the affected area with a safe cleaner such as a vinegar-water solution or an enzyme-based cleaner. Do a colorfastness test on a hidden spot before broad application to avoid color changes.
Tip: Avoid soaking; moisture trapped in foam invites mold growth. - 4
Scrub gently and blot
Gently scrub along seams with a soft brush in small circular motions. Wipe away residues with clean microfiber cloths and blot dry as you go.
Tip: Work in sections to keep track of treated areas. - 5
Disinfect and rinse
Apply a mild hydrogen peroxide spray to the treated area after scrubbing, then wipe with a damp cloth to remove residue. Rinse lightly to prevent leaving cleaner film behind.
Tip: Do not oversaturate the fabric; moisture left in foam is a mold risk. - 6
Dry thoroughly
Open the car doors and run a fan or dehumidifier to speed drying. Check for any remaining damp spots after 24 hours and repeat the cleaning cycle if odors persist.
Tip: Aim for complete dryness, not just surface dryness.
FAQ
Is it safe to drive the car immediately after cleaning mold from car seats?
If the interior is completely dry and there is no lingering odor, it is generally safe to drive. However, if you still detect moisture or mold smell, delay driving and re-check the seating areas.
If it feels dry and clean, you can drive, but if you sense dampness or mold odor, wait and recheck.
What household products work best for cleaning mold on fabric car seats?
White vinegar solutions, diluted hydrogen peroxide, and enzyme-based upholstery cleaners are effective options. Avoid chlorine bleach on dyed fabrics and always test first.
Try mild cleaners like vinegar or enzyme cleaners first, and test a hidden spot before full application.
What should I do if mold keeps returning after cleaning?
Reassess moisture sources, ensure complete drying, and consider repeating the cleaning cycle with different products. If mold persists, professional assessment may be necessary.
If mold comes back, check for hidden moisture and consider getting a professional opinion.
Can I treat leather or vinyl car seats the same way as fabric seats?
Leather and vinyl require specialized cleaners and conditioning products. Fabric-safe cleaners can damage non-fabric surfaces, so follow manufacturer guidance for these materials.
Leather seats need leather-safe cleaners and conditioners; don’t use fabric cleaners on them.
When should I call a professional for car seat mold?
If mold covers a large area, if moisture persists after cleaning, or if you suspect hidden mold in padding, professional remediation is advised.
If the mold is widespread or keeps coming back, a pro may be needed.
Watch Video
The Essentials
- Identify moisture sources and act promptly
- Use fabric-safe cleaners and test first
- Prioritize complete drying to prevent regrowth
- Wear PPE and ventilate during cleaning
- Consider professional help for large or hidden mold