Home Depot Mold Killer: DIY Mold Remediation Guide
Learn how to choose, apply, and safely use home depot mold killer products for DIY mold remediation. Expert guidance from Mold Removal Lab on product selection, safety, and when to call a pro.

What is a mold killer and why homeowners reach for products from big-box stores
Mold growth is a common aftereffect of moisture intrusion in homes. A mold killer is a consumer product designed to kill mold on surfaces and discourage regrowth. When shopping at big-box retailers like Home Depot, homeowners often see a range of products labeled as mold killers, cleaners, or mold removers. According to Mold Removal Lab, understanding the surface type and the extent of contamination helps select a product with appropriate active ingredients and safety features. This guide focuses on typical DIY products found at home improvement stores and outlines how to use them responsibly to reduce mold visibility and odors while minimizing health risks.
Mold killers differ in their base chemistry. Some products rely on chlorine bleach to oxidize mold on non-porous surfaces, while others use hydrogen peroxide, quaternary ammonium compounds (quats), or surfactants that improve penetration. The best choice depends on the surface you’re treating, whether the area is well-ventilated, and how porous the material is. For example, a bathroom tile with grout is nonporous, but wood or drywall can absorb moisture and harbor hidden mold. The Mold Removal Lab team emphasizes that a product’s label should clearly state the surfaces it is safe to treat and any warnings about fumes or skin contact. Always start with a small patch test on an inconspicuous area to verify that the product does not damage the surface.
Label literacy matters. Look for active ingredients, dwell time, surface suitability, and safety warnings. Some products specify “for nonporous surfaces,” while others are designed for porous materials. If you’re unsure about surface compatibility, consult the product’s safety data sheet (SDS) or seek professional guidance. Remember that even the best cleaner won’t prevent regrowth if moisture is ongoing. Keeping a dry, ventilated environment is essential to successful mold management.
How to pick a mold killer product at Home Depot
Choosing the right product starts with reading labels, not just the bold claims on the front. Look for the active ingredients listed on the back—common options include sodium hypochlorite (bleach), hydrogen peroxide, or quat-based formulas. Consider the surface: nonporous surfaces may respond well to bleach or peroxide, while porous materials like drywall or wood may require specialized mildew removers designed for absorption. Check the dwell time: some products require a few minutes to sit, others longer; do not rinse if the label instructs you to leave it to dry. Review safety warnings, including whether the product is safe for pets and children and whether it can release fumes in enclosed spaces. Mold Removal Lab analysis shows that products vary in efficacy and user friendliness, so compare products side by side and choose one that fits your space, your ventilation, and your comfort level with handling chemicals.
When shopping, consider whether you need a standalone cleaner or a product with added antimicrobial protection for a longer-lasting effect. Some labeled “mold killers” are actually disinfectants with mold-targeting claims; others are concentrates meant for dilution. A conservative approach is to select a product that states its use on the specific surface you’re cleaning (tile, painted surfaces, wood, fabric) and to follow all label directions precisely. If you’re addressing hidden mold or large areas, plan for professional help.
Safety labeling isn’t cosmetic. Labels should outline first-aid measures, contact information, storage instructions, and disposal guidance. If you’re unsure about a label’s meaning, consult a store associate or look up the SDS online. Finally, beware marketing language that overpromises results—effective mold remediation combines product use with moisture control and thorough drying.
To recap, your Home Depot selection should balance surface compatibility, required dwell time, and safety considerations. Use Mold Removal Lab’s recommendations as a practical baseline when comparing options and always start in an inconspicuous area to confirm surface compatibility.
Common active ingredients and their pros/cons
Bleach-based cleaners can whiten and kill surface mold on nonporous surfaces, but they can damage finished wood and may not reach deeply embedded mold. Hydrogen peroxide is gentler on many surfaces and can be effective on some porous surfaces, though it may require multiple applications. Quaternary ammonium compounds (quats) are common in household cleaners and often provide a broad-spectrum kill; they tend to be less harsh on some materials but can leave residues. Always check label warnings for skin irritation and eye hazards, and avoid mixing products with ammonia or other cleaners as this can produce dangerous gases. Mold Removal Lab analysis shows that the efficacy of any mold killer is highly dependent on surface type and moisture control; no single product is a guaranteed fix, so integrate cleaning with thorough drying and moisture reduction.
Some brands offer “mold inhibitor” or post-cleaning sealants designed to reduce immediate regrowth; these should not replace moisture control and proper drying. Sodium hypochlorite (bleach) is effective on hard, nonporous surfaces but can be corrosive to metals and degrade sealants over time. Hydrogen peroxide alternatives can be safer for indoor use on sensitive materials, but may have limited effectiveness against established colonies. In all cases, follow the label’s directions and perform a small test patch before wide application. The goal is to reduce visible mold, limit odors, and prevent quick recurrence by addressing underlying moisture issues.
From a practical perspective, many DIY mold killers perform best as part of a broader moisture-management plan. Mold Removal Lab suggests pairing product use with rapid drying, improved ventilation, and source mitigation (fix leaks, dehumidify). This multi-pronged approach significantly reduces the chance of regrowth and makes any subsequent cleaning easier. When choosing an ingredient, weigh efficacy, safety, and surface compatibility before committing to one option.
For homeowners, the most common choices are bleach-based products for nonporous surfaces, hydrogen peroxide for lighter or semi-porous materials, and quat-based cleaners for general purpose use. Always consider the surface you’re treating and whether there are nearby occupants who may be exposed to fumes. A misapplied product on a sensitive surface can worsen damage or leave behind a residue that attracts dirt later on.
The bottom line is: there isn’t a one-size-fits-all solution. Assess the surface, check the label, and select a product whose stated capabilities match your mold scenario. If mold appears persistent or extensive, consult a pro rather than relying solely on a consumer-grade product.
Safety basics: PPE, ventilation, and storage
Personal protective equipment (PPE) should be worn whenever you handle mold-killing products. At minimum, wear disposable gloves, safety goggles, and an N95 respirator or better in enclosed spaces. Ensure adequate ventilation by opening windows and using a fan directed outward to prevent fumes from accumulating. Do not mix cleaners, and store products in their original containers away from children and pets. After use, rinse tools with clean water and dispose of single-use cloths safely in sealed bags. Keep the area well-ventilated during and after treatment for several hours to reduce lingering odors and toxins. Mold Removal Lab emphasizes that PPE is essential to minimize exposure to chemicals and mold spores during cleaning and drying.
If you’re unsure about air quality, use a temporary air purifier with a HEPA filter and consider running the purifier during and after the operation. Store cleaners in a cool, dry place away from heat sources and direct sunlight. Always wash hands thoroughly after handling chemicals, even if you wore gloves. An extra precaution is to keep pets and kids away from the work area during treatment and until the space is completely dry and odors have dissipated.
Surface suitability: non-porous vs porous materials
Non-porous surfaces like tile, glass, metal, and sealed countertops are typically easier to clean with a mold killer because the mold does not penetrate deeply. Porous materials such as drywall, wood, fabric, and insulation can harbor hidden mold within pores, making treatment more complex. In these cases, a mold killer may remove surface mold, but underlying moisture and structural materials may require professional remediation. When testing surfaces, apply a small amount to a hidden patch; monitor for discoloration or damage for 24 hours. If damage or discoloration appears, stop and reassess with a professional.
Mold in porous materials often requires more than surface cleaning. In some cases, it’s necessary to remove and replace affected drywall or insulation to prevent regrowth. Area containment becomes important to prevent spread during removal. If you are uncertain about porosity or hidden mold, a professional assessment can prevent costly mistakes.
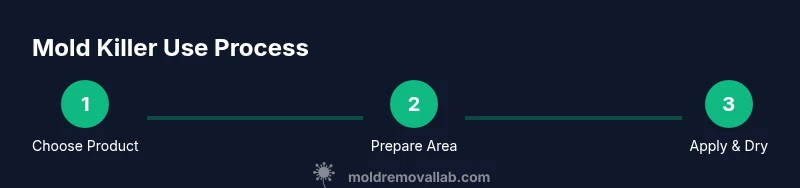
How to apply mold killer safely: dwell time, method, drying
Read the product label before you begin. Apply the mold killer to the affected area using a clean sponge or spray bottle, covering all visible mold. Allow the product to dwell for the recommended time, usually several minutes, to let active ingredients work. After dwell time, scrub gently with a soft-bristled brush, rinse if the label instructs, and dry the area thoroughly with towels or a clean cloth. Do not reuse rags that have mold on them without washing, and dispose of contaminated materials safely. Finally, rewash the area after a day or two to confirm that mold does not return. This step-by-step approach balances cleaning power with surface safety and moisture control.
For strong odors or stubborn growth, a second application after the area has dried might be appropriate, but always follow label directions. If the surface shows signs of damage or staining after cleaning, stop and seek guidance. Gentle scrubbing and careful drying are often more effective than aggressive cleaning on fragile surfaces. Mold Removal Lab notes that patience and proper dwell time can significantly influence results.
Clean-up and drying to prevent regrowth
Mold growth returns when moisture is present. After treatment, dry the area completely—use a fan, dehumidifier, or natural ventilation to lower humidity. Inspect for any remaining odor, stains, or fuzzy growth; repeat treatment if necessary, following label directions. Clean and store tools properly, wash hands after handling chemicals, and ensure that surrounding items are dried and protected. Document any moisture sources you find and address them to minimize future mold issues. Proper drying is often the most critical step in preventing regrowth and protecting indoor air quality.
When to call a professional and what to expect
DIY products from Home Depot can address small, contained mold issues, but larger areas, mold growth behind walls, or recurring moisture problems often require professional remediation. If you see mold covering more than a square foot in hidden spaces, notice musty odors persisting after cleaning, or experience repeated moisture intrusion, contact a licensed remediator. A professional will assess moisture sources, remove contaminated materials safely, and restore ventilation or insulation as needed. Early professional input can save time, reduce exposure risk, and prevent structural damage.
Alternatives and natural options that can complement professional work
Some homeowners explore natural options such as hydrogen peroxide or white vinegar for light mold on nonporous surfaces; however, these cleaners are not guaranteed to perform as well as store-bought mold killers. Vinegar may help with mild mold and is generally safe, but it lacks the potency of certain chemical products for heavy contamination. Always use any natural alternative in addition to proper moisture control; never rely on them as the sole solution for significant mold problems. In some cases, using natural alternatives helps reduce chemical exposure when used for routine maintenance, but they should be part of a broader mold-control plan rather than a sole remediation method.
The broader takeaway is that successful mold remediation combines product selection, proper application, thorough drying, and moisture management. For persistent or widespread issues, a professional remediation contractor can identify moisture sources, remove contaminated materials safely, and implement long-term prevention strategies. The Mold Removal Lab team emphasizes using consumer products wisely and recognizing when to escalate to professional help.
KEY-TAKEAWAYS