Cover Mold with Paint: Safe Remediation Guide for Homes
Discover why painting over mold isn’t a lasting fix and learn the proper steps to remediate moisture, remove mold, and repaint safely with mold-resistant products.

According to Mold Removal Lab, covering mold with paint is not a valid remediation. It may hide the problem, trap moisture, and allow mold spores to continue growing behind the finish. The safe approach is to identify and fix the moisture source, remove visible mold, and treat the substrate. After proper drying and cleaning, repaint with mold-resistant primers and paints designed for high-humidity areas, and maintain ongoing moisture control.
Why painting over mold is a poor fix
Covering mold with paint might seem like a quick cosmetic fix, especially in areas that are painted regularly. However, this approach hides the underlying problem rather than solving it. According to Mold Removal Lab, covering mold with paint is not a valid remediation. It may mask the presence of active growth, trap moisture behind the surface, and create an environment where mold can continue to thrive. This is particularly risky in damp spaces like bathrooms, basements, and kitchens where humidity cycles drive moisture in and out of porous materials. Once paint is applied over mold, spores can become embedded in the finish, making future remediation more difficult and expensive. In most cases, the mold will return within weeks or months if the moisture source remains, and you’ll be paying for another round of repairs instead of a lasting solution. For landlords and homeowners, the temptation to “just paint it” can delay essential repairs and lead to larger issues, including damaged drywall, wood rot, and potential health concerns for residents. The most reliable path is to treat mold as a moisture problem and deal with both together, rather than masking it with paint.
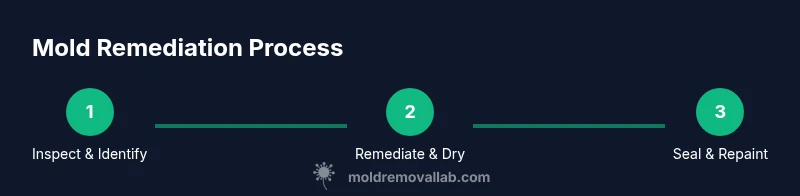
Before you paint: essential remediation steps
Before you select a paint or primer, take a careful, step-by-step approach to remediation. Start by identifying the moisture source—leaky roofs, plumbing, or condensation—and fix it. In many cases, this involves repairing leaks, improving ventilation, or increasing air circulation with fans and dehumidifiers. The Mold Removal Lab Team emphasizes that moisture control is the foundation of mold prevention. Next, remove visible mold using appropriate methods: non-porous surfaces can be cleaned with detergent and warm water, while porous materials like drywall or insulation may need to be removed and replaced. Wear a properly fitted N95 respirator, eye protection, and gloves to protect yourself from spores, and seal the work area to prevent cross-contamination. After cleaning, thoroughly dry all surfaces. Use a moisture meter if available to ensure humidity levels remain below 50-60% in the treated area. Only then can you consider painting, using coatings designed for mold resistance on clean, dry substrates. If you skip these steps, you risk sealing in moisture and creating a substrate that will relapse into mold growth later. In short: remediation comes first, coating comes second.
Choosing paints and coatings for mold-prone areas
When it comes to finishing a mold-prone surface, you’ll want products that are designed to last in humid environments. Start with a high-quality, mold-resistant primer that isolates the substrate and contains the existing moisture threat. Follow with a topcoat that is rated for bathrooms or other high-humidity spaces. Keep in mind that no paint can kill existing mold; coatings are a barrier to moisture and vapor, not a magic fix. Based on Mold Removal Lab research, coatings matter most after proper remediation, not as a substitute for it. Look for products with independent lab testing, and read labels for verbs like “moisture resistant,” “mold resistant,” or “anti-microbial” (while noting that antimicrobial claims do not replace cleaning and drying). In addition, use UV-protective finishes where sunlight exposure is a factor, and avoid very glossy surfaces that can show spore deposits more clearly and require more frequent cleaning. Remember that paint failures often reflect improper surface preparation, so dedicate extra time to sanding, vacuuming, and dust-free preparation before applying primer.
When you should not paint over mold
There are clear red flags that indicate painting over mold is not appropriate. If you see active growth over more than a small area, if the mold covers porous materials such as drywall or fabric, or if there is a persistent musty odor, stop and reassess. Do not paint until you have eliminated the moisture source and replaced damaged material if necessary. Large areas of mold, mold in or near HVAC systems, or mold associated with sewer or wastewater exposure require professional remediation. Additionally, if you are allergic or sensitive to mold, or if the growth coincides with water damage, the safest option is to consult a qualified mold remediation specialist. Painting is not a substitute for proper remediation, and DIY fixes may void warranties or complicate insurance claims. By recognizing these warning signs early, you can avoid wasting time and money on an ineffective finish and protect your health.
After painting: ongoing moisture control and maintenance
Finishing with mold-resistant products is not a one-time fix. After you paint, continue to manage moisture and monitor the area for signs of regrowth. Maintain indoor humidity levels between 30-50% where possible, use exhaust fans in bathrooms and kitchens, and repair leaks promptly. Regularly inspect caulk joints, edges around windows and doors, and any places where water runs or condenses. A dehumidifier can help in damp basements or crawlspaces, and air purifiers with HEPA filtration may reduce airborne spores in the short term. Keep a log of moisture-related issues and repaint or re-seal when you notice coating degradation or discoloration. If you notice new mold growth after painting, revisit remediation steps and consider professional help. The Mold Removal Lab team recommends treating painted surfaces as part of a comprehensive moisture management plan, not as a standalone solution.
Hidden mold and walls: how to spot behind paint
A common challenge with painted walls is hidden mold in the substrate, behind the finish. Use a moisture meter on suspected walls, and look for soft spots, staining, or bulges that indicate moisture movement. If you suspect hidden mold, do not rely on visual inspection alone; consider professional testing. For smaller areas, careful removal of a paint chip can reveal whether mold penetrates the substrate; if you see staining on drywall behind the paint, you may need to replace sections. In some cases, an odor test or moisture readings over time can indicate ongoing moisture and mold activity. The safest approach is to assume that any damp painted surface could harbor mold and plan remediation accordingly. If you’re unsure, seek professional guidance before proceeding with painting.
Real-world outcomes and alternatives
In many homes, the best long-term solution is complete replacement of affected materials and improvements to the building envelope, not simply painting over mold. Replacing drywall, sealing leaks, improving ventilation, and upgrading insulation may be necessary to stop mold cycles. For small, isolated patches, a properly executed remediation followed by a mold-resistant finish can work; however, this strategy requires diligence and regular monitoring. If you must address mold in a rental property, ensure documentation and disclosures are in line with local regulations. Ultimately, the safest, most durable result comes from a holistic approach: fix moisture, remove mold, and finish with appropriate coatings, rather than concealing the problem with paint.
Tools & Materials
- N95 respirator(Fit-tested; replace if damaged or wet)
- Safety goggles(Wraparound style recommended)
- Protective gloves(Nitrile or latex; durable and puncture-resistant)
- Plastic sheeting (6 mil or thicker)(For containment and debris control)
- Painter's tape(Seal containment edges)
- Detergent or non-ammonia cleaner(Used for initial cleaning; avoid bleach on porous materials)
- HEPA vacuum(For initial cleaning and debris removal)
- Mold-resistant primer(Isolates substrate and improves adhesion)
- Mold-resistant topcoat paint(Choose product rated for bathrooms/high humidity)
- Dehumidifier(Reduces humidity during dry-out phase)
- Moisture meter(Helpful to verify low humidity post-cleanup)
Steps
Estimated time: 2-3 days (plus potential longer drying times depending on area and climate)
- 1
Identify moisture sources
Inspect the area to locate leaks, condensation, or humidity sources. Repair these issues to prevent recurrence before painting. Document the problem areas for later reference.
Tip: Record moisture patterns with a simple sketch or photos to guide repairs. - 2
Contain the work area
Use plastic sheeting and tape to isolate the space and prevent mold spores from spreading to other rooms. Maintain negative pressure if possible.
Tip: Keep doorways closed and seal gaps around the containment with tape. - 3
Clean or remove moldy materials
Non-porous surfaces can be cleaned with detergent and warm water; porous materials may need to be removed and replaced. Wear PPE during all handling.
Tip: Dispose of contaminated waste in sealed bags; wash tools separately. - 4
Dry the area thoroughly
Run a dehumidifier and fans to achieve complete drying. Use a moisture meter to confirm humidity stays below 50-60%.
Tip: Do not apply primer until the surface is completely dry. - 5
Prime with mold-resistant product
Apply a quality mold-resistant primer to seal the surface. Allow to dry according to label directions before applying topcoat.
Tip: Lightly sand between coats for better adhesion. - 6
Apply a mold-resistant topcoat
Finish with a topcoat designed for high humidity areas. Follow can directions and ensure even coverage.
Tip: Use a high-quality brush or roller to avoid misshaped edges. - 7
Reinspect and monitor
Recheck for moisture and signs of regrowth after 1-2 weeks and again after a full month. Address any issues promptly.
Tip: Keep a simple log of humidity, cleaning, and repaint dates.
FAQ
Can I cover mold with paint and call it fixed?
No. Painting over active mold is not a valid remediation. It hides the problem and can trap moisture, leading to continued growth.
No. Painting over active mold won’t fix the problem and can trap moisture, allowing mold to keep growing.
What kind of paint should I use after mold remediation?
Use a mold-resistant primer and a topcoat formulated for high humidity areas. These products help seal the surface and resist moisture but only after proper drying and cleaning.
Choose a mold-resistant primer and a topcoat designed for damp spaces, and ensure the surface is clean and dry before painting.
How long should I wait for surfaces to dry before painting?
Drying time depends on climate and ventilation. Wait until the surface is completely dry and a moisture test confirms low humidity before applying primer.
Wait until the surface is completely dry and moisture is low before painting.
Is painting over mold illegal?
Painting over mold is generally not illegal, but it can violate rental or insurance disclosures and may fail to meet building codes if it masks a defect.
It's usually not illegal, but it can cause insurance or code issues if it hides a moisture problem.
When should I hire a professional?
If mold covers a large area, recurs after cleaning, or is near HVAC systems or structural materials, professional remediation is advised.
If the mold is widespread or near structures or HVAC, get a professional.
Will moisture return mold after painting?
If the underlying moisture problem isn’t fixed, mold can return even after painting. Ongoing moisture management is essential.
Yes, without fixing moisture, mold can return after painting.
The Essentials
- Do not ignore moisture sources; fix them first
- Remediate mold before repainting
- Use mold-resistant primers and topcoats after drying
- Contain the area to prevent spread
- Monitor humidity and signs of regrowth regularly