Paint on Mold: Safe, Practical Remediation and Repainting Guide
A practical, step-by-step guide on when and how to paint on mold safely, with prep, products, safety tips, and maintenance to prevent regrowth.

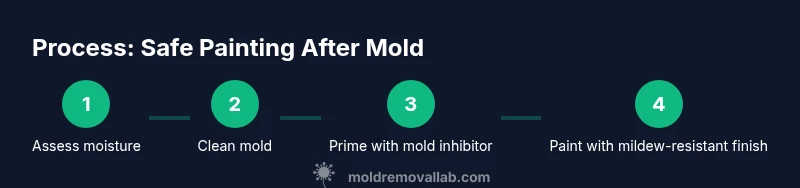
Painting over mold is not a safe cure. Before applying any paint, address moisture, remove visible mold, and dry the area completely. Use a mold-killing cleaner, a primer designed for mold-prone surfaces, and one to two coats of mildew-resistant paint. Wear PPE, contain the area, and re-test for moisture to prevent regrowth.
Why paint on mold is not a cure
Painting on mold is a common quick fix, but it does not remove the underlying moisture or the mold colonies themselves. According to Mold Removal Lab, this approach often leads to regrowth once conditions remain favorable. If you only cover the surface, you may still be breathing mold spores, and you risk structural damage over time as dampness continues to seep behind the painted area. A proactive homeowner should treat the moisture source first, then address the mold growth with proper cleaning and sealing, before considering any paint job. The key is to stop the cycle of dampness that feeds mold and to use products that resist future growth rather than simply masking the problem.
Understanding moisture controls and why they matter
Moisture control is the single most important factor in mold prevention after painting. Humidity, leaks, condensation, and poor ventilation all contribute to mold-friendly environments. After any moisture event, you should dry surfaces quickly and monitor humidity levels with a hygrometer. Mold spores can become active again when relative humidity rises above typical indoor thresholds. Mold Removal Lab’s guidance emphasizes that consistently dry, low-humidity conditions dramatically reduce the chance of mold returning after a paint job. Plan for improved ventilation, dehumidification, and water intrusion repair as part of the overall remediation strategy.
Assessing mold extent and deciding if painting is appropriate
Not all mold growth warrants painting over it. Small, isolated patches on painted surfaces might be treated and sealed, while extensive growth on porous materials (drywall, wood with softening, or insulation) usually requires removal and replacement. Visual checks, moisture readings, and odor clues help determine the extent. If growth covers large areas or penetrates deeply, painting will not fix the problem and could trap moisture behind the coating. When in doubt, document the area, slow the spread with containment, and consult a mold remediation mindset rather than a quick paint fix. The decision to paint on mold should be made only after confirming moisture control and mold removal steps have been completed.
Cleaning vs killing vs masking: mold cleaners and inhibitors
Cleaning removes visible mold and dirt, while killing agents aim to destroy remaining spores. Bleach-based cleaners can work on non-porous surfaces but are less effective on porous materials and can damage finishes. For porous substrates, use products designed for mold removal that penetrate surfaces, followed by thorough drying. After cleaning, apply an inhibitor or sealant to reduce future growth, but remember: a sealant is not a substitute for removing moisture sources. Mold Removal Lab recommends treating the surface with a mold-resistant primer before painting to improve long-term resilience.
Primers and paints that resist mold growth
Choose primers and paints formulated to resist mildew and mold growth. A good mold-resistant primer improves adhesion for the paint layer and creates a moisture barrier. Follow with high-quality, mildew-resistant acrylic or epoxy paints. Look for products labeled as anti-mold or mold-resistant and ensure they are compatible with the surface you are painting. Remember that even the best paint cannot prevent mold without proper moisture control. For painted surfaces in kitchens, bathrooms, or basements, select finishes with durable washability and low odor to help maintain indoor air quality.
Surface preparation: cleaning, drying, and priming
Proper surface preparation is essential for a durable finish. Begin by removing loose material, dust, and any decayed substrate. Clean with a product designed for mold removal on the specific surface type, then rinse and dry completely. If the surface remains damp or shows water staining, wait longer or use a fan and dehumidifier to achieve a dry, stable substrate. Apply a stain-blocking or mold-inhibiting primer to all affected areas, then allow it to cure per label directions before painting. This preparation improves paint adhesion and reduces the opportunity for future mold growth.
Containment and safety: PPE and containment strategies
Mold remediation work should include appropriate personal protective equipment (PPE) and containment practices. Wear an N95 respirator or better, eye protection, gloves, and protective clothing. Seal off the work area with plastic sheeting to prevent spores from migrating to other rooms. Use a HEPA-filtered vacuum to clean up dust and spores after cleaning, and ensure proper ventilation during the process. Safety should be your priority, not speed. If mold is extensive or adhesives are compromised, stop and seek professional assistance to avoid health risks.
Step-by-step painting protocol: two coats guide
A controlled painting protocol minimizes risk and improves results. After cleaning and drying, apply a mold-resistant primer and allow it to dry thoroughly. Then apply the first coat of mold-resistant paint, maintaining even strokes and a steady pace. Allow the first coat to fully cure before applying a second coat for durability. Always finish with a breathable, low-odor topcoat if the space is occupied. Watch for bubbling, peeling, or moisture on the surface; these are signs you need to stop and reassess moisture control before continuing to avoid trapping moisture behind the paint.
Common mistakes and how to avoid them
Common errors include painting over damp surfaces, skipping priming on rough textures, and using a non-mold-resistant paint in moisture-prone areas. Another frequent mistake is neglecting ventilation, which leads to stubborn odors and reduced drying times. Don’t rush the curing process; moisture can still be present under the coating. If you notice bubbling or peeling, stop, re-clean, re-dry, re-prime, and repaint with better preparation. The simplest way to avoid these mistakes is to plan for proper moisture management first and proceed with a tested system for mold remediation and paint.
Maintenance tips after painting to prevent regrowth
After completing the project, maintain the space by monitoring humidity and addressing any water intrusion promptly. Use exhaust fans in moisture-prone rooms, fix leaks promptly, and maintain regular cleaning to remove dust and spores. Inspect painted surfaces periodically for signs of moisture or mold, especially after heavy rains or seasonal changes. Adequate ventilation and ongoing moisture control are more important than the color choice when it comes to long-term mold prevention. Regular upkeep is the best defense against mold returning after painting on mold.
When to call a pro and what they will do differently
If mold growth reappears after painting or if you suspect hidden moisture sources behind walls, enlist a professional. A mold remediation specialist can perform a thorough inspection, use moisture meters to locate hidden dampness, remove affected materials, and implement a lasting moisture-control plan. A professional will also advise on whether painting is a viable long-term solution or if more robust interventions, such as encapsulation or structural repairs, are necessary to prevent health risks.
Realistic expectations: cost, time, and durability
Expect that painting over mold is part of a broader remediation plan, not a standalone solution. The overall timeline depends on moisture source resolution, surface materials, and ventilation upgrades, and it can range from a few days to longer if structural repairs are needed. Durability hinges on sustained moisture control; even the best mold-resistant paint may fail if leaks persist. The goal is to stop moisture, remove mold, and apply a finish that resists future growth while maintaining safe indoor air quality.
Tools & Materials
- N95 respirator or better(Fit-tested for best protection)
- Protective goggles(Eye protection during cleaning and painting)
- Disposable coveralls or old clothing(Keeps mold spores off skin and clothes)
- Latex or nitrile gloves(Protect hands during cleaning and painting)
- Plastic sheeting or painter's drop cloths(Contain the work area)
- Masking tape(Seal edges and protect adjacent surfaces)
- HEPA-equipped vacuum(Clean dust and spores after work)
- Mold-removing cleaner or detergent(Use product appropriate for surface)
- Mold-inhibiting primer(Improves adhesion and moisture barrier)
- Mold-resistant topcoat/paint(Choose finish appropriate for room)
- Paint brushes and rollers(Synthetic brushes for water-based paints)
- Paint tray and liners(For even application)
- Moisture meter or hygrometer( Helpful to verify drying)
- Dehumidifier or fan(Controls humidity during work)
- Trash bags(Dispose contaminated materials)
Steps
Estimated time: 8-16 hours total
- 1
Inspect and protect
Identify all mold growth and moisture sources. Set up containment with plastic sheeting and masking tape to limit spore spread. Remove loose material and prepare the area for cleaning.
Tip: Seal the work area completely and don’t skip containment to prevent cross-contamination. - 2
Ventilate and dry
Open doors/windows where possible and run a dehumidifier to bring indoor humidity down. Improve air movement with a fan pointed away from the work area to direct moisture out of the space.
Tip: Aim for relative humidity below 60% before cleaning begins. - 3
Clean mold-damaged surfaces
Use a mold-removing cleaner on hard, non-porous surfaces. For porous materials, assess whether removal is required rather than cleaning over, as surface cleaning may not prevent regrowth.
Tip: Never mix cleaners with ammonia or bleach; this can create toxic fumes. - 4
Dry thoroughly and verify
Allow treated areas to dry completely. Use a moisture meter if available to confirm dryness before priming. If dampness persists, address the source and re-dry.
Tip: Patience pays off; rushing drying increases mold risk later. - 5
Prime the surface
Apply a mold-inhibiting primer to all cleaned surfaces. Ensure even coverage and allow the primer to cure as directed by the label.
Tip: Primer improves adhesion and adds a moisture barrier for the paint layer. - 6
Apply the first coat of paint
Use a mold-resistant paint and apply in smooth, even strokes. Avoid heavy coats that can trap moisture. Let the coat dry fully before proceeding.
Tip: Keep a consistent rhythm and back-brush to ensure uniform coverage. - 7
Apply a second coat
Apply a second coat for durability and uniform color. Two coats generally provide better resistance to moisture and wear.
Tip: Ensure the first coat is fully cured to prevent lifting of the second coat. - 8
Final check and cleanup
Inspect for missed areas, re-clean if needed, and remove containment materials carefully to prevent recontamination. Ventilate the space during cleanup and monitor humidity after completion.
Tip: Dispose of contaminated materials in sealed bags; clean tools before storing.
FAQ
Is it safe to paint on mold?
Painting on mold is not a safe standalone solution. It may hide the problem and allow regrowth if moisture sources aren’t addressed. Use painting as part of a broader remediation plan that includes moisture control and mold removal.
Painting over mold is not a safe standalone solution. It should be part of a broader plan that addresses moisture and mold removal.
Can I paint directly over visible mold?
No. First remove or treat the mold and dry the surface. Then use a mold-inhibiting primer and a mildew-resistant paint if painting is warranted. If mold recurs, reassess moisture sources.
No, you shouldn't paint over visible mold. Clean, dry, and treat first, then prime and paint if appropriate.
What paints are best for mold-prone areas?
Look for mildew-resistant or mold-resistant paints paired with a mold-inhibiting primer. These products improve resistance to moisture and spore growth, especially in bathrooms, kitchens, and basements.
Choose mildew-resistant paints with a mold-inhibiting primer for areas prone to moisture.
How long will paint last against mold after remediation?
Durability depends on ongoing moisture control. With proper prep and ventilation, painted surfaces can perform well for an extended period, but persistent moisture will undermine durability.
Durability depends on moisture control; good prep helps, but ongoing humidity management is essential.
When should I re-test moisture after painting?
Re-test moisture a few days to a couple of weeks after painting, especially after weather changes or leaks. If readings rise, investigate the humidity sources and adjust ventilation.
Check moisture a few days to a couple weeks after painting, especially after weather changes.
When is it necessary to call a professional?
If mold covers a large area, shows signs of hidden moisture, or reappears after painting, a mold remediation professional should assess and perform more extensive work.
Call a pro if mold is widespread, persistent, or returns after painting.
Watch Video
The Essentials
- Start with moisture control before any painting.
- Choose mold-resistant primers and paints for durability.
- Contain and ventilate the workspace to protect occupants.
- Confirm complete dryness before each coat to prevent regrowth.
- Call a pro if mold recurs or if there is extensive structural damage.