How to Clean Mold From Drywall: Safe, Practical Guide
Learn to safely clean mold from drywall with proven steps, PPE, containment, and drying. This guide also covers prevention to keep your home safe mold-free.

This guide helps you clean mold from drywall safely and effectively. You’ll learn safety protocols, containment, cleaning methods, and aftercare to prevent recurrence, plus what tools and PPE you need. By following these steps, homeowners can restore a healthy living space while protecting their health.
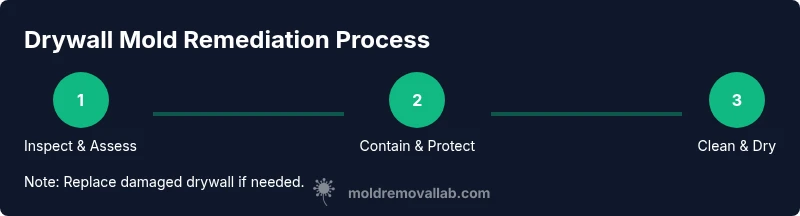
Assessing Mold on Drywall
Mold growth on drywall is usually a sign of an ongoing moisture problem. Before you begin cleaning, take a moment to understand the scope of the issue and plan your remediation. As Mold Removal Lab notes, start by identifying the moisture source, the extent of growth, and any drywall that looks structurally damaged. Look for dark spots, staining, or powdery patches, and don’t ignore a musty odor, which often signals hidden colonies. Measure the affected area and map it on a simple sketch so you know what to treat and what to replace. If you find damp insulation, leaks behind walls, or ongoing condensation, stop the cleaning and address the moisture first. A small, contained area may be manageable with DIY methods, but more extensive growth or widespread dampness often means professional assessment. The goal is to confirm the presence of mold, not merely dirt, and to decide whether surface cleaning is enough or if drywall replacement is required.
According to Mold Removal Lab, a thorough assessment that identifies moisture sources and potential hidden growth sets the stage for a successful remediation and minimizes the chance of regrowth.
Safety First: PPE and Containment
Safety is non-negotiable when dealing with mold. Put on a respirator (N95 or better), eye protection, gloves, and disposable coveralls before touching any moldy surface. Ensure good ventilation if outdoors, but avoid blowing spores into other rooms. Create a containment zone with plastic sheeting, sealing doors and vents so dust and spores stay inside. Use painter’s tape to secure seams and place a floor barrier to catch debris. Keep children and pets away, and wash hands after removal of PPE. If you have asthma or allergies, re-evaluate before starting; consider hiring a professional to minimize health risks. Remember: the goal of containment is to limit exposure and keep the rest of your home clean during remediation.
Cleaning Strategies for Drywall Mold
Drywall molds are best treated with a combination of mechanical removal and gentle cleaners rather than aggressive solvents. Begin with dry removal: gently brush or scrub the surface with a soft brush to lift loose spores. For small patches, mix a mild detergent with warm water, apply with a sponge, and wipe away from the outer edges toward the center. Some homeowners use white vinegar for its antifungal properties; spray, wait a few minutes, then wipe. Hydrogen peroxide in a spray bottle is another option, especially for stubborn spots—apply, wait briefly, then scrub. Avoid saturating the drywall; excess moisture can push mold deeper and damage the paper backing. Bleach is generally not recommended for porous drywall because it often fails to penetrate and can produce harmful fumes in enclosed spaces. If paint or wallpaper covers the moldy area, you may need to remove and replace affected sections for a lasting solution. Always test a hidden area first to check for color changes.
Drying and Aftercare
After cleaning, drying is critical to prevent mold from returning. Use a dehumidifier and a fan in the treated room and keep doors open to promote air movement, weather permitting. Check for dampness at least daily for several days; moisture left behind is a leading cause of regrowth. If you still notice moisture or a lingering odor, recheck for hidden leaks in roofs, plumbing, or exterior walls. Once the wall feels dry to the touch, seal the area with a mold-resistant primer and repaint with a moisture-resistant finish. Reinstall any replaced drywall and inspect surrounding areas to ensure no new moisture has formed. Document the remediation with photos and notes to guide future maintenance and early detection.
Prevention to Stop Recurrence
The best remediation is prevention. Address leaks as soon as they’re detected and improve ventilation in problem zones such as bathrooms, basements, kitchens, and laundry spaces. Use exhaust fans during showers, and keep interior humidity at comfortable levels to reduce condensation on walls. Consider applying a mold-resistant primer or paint to drywall patches after repairs and seal cracks around windows or plumbing penetrations. Regularly inspect for signs of dampness, peeling paint, or musty odors and respond promptly. Keep belongings away from walls to improve airflow and avoid creating hidden moisture pockets. By maintaining a dry, well-ventilated environment and staying vigilant, you minimize the chance of mold returning on drywall.
When to Call a Pro
If mold covers a large area, keeps returning after cleanup, or you suspect hidden growth behind walls, it’s time to hire a licensed mold remediation professional. A pro can perform thorough containment, accurate moisture measurements, and safe removal of damaged drywall. They can also advise on building envelope improvements and moisture source control. If you have health concerns or are immunocompromised, seek professional help sooner rather than later. A written remediation plan and documentation help ensure your home meets local codes and reduces the risk of future outbreaks.
Tools & Materials
- PPE: N95 respirator or higher(Ensure proper seal; replace if uncomfortable)
- Goggles/eye protection(Eye protection against splashes)
- Disposable coveralls(Keeps clothing free from spores)
- Gloves (nitrile or latex)(Water-resistant if possible)
- Plastic sheeting (6 mil) for containment(Seal off area; create barrier)
- Painter's tape(Seal seams and keep dust from spreading)
- Plastic bags for disposal(Double-bag contaminated materials)
- Soft brush and scrub sponge(Gentle abrasion to lift mold)
- Bucket, mild detergent, warm water(Dirt and mold removal base)
- White vinegar (acetic acid) or 3% hydrogen peroxide(Natural cleaning options)
- Spray bottle(Application of cleaners)
- Drying equipment: dehumidifier or fan(Promote moisture removal)
- Moisture meter (optional)(Check for lingering moisture)
- Mold-resistant primer and paint(Post-cleanup coating)
Steps
Estimated time: Total time: 2-6 hours depending on area and conditions
- 1
Prepare and Protect
Gather PPE, clear the area, and vent the space to reduce exposure. This step sets the foundation for safe remediation and helps you work without distractions.
Tip: Wear PPE correctly and ensure a comfortable fit before starting. - 2
Contain the Affected Area
Seal off the room with plastic sheeting to prevent spores from drifting to other areas. Close doors, seal gaps, and place a barrier at the floor line.
Tip: Use tape to secure seams and prevent air leakage. - 3
Dry Run and Pre-Clean
Remove loose debris and damp areas as much as possible before applying cleaners. This minimizes the amount of material you need to treat.
Tip: Test a hidden spot to ensure you won’t damage finishes. - 4
Clean Moldy Surface
Apply your chosen cleaner (detergent solution, vinegar, or hydrogen peroxide) with a damp sponge or cloth. Scrub gently from edges toward the center and avoid soaking the drywall.
Tip: Never saturate drywall; excessive moisture invites regrowth. - 5
Rinse and Dry Surfaces
Wipe away residue with a clean damp cloth, then dry the area thoroughly using a dehumidifier and fans. Check for residual dampness in walls and studs.
Tip: Remove moisture as quickly as possible to prevent regrowth. - 6
Address Moisture Source
Repair leaks, improve ventilation, and consider a moisture barrier to prevent future dampness. Addressing the root cause reduces recurrence.
Tip: Stabilize moisture sources before finishing wall repairs. - 7
Patch, Prime, and Repaint
If drywall is damaged, cut out and replace affected sections. Apply a mold-resistant primer and paint to seal surfaces and protect against future moisture.
Tip: Allow proper drying between coats and ventilate during painting.
FAQ
Is bleach effective for mold on drywall?
Bleach is generally not recommended for porous drywall because it often doesn’t reach mold roots and can create fumes in enclosed spaces. Safer alternatives like detergents, vinegar, or hydrogen peroxide are typically preferred, especially for finished drywall.
Bleach is usually not the best option for drywall; safer cleaners work better and limit fumes.
Can I clean mold from drywall without removing it?
If the mold is superficial and the drywall is in good condition, surface cleaning may suffice. If the drywall is damaged, moldy, or shows signs of persistence after cleaning, replacement is often required.
If you see damage or ongoing mold after cleaning, replace the drywall.
How do I know if the mold is behind the drywall?
Indicators include a persistent musty odor, ongoing dampness, staining on both sides of the drywall, or acoustic changes like softening near the suspected area.
Look for odor, dampness, or soft spots that suggest mold behind the wall.
What tools are essential for drywall mold cleanup?
Basic PPE, containment materials, cleaning agents, brushes or sponges, and drying equipment are essential. Having a moisture meter can help confirm dryness.
You’ll need PPE, containment supplies, cleaners, and a dehumidifier or fan.
How long does it take to dry after cleaning?
Drying time varies with room conditions. Use a dehumidifier and fans and monitor moisture levels until surfaces feel dry to the touch.
Drying depends on the space, but use a dehumidifier and fans and check moisture until dry.
When should I replace drywall?
Replace drywall if it’s severely damaged, if mold penetrates the backing, or if it keeps returning after cleaning. Structural concerns require professional assessment.
If the mold penetrates deeply or keeps coming back, replace the drywall.
Watch Video
The Essentials
- Assess moisture sources before cleaning
- Contain the area to prevent spores spreading
- Use non-bleach cleaners on drywall
- Dry thoroughly and monitor humidity
- Address underlying moisture to prevent recurrence