Ceiling Mold: Safe Removal and Prevention
Learn how to identify ceiling mold, safely remove it, fix moisture sources, and prevent recurrence with practical steps and expert tips from Mold Removal Lab.

Ceiling mold signals hidden moisture and can threaten indoor air quality. This guide helps you identify sources, safely remove mold from ceilings, fix leaks, and prevent recurrence with moisture control, ventilation, and proper sealing. You’ll learn practical steps, safety precautions, and when professional help is necessary to protect your home and health.
What is ceiling mold and why it forms
Ceiling mold is a type of mold growth that appears on or just beneath the surface of ceilings. It often starts as small dots or splotches and can quickly spread when moisture is present. The spores themselves are invisible, but growth is visible as fuzzy or powdery patches, usually black, green, white, or gray. Understanding the conditions that favor ceiling mold helps homeowners act quickly. Moisture is the single most important factor: roof leaks, plumbing faults, or condensation from poor insulation create the damp environment mold needs to thrive. In addition, warm indoor temperatures and stagnant air can accelerate spread along ceiling corners, around fixtures, or above bathrooms and kitchens. Detecting ceiling mold early reduces removal complexity and the risk to occupants. The Mold Removal Lab team emphasizes that safety comes first: never disturb active mold growth without protection, and keep a sealed work area to prevent spores from drifting into living spaces. By recognizing the signs—water stains, paint peeling, and musty odors—you can start a targeted remediation plan before it becomes a larger problem.
Identifying moisture sources in your home
To stop ceiling mold, you must locate and fix the moisture source feeding the growth. Start by inspecting the ceiling for active leaks from the roof or plumbing lines in the attic and above rooms. Look for water stains that appear after rain, or after long showers, and check traces of condensation along vents and HVAC ductwork. A moisture meter can help quantify humidity levels in the ceiling cavity; aim to keep relative humidity below 50-60% in living areas, and even lower in bathrooms or kitchens. Check attic insulation and attic vents to ensure warm, moist air isn’t wicking into the ceiling. If you find persistent dampness despite repair attempts, there may be hidden leaks behind walls or under roofing. In these cases, a professional inspection is advised. As you investigate, document locations, approximate size of the affected area, and how long moisture has been present. This information guides remediation scope and prevents unnecessary removal work.
Safe cleanup protocol for ceiling mold
Before any cleanup, put on a fitted respirator or NIOSH-approved mask, eye protection, and disposable coveralls. Isolate the work zone with plastic sheeting to prevent spores from traveling to other rooms. Do not perform aggressive sanding on moldy ceilings, which can release spores into the air. Start with containment and cleaning using a detergent solution and a scrub brush; wipe the surface from top to bottom and dispose of rags in sealed bags. Vacuum with a HEPA-equipped vacuum only after you have removed loose mold and debris; do not rely on vacuums without HEPA, as ordinary vacuums spread spores. Allow the ceiling to dry completely, then apply a mold-inhibiting primer or paint to discourage future growth. If fungi have penetrated porous materials like drywall, you may need to replace affected sections rather than simply clean them. Throughout the process, monitor ventilation; avoid running fans directly at the mold while cleaning to prevent aerosolization unless you can control airflow. The goal is to remove active growth and create an inhospitable environment for regrowth.
Materials and methods for ceiling mold removal
A typical ceiling mold cleanup relies on personal protective equipment, containment, and gentle cleaning methods. Essential items include an N95 respirator, safety goggles, disposable coveralls, and heavy-duty plastic sheeting to seal off the work area. Use a detergent solution (mild soap and warm water) with a scrub brush to remove visible mold from nonporous ceiling surfaces, then wipe clean with a damp sponge. For stubborn spots on painted ceilings, consider a diluted borax solution or a labeled mold-inhibiting cleaner, following product instructions. After cleanup, vacuum the area with a HEPA vacuum to capture residual spores, and allow the surface to dry completely before sealing with a mold-resistant primer or paint. If the ceiling material is porous or visibly damaged, removal and replacement of affected sections may be necessary. Record all steps and ventilate the space during and after cleanup to minimize lingering odors and spores.
Repairing underlying moisture problems
Addressing the root causes of moisture is essential to prevent recurrence. Start by repairing roof leaks or plumbing faults that feed ceiling mold; ensure any penetrations are watertight and inspected after heavy rain. Improve insulation and seal gaps where warm, moist air can reach the ceiling from living spaces or bathrooms. Install or upgrade exhaust fans in bathrooms and kitchens, venting to the outdoors, and keep humidity levels in check with dehumidifiers when needed. Regular maintenance of gutters, downspouts, and roof flashing helps reduce water intrusion. Consider installing a moisture barrier on ceilings in humid zones and schedule seasonal inspections to catch early signs of moisture. By combining mechanical fixes with proper cleaning and sealing, you create a durable barrier against mold.
Prevention strategies to keep ceilings mold-free
Prevention centers on moisture control and routine monitoring. Maintain indoor relative humidity between 30-50% in most rooms, lower in bathrooms and kitchens. Use exhaust fans during and after showers, and run dehumidifiers in damp climates or seasons. Inspect ceilings for slow leaks after storms and repair promptly to prevent mold rebound. Keep indoor surfaces dry, wipe up condensation, and ensure proper ventilation to avoid stagnant air. Use mold-resistant paints or primers on ceilings after cleanup, and seal any small cracks with appropriate caulking. Schedule annual inspections in moisture-prone areas, such as bathrooms, laundry rooms, and basements, to catch issues before they become visible mold growth.
When to call a professional
If the affected area is large, if mold returns after cleaning, or if there is suspected damage to electrical or structural components, seek professional remediation. A licensed mold technician can confirm species, assess hidden growth behind walls, and implement safer containment and disposal. If you have health conditions or allergies, professional help is advised even for smaller areas. For homes with possible asbestos-containing materials, avoid disturbing ceiling coatings and contact a specialized contractor for safe testing and removal. The decision to hire a professional is a precautionary measure that protects occupants and prevents cross-contamination during remediation.
Tools & Materials
- N95 respirator(Fit-tested if possible; protect against mold spores)
- Safety goggles(Chemical splash protection)
- Disposable coveralls(Ventilate sleeves and legs to minimize skin exposure)
- Plastic sheeting(Seal off the room to prevent spores from spreading)
- Duct tape / painter's tape(Create containment barriers)
- HEPA vacuum(Dedicated unit for mold debris)
- Detergent solution(Mild soap and warm water for cleaning)
- Scrub brush / sponge(Non-abrasive for painted ceilings)
- Mold-resistant primer/paint(Seal surfaces after cleaning)
- Painter's tray / rollers(Optional for painting step)
- Ladder(Safe access to ceiling)
- Moisture meter(Useful to monitor humidity)
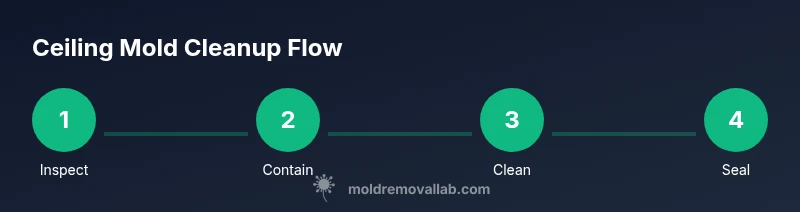
Steps
Estimated time: Total time: 2-6 hours depending on extent and area size
- 1
Inspect and plan
Survey the affected ceiling area to determine extent. Note any leaks, stains, or odors, and plan containment to prevent cross-contamination. Gather all tools and materials before starting.
Tip: Take photos of stains and leaks for reference and to guide contractors if needed. - 2
Contain the work area
Seal the room with plastic sheeting, creating a negative flow to prevent spores from entering adjoining spaces. Close doors and turn off HVAC to limit airflow through the house.
Tip: Seal gaps with tape to maximize containment and reduce dust spread. - 3
Protect yourself
Don the N95 mask, safety goggles, and disposable coveralls. Avoid touching your face and wash hands after removing PPE to prevent cross-contamination.
Tip: Work slowly and breathe through the mask; avoid vigorous cleaning that stirs spores. - 4
Clean the ceiling surface
Wash the ceiling with a detergent solution, scrubbing top-to-bottom to remove visible mold. Rinse with a damp cloth and allow to dry thoroughly before continuing.
Tip: Use a separate cloth for rinsing to prevent spreading mold to clean areas. - 5
Vacuum and seal residual spores
Vacuum the area with a HEPA-equipped machine after cleaning; avoid using non-HEPA vacuums that can release spores back into the air.
Tip: Do this step in short passes and keep the vacuum moving to prevent heat buildup. - 6
Prime, paint, and seal
Apply a mold-inhibiting primer, then paint with mold-resistant paint. Allow adequate drying time between coats as recommended by the product label.
Tip: Label all areas where you applied sealant to track treated zones. - 7
Address moisture sources
Repair leaks, improve ventilation, and reduce humidity to prevent return. Reinstall HVAC components correctly and install exhaust fans in damp zones.
Tip: Consider a dehumidifier in high-humidity seasons and monitor humidity levels regularly.
FAQ
What causes ceiling mold?
Ceiling mold results from persistent moisture, typically from roof leaks, plumbing faults, or condensation. When humidity remains high and air circulation is poor, mold spores can grow on ceiling materials like drywall or paint.
Ceiling mold is usually caused by ongoing moisture from leaks or high humidity, with poor air flow allowing spores to grow on ceiling materials.
Is bleach safe for ceiling mold?
Bleach can kill surface mold on non-porous surfaces, but it is less effective on porous ceiling materials and can create harmful fumes. It’s better to use detergent cleaners and mold-resistant paints after cleaning.
Bleach isn’t ideal for porous ceilings; use detergent cleaners and mold-resistant sealants instead.
How long does remediation take?
Remediation duration depends on the extent of mold and moisture issues. Small, contained areas may be cleaned in a few hours, while larger or hidden growth behind walls can require assessment and multiple visits.
It varies by how much mold there is and whether the moisture problem is fully fixed.
Can ceiling mold affect health?
Exposure to mold spores can irritate the eyes, nose, and throat and may worsen asthma or allergies in sensitive individuals. If health symptoms persist, seek medical advice and address the mold problem promptly.
Mold can irritate airways and trigger allergies, so fix the mold and seek medical advice if symptoms persist.
When should I hire a professional?
Consider a professional if mold covers a large area, recurs after cleaning, or there is hidden growth behind walls. A licensed remediator can safely contain and remove mold and assess structural moisture issues.
If the mold is widespread or behind walls, hire a licensed professional for safe remediation.
The Essentials
- Identify moisture sources before cleaning.
- Contain area and protect occupants during remediation.
- Use PPE and HEPA filtration to minimize exposure.
- Repair leaks and improve ventilation to prevent recurrence.
- Consider professional help for large infestations or asbestos risk.