Can You Take Mold with You When You Move? Practical Guide
Learn why moving mold is unsafe, how to remediate on-site, and steps to plan a mold-free relocation. Mold Removal Lab shares practical guidance for homeowners and renters navigating mold during moves.

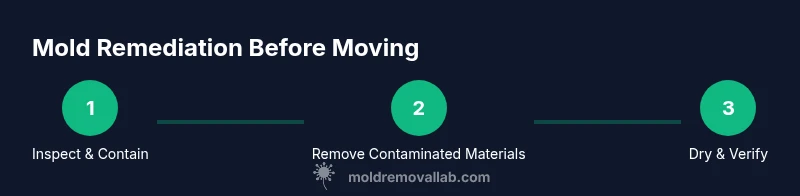
Short answer: no, you should not attempt to move mold. Mold is a health hazard that can spread spores during transport and exposure during relocation. Instead, contain the area, remove contaminated materials on-site, dry the space thoroughly, and verify remediation with testing before any move. If you suspect hidden mold, schedule a professional inspection before packing.
The reality of mold during moves
According to Mold Removal Lab, the idea that you can simply pack up a home with active mold is not safe or practical. 'Can you take mold with you when you move' is a question many homeowners ask in the middle of a relocation. The short answer is no: mold is a health hazard that grows where moisture exists and can easily spread during packing, loading, and transport. In practical terms, any visible mold should be treated and removed on-site before you consider moving. The Mold Removal Lab team found that containment, careful removal of contaminated materials, and thorough drying are essential to prevent spores from spreading to new spaces. For renters and owners alike, this approach reduces health risks and minimizes legal exposure when selling or leasing a home. This guidance helps readers understand why mold can’t be safely relocated with belongings and what to do instead.
Recognizing mold growth and common hotspots
Mold often hides in damp areas that homeowners may overlook during a move preparation. Look behind appliances, in wall cavities, under sinks, around window frames, and in basements or crawl spaces. Controlling humidity with dehumidifiers and ensuring good ventilation are critical in preventing new growth. Mold spores are microscopic, but their presence can cause allergy-like symptoms, asthma flare-ups, and other health concerns for sensitive individuals. Mold Removal Lab emphasizes that early detection and decisive action dramatically reduce remediation costs and health risks when moving between homes.
Immediate actions if you suspect mold before moving
If you discover mold prior to relocation, stop any disturbance of the area and implement containment: close off the space, seal doors with plastic sheeting, and avoid touching or disturbing visible colonies. Wear appropriate PPE (N95 mask, gloves, eye protection) and limit occupancy inside the affected area. The next step is to arrange a professional mold assessment to determine the extent, identify hidden growth, and plan remediation. Quick, careful actions reduce the likelihood of spores migrating into other rooms or into the moving process itself.
On-site remediation options before relocation
On-site remediation is typically the safest and most cost-effective approach before moving. This includes removing porous, mold-contaminated materials (such as drywall or carpet) if they cannot be cleaned, cleaning solid surfaces with mold-rated cleaners, and drying everything to below 50% relative humidity. Use HEPA filtration during cleanup to capture spores and prevent re-aerosolization. After cleaning, verify that moisture sources are eliminated and that there is no ongoing dampness. Mold Removal Lab advises documenting the remediation with photos and notes for future reference and potential landlord or insurer needs.
Packing and transporting mold-contaminated items
Do not pack or transport items that are actively moldy or damp. Contaminated materials should be sealed in heavy-duty plastic bags or containers and disposed of according to local regulations. Books, textiles, and porous items that show mold should be discarded rather than cleaned, as cleaning can spread spores and allow regrowth. Non-porous items that have been properly cleaned and dried can be packed with care, but only after a qualified assessment confirms that no mold remains. Handling items with mold risk requires meticulous containment and hygiene practices.
Cleaning and drying protocols after remediation
After remediation, run dehumidifiers and fans to drive moisture down rapidly, then re-test for residual humidity and visible mold spores. Use moisture meters on structural materials to ensure readings are within safe ranges. Keep airflow going for as long as needed to prevent re-moistening, especially in basements or areas with poor ventilation. Document the drying process and conduct a final inspection to confirm that mold is eliminated before proceeding with packing or moving.
Documentation and legal considerations when moving moldy homes
Mold-related issues can affect sale timelines, rental agreements, and liability. Keep a detailed remediation log that includes dates, contractors, materials removed, and moisture readings. If you are renting, inform the landlord and obtain written confirmation of remediation and clearance test results. In some jurisdictions, undisclosed mold problems can lead to legal claims; being transparent and thorough helps protect both tenants and landlords. Mold Removal Lab emphasizes the importance of following local codes and relying on licensed professionals for any remediation work beyond basic cleaning.
Planning a mold-safe relocation for the future
Pre-move planning is key to a safer relocation. Schedule a mold inspection before listing or vacating a home, address damp sources, and establish a moisture-control plan for the new residence. Consider upgrading ventilation, installing exhaust fans in bathrooms and kitchens, and using air purifiers with HEPA filters. By taking these steps, you reduce the risk of mold recurrence in the new space and create a healthier environment for occupants from day one.
Tools & Materials
- Personal Protective Equipment (PPE) including N95 respirator, gloves, goggles(Ensure proper fit and full coverage; replace if damaged)
- Plastic sheeting and zip-top bags(Use for containment and waste segregation)
- HEPA vacuum and air scrubber(Keep exhaust away from clean areas)
- Moisture meter or hygrometer(Monitor moisture before, during, and after remediation)
- Waste bags rated for hazardous materials(Seal contaminated waste securely; label appropriately)
- Commercial-grade mold cleaner or enzymatic cleaner(Follow label directions; avoid mixing cleaners)
- Detergent, brushes, and microfiber cloths(Use clean tools to prevent cross-contamination)
- Sealed containers for removed materials(Label contents and date of removal)
- Dehumidifier (portable or room unit)(Maintain low humidity after cleaning)
Steps
Estimated time: 2-3 days
- 1
Assess and secure the area
Identify all mold-affected zones and isolate them with plastic barriers to prevent spores from spreading. Communicate with household members about avoiding the contaminated area and monitor for symptoms. This step reduces cross-contamination while you plan remediation.
Tip: Tarp doorways and vents to limit airflow into other spaces; document the initial condition with photos. - 2
Contain and protect
Set up a physical containment zone using plastic sheeting; seal the zone at doorways and vents. Use a HEPA-filtered vacuum to clean the perimeters and reduce loose spores. Wearing PPE is essential during containment.
Tip: Avoid opening additional areas; limited disturbance minimizes spore release. - 3
Remove contaminated materials
Carefully remove porous materials that cannot be cleaned (drywall, carpet). Place them in sealed bags or a labeled container. Keep the waste contained during transport to the disposal area.
Tip: Label waste as mold-contaminated and prevent mixing with other debris. - 4
Clean, disinfect, and dry
Clean non-porous surfaces with approved cleaners and disinfectants. Use HEPA tools to capture spores and dry all materials thoroughly to below 50% humidity. Reassess with a moisture meter after cleaning.
Tip: Work in small sections to avoid cross-contamination; dry zones before moving on. - 5
Dispose and seal belongings
Dispose of removed materials according to local regulations. Seal cleaned items in labeled bags or containers for transport. Do not bring contaminated items into the moving process.
Tip: Keep an inventory of bags and containers for accountability. - 6
Verify remediation
Conduct a final moisture and cleanliness check; consider a professional inspection or third-party air testing if needed. Only proceed with moving after clearance confirms mold absence.
Tip: Retain test results and remediation receipts for future reference.
FAQ
Is it legal to move mold to a new home?
No. Moving mold can violate housing codes and risk health and liability. Remediation should be completed on-site before relocation.
No, moving mold is not legal or safe. Remediation must happen before relocating to protect health and avoid liability.
What if my landlord won’t fix mold before moving out?
Document the mold, notify the landlord in writing, and request professional remediation or a rent abatement if appropriate. Consult local tenant rights resources.
If your landlord won’t fix it, document and inform them in writing. Seek professional remediation and know your tenant rights.
How long does remediation usually take?
Remediation duration depends on scope but typically spans hours to a few days, followed by drying and clearance testing if required.
Remediation can take hours to a few days, plus drying and clearance checks if needed.
Can I rent equipment to test moisture after remediation?
Yes, many hardware stores offer moisture meters for rent or purchase. For conclusive results, hire a licensed professional to perform testing.
Yes, you can rent moisture meters; for definitive results, consider professional testing.
Are there safe DIY methods for mold cleaning?
Simple surface cleaning on non-porous materials is possible with approved cleaners, but porous materials, hidden growth, or large areas require professional remediation.
DIY cleaning is limited to non-porous surfaces; larger or hidden mold should be handled by pros.
Watch Video
The Essentials
- Do not move active mold; remediation on-site is essential.
- Containment and proper cleaning reduce cross-contamination.
- Document remediation steps and moisture readings for records.
- Dispose of moldy materials safely and legally.
- Plan moisture control to prevent future mold growth in the new home.