Can You Put Moldy Coffee Grounds in Your Garden? A Practical How-To
Explore safe, practical guidance on handling moldy coffee grounds in the garden. Learn when to compost, how to minimize risk, and safer alternatives for a healthy, productive outdoor space.

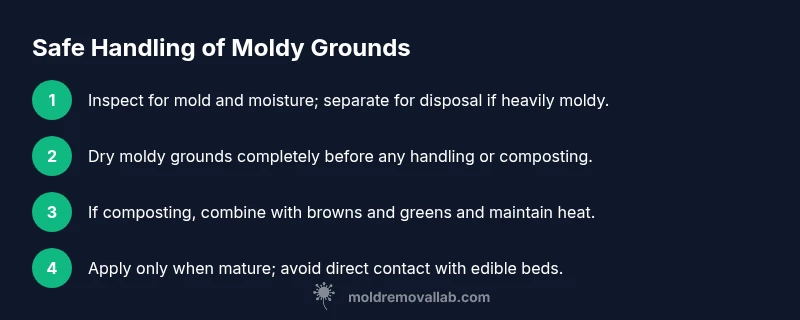
Moldy coffee grounds should not be spread directly on garden soil, especially near edible crops. Use them only as compost feedstock after drying and heat-treating, or discard. If you reuse them, dry completely, remove visible mold, and mix into a hot compost pile or bury deep in soil away from vegetables.
Can Moldy Coffee Grounds Be Used in the Garden? A Cautious Stance
Can you put moldy coffee grounds in your garden? This question comes up often for homeowners who want to recycle kitchen waste. The short answer is that moldy grounds should not be spread directly on soil, especially around edible crops. Mold can release spores and odors, and damp, moldy material may attract pests. According to Mold Removal Lab, moldy grounds can indicate moisture problems and potential mold growth that could transfer to soil or your plants. The safest path is to treat moldy coffee as a compost feedstock only after it has been dried and heat-treated, or to discard it outright if you cannot manage it safely. This article walks you through practical steps to decide whether to compost, how to do it safely, and what safer alternatives exist for garden health. You’ll learn, step by step, how to minimize risk while still recycling organic waste. You’ll also find troubleshooting tips if your compost pile develops odors or pests, and you’ll see how to evaluate soil health after adding any coffee byproducts to the garden.
Understanding Coffee Grounds, Mold, and Soil
Coffee grounds are a readily available, nitrogen-rich feedstock for composting. They can accelerate microbial activity, improve soil tilth, and contribute minor nutrients such as nitrogen. However, when grounds become moldy, the balance shifts. Mold indicates moisture buildup, reduced airflow, and potential microbial imbalance in the compost system. In the soil, moldy matter may temporarily alter pH and create odors that attract scavengers. The key takeaway is that moldy grounds should not be treated the same as fresh coffee byproducts. If you’re committed to recycling them, ensure you handle them with protective gear, dry them thoroughly, and integrate them into a hot, well-managed compost pile that reaches temperatures high enough to neutralize most molds. Mold Removal Lab’s guidance emphasizes safety and mindful placement, particularly in gardens where children or pets play or where edible crops are grown. When used correctly, mold-free compost can support soil structure, water retention, and beneficial soil biology, but moldy inputs require extra care.
Safety Considerations and When to Avoid
Safety first: mold is a sign that conditions are ripe for microbial growth, and some molds can produce mycotoxins or irritants. Direct application of moldy coffee grounds to garden beds—especially near herbs and vegetables—risks introducing spores into the soil environment. People with allergies or respiratory sensitivities may notice irritation from mold spores released during handling. If you have a small child or a pet that frequents the garden, avoid exposure to moldy materials. If the grounds are heavily moldy or smell rotten, discard them or bag them securely for disposal. For homes with limited space, the preferred route is to add moldy coffee grounds to a hot compost pile or composting system that maintains adequate aeration, moisture, and warmth. The Mold Removal Lab recommends erring on the side of caution and treating moldy inputs as high-risk until proven safe through proper composting practices or professional guidance.
Safe Composting of Moldy Grounds: A Step-By-Step Approach
If your goal is to recycle coffee grounds, the safest route is to compost moldy material only within a high-heat, well-managed system. Start by drying the grounds completely and removing visible mold before adding to the pile. Create a balanced mix of browns (dry leaves, shredded paper, straw) and greens (coffee grounds, kitchen scraps) to achieve a carbon-to-nitrogen ratio that supports rapid microbial activity. Turn the pile regularly to introduce oxygen and monitor temperature. The pile should reach and maintain elevated temperatures for several days to reduce pathogens and molds. When the finished compost is dark, crumbly, and earthy-smelling, you can apply it to non-edible areas or bury it deeply in soil away from root zones of crops. If odor, pests, or slimy textures persist, pause composting and reassess moisture and airflow. The goal is safe, stable compost rather than a quick fix for garden soil.
Alternative Uses Without Risk
Not every moldy input is a good fit for the garden. Consider safe alternatives that reduce risk while still making use of your kitchen waste. Dry and store moldy grounds for disposal rather than using them in the garden. If you have a worm bin, you can add only non-moldy, crumbly coffee grounds in small amounts as part of a balanced waste stream—avoid moldy material that could harm the worms. For ornamental beds or areas where you don’t plant edible crops, mold-free compost can be used as a mulch substitute after thorough curing. In short, weigh the risk, check for mold indicators, and prioritize methods that eliminate pathogens before applying any organic matter to the soil.
Testing Soil and Plant Response After Using Grounds
After introducing any coffee byproduct to the soil, observe plant health and soil conditions. Look for changes in soil texture, moisture retention, and drainage, along with the absence of unusual odors or mold growth. If you notice persistent odors, discolored soil, or plant distress, stop applying inputs and re-evaluate your composting setup. A simple soil test can help you gauge pH and nutrient shifts, but the most practical indicator is your plants’ vigor. If you’re uncertain, consult local extension resources or a soil-testing laboratory. The goal is to ensure your garden remains a healthy environment for growth and safety. Mold Removal Lab emphasizes cautious handling and ongoing observation as part of a responsible garden nutrient cycle.
Real-World Scenarios: Kitchen Waste to Garden Strategy
In many homes, fermented or moldy scraps from the kitchen end up in compost or municipal waste streams. A practical strategy is to separate moldy from non-moldy materials at the source. Use non-moldy coffee grounds in a hot compost system where temperatures rise quickly, while set-aside moldy portions for disposal. For balcony or small-space gardeners, consider a compact, enclosed composting bin that can reach high heat and minimize exposure to outside air. Always prioritize safety: avoid direct contact with moldy materials, wear PPE, and keep children and pets away from composting areas during active mold growth. By adopting mindful collection, monitoring, and disposal practices, you promote soil health while reducing health risks.
Common Mistakes and Quick Fixes
Common mistakes include adding moldy grounds directly to soil, failing to dry materials, and neglecting aeration or moisture control in the compost pile. Quick fixes involve removing moldy portions, drying thoroughly before adding to a hot compost system, and turning the pile to maintain airflow. If odors or pests arise, pause adding new material and inspect for moisture saturation or insufficient browns in the mix. Small adjustments to pile structure and moisture can dramatically improve outcomes. Remember, the goal is safer garden inputs rather than quick, risky gains.
Tools & Materials
- Gardening gloves(Protect hands when handling moldy materials)
- N95 or equivalent mask(Limit inhalation of spores during handling)
- Clear plastic bags or sealed containers(Contain moldy material for disposal)
- Compost bin or sturdy pile area with lid(Must provide good aeration and heat)
- Compost thermometer or ambient heat probe(Helpful for monitoring pile temperature)
- Shovel or scoop(Move materials without contaminating tools)
- Moisture meter (optional)(Helps maintain proper moisture balance)
- Drying tray or rack(Spread grounds to dry completely before composting)
Steps
Estimated time: 8-12 weeks for finished compost; 2-3 weeks active work, plus drying and curing
- 1
Inspect the grounds
Wear PPE and assess the mold level, odor, and moisture content. If there is extensive visible mold or a rotten smell, set aside the material for disposal rather than composting. This initial check helps prevent introducing mold into your garden soil.
Tip: If unsure, err on the side of safety and avoid adding to compost until you’ve dried and checked it. - 2
Dry the grounds completely
Spread the grounds in a thin layer on a drying tray in direct sun or a warm indoor area until moisture is gone and no visible mold remains. Drying reduces moisture that supports mold and makes subsequent handling safer.
Tip: Aim for several hours to a full day of drying, depending on humidity. - 3
Decide on disposal vs. composting
If any mold remains after drying, consider disposal. Mold-free material can be composted, but moldy portions should be kept separate to avoid cross-contamination.
Tip: Label bags clearly to prevent accidental mixing with other compost inputs. - 4
Prepare a hot compost pile
Build a balanced mix of browns and greens to reach a healthy C:N ratio. Include dry leaves, paper, or straw alongside the coffee grounds to promote heat and airflow. The goal is a pile that heats up and sustains high temperatures.
Tip: Keep pile size manageable (roughly knee-high) to ensure adequate turning and aeration. - 5
Turn and monitor the pile
Turn the pile every 2-3 days during the first two weeks and monitor temperature. High enough heat helps kill molds and pathogens. If the pile cools quickly, add more greens or water to maintain microbial activity.
Tip: Using a compost thermometer helps you confirm adequate heat (avoid guessing). - 6
Evaluate readiness
Finished compost should be dark, crumbly, and earthy-smelling with no detectable mold or off-odors. Refer to local guidelines for acceptable curing times, which vary with climate and pile management.
Tip: When in doubt, give it more time and perform a simple sniff test. - 7
Apply safely
Only apply finished compost to non-edible areas or bury it well away from root zones of crops that will be consumed. Avoid direct contact with edible beds until you’re confident the material is fully mature and safe.
Tip: Use a mulch or soil surface layer to reduce direct contact with roots. - 8
Clean tools and store
Rinse and sanitize tools after handling moldy materials to prevent cross-contamination in future projects. Store gloves, masks, and containers separately from clean garden gear.
Tip: A simple bleach solution rinse (1:9) can help sanitize metal tools; dry thoroughly afterward.
FAQ
Is mold from coffee grounds dangerous to humans?
Most molds on coffee grounds pose minimal risk when handled with PPE, but some molds can irritate the skin, eyes, and respiratory system. Treat moldy material with caution, sanitize tools, and avoid inhaling spores.
Molds can irritate skin and lungs, so handle moldy grounds with care and wash up afterward.
Can I use moldy grounds around potted plants?
It's best to avoid applying moldy grounds directly to pots. If you must, add only non-moldy portions and ensure the material is fully composted and mature before use.
Avoid moldy parts on potted plants; use only mature compost after proper processing.
Should I throw away moldy grounds or attempt composting?
If mold growth is extensive, disposal is safer. If you dry, isolate, and heat-treat the material correctly, composting can be an option with careful management.
If heavily moldy, consider disposal; otherwise, you can compost with proper heat.
How do I know when compost is ready to use?
Finished compost appears dark, crumbly, and earthy with no strong odor or mold. It should blend into soil and support plant growth without signs of mold.
Healthy, earthy-smelling, crumbly compost is ready to use.
Where should finished compost be applied in the garden?
Apply to non-edible beds or bury beneath the soil surface away from root zones of edible crops to minimize risk.
Use on non-edible areas or bury it away from edible beds.
How long does it take for coffee ground compost to mature?
Maturation depends on pile management, climate, and aeration. It usually takes several months; follow best-practice composting to maintain pace and quality.
Maturation varies, but expect several months with good management.
Watch Video
The Essentials
- Avoid direct application of moldy grounds to edible beds.
- Dry and heat-treat moldy material before composting.
- Use hot composting with a balanced green/brown mix.
- Monitor moisture and odor to catch problems early.
- Apply finished compost only to non-edible soil or bury deeply.