Can You Get Mold Out of Wood? A Practical Guide
Learn proven, safe methods to remove mold from wood with step-by-step instructions, essential tools, safety tips, and advice on DIY vs professional remediation.

Yes—can you get mold out of wood? In most cases, you can remove surface mold from wood with careful cleaning, thorough drying, and moisture control. The Mold Removal Lab team emphasizes testing a small area first, using gentle cleaners, and sealing after drying to prevent return. Deep, warped, or widespread growth may require professional remediation.
What mold on wood means and why it happens
Mold on wood usually starts when moisture lingers near wooden surfaces. The question most homeowners ask is can you get mold out of wood, and the short answer is yes for surface contamination, provided you address the underlying moisture and dry the wood promptly. According to Mold Removal Lab, mold growth on wood is often a sign of elevated humidity, leaks, or poor ventilation. Before you dive into cleanup, identify whether the growth is superficial or if the wood is compromised. Surface stains and musty odors can appear early, but soft, crumbly, or spongy wood suggests deeper moisture damage that may require more than cleaning. The Mold Removal Lab team stresses that successful remediation hinges on two things: removing moisture sources and removing visible mold from the surface.
Quick path to decision-making: surface mold vs. structural mold
The most reliable way to decide your next step is to categorize what you see. Surface mold on finished wood (like trim or a painted panel) responds well to cleaning and drying, often without wood replacement. If wood remains damp after cleaning, or if you can press the wood and it feels soft or crumbles, this is a sign of deeper moisture and possible structural compromise. In those cases, professionals may recommend replacing or sealing the affected area after remediation. Remember, Mold Removal Lab analysis shows that addressing moisture first dramatically improves outcomes, reducing the likelihood of regrowth.
Moisture sources you should fix first
Before cleaning, locate and fix the moisture source. Leaks, high indoor humidity, or poor ventilation create a favorable environment for mold to return. Fix plumbing leaks, reduce humidity with dehumidifiers, and improve airflow with ventilation fans. Even if you clean mold off wood, moisture can rebound if the root cause isn’t addressed. The guidance from Mold Removal Lab emphasizes moisture control as the foundation of any effective remediation plan.
About wood types: porous vs. non-porous surfaces
Wood is porous and can trap mold spores deep within. Painted or sealed wood responds differently than bare, unfinished wood. Surface mold on sealed wood may be easier to remove, while mold that has penetrated into porous wood fibers can require more aggressive cleaning, finish sanding, or even replacement in severe cases. The distinction matters because it guides your cleaning methods and your expectations about long-term success. The Mold Removal Lab team notes that deeply penetrated mold is less likely to be fully removed without removing or stabilizing the affected wood.
Safety and health considerations when cleaning mold
Mold exposure can irritate eyes, nose, throat, and lungs, especially for sensitive individuals. Wear appropriate protective gear: a properly fitted respirator, gloves, and eye protection. Keep others out of the work area and seal off the space to limit spore spread. If you have mold-related health concerns or very widespread growth, consult a professional. Mold Removal Lab emphasizes that safety is as important as effectiveness when dealing with mold on wood.
What to expect from a remediation plan
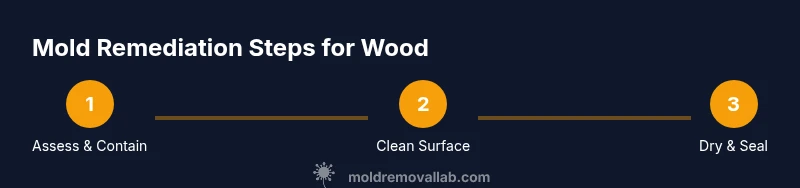
A typical plan includes moisture control, surface cleaning with appropriate cleaners, drying until the wood reaches a stable moisture level, and sealing or finishing the wood to prevent future growth. In some cases, replacing severely damaged boards or beams is the best long-term solution. The key takeaway from Mold Removal Lab is that proactive moisture management and careful cleaning yield better long-term results than aggressive scrubbing alone.
Tools & Materials
- Protective gear (gloves, goggles, respirator)(NIOSH-approved respirator (N95 or better) and eye protection)
- Plastic sheeting and painter's tape(To isolate the work area and limit spores migrating)
- Mild detergent or wood-safe cleaner(Non-ammonia; test on a hidden area first)
- White vinegar (5-8% acetic acid) or 3% hydrogen peroxide(Test a small spot first; avoid soaking the wood)
- Soft-bristle brush or sponge(Non-abrasive to avoid scratching the surface)
- Rags, disposable towels, and bucket(For application, blotting, and cleanup)
- Moisture meter or hygrometer(Helpful to confirm drying progress)
- Dehumidifier or fan(s)(Maintain dry air and promote faster drying)
- Wood finishing sealer or protective finish(Apply after drying to protect against future moisture)
Steps
Estimated time: 2-6 hours
- 1
Identify moisture sources and mold extent
Survey the area and determine where moisture comes from (leaks, condensation, poor ventilation). Note how far the mold has spread on the wood. This helps you plan selective cleaning and whether replacement is needed.
Tip: Document with photos before you start; this helps if you file a claim or consult a pro. - 2
Contain the work area
Seal off the space with plastic sheeting to prevent spores from drifting to other rooms. Turn off HVAC or use portable fans away from the cleanup zone to minimize air currents that can carry spores.
Tip: Keep children and pets out of the area during remediation. - 3
Don protective gear and prep surfaces
Put on a fitted respirator, gloves, and eye protection. Lay down plastic to protect nearby surfaces and pre-dilute cleaners as needed. This reduces exposure and makes cleanup more efficient.
Tip: Ensure the respirator seal is correct before you begin. - 4
Clean mold from the wood surface
Apply a mild cleaner or a vinegar/H2O2 solution to the moldy area. Gently scrub with a soft brush, working with the grain. Avoid saturating the wood and never mix cleaners with ammonia.
Tip: Always test cleaners on an inconspicuous spot first to prevent finish damage. - 5
Rinse, dry, and monitor moisture
Wipe away cleaning solutions with a damp cloth, then dry the surface promptly using fans or a dehumidifier. Check moisture levels regularly and aim for stable wood moisture content or ambient RH that supports slow, safe drying.
Tip: Ventilate the area until the wood is fully dry; damp wood invites regrowth. - 6
Decide on finishing or replacement
If the wood shows signs of deep penetration, warping, or persistent mold after cleanup, consider replacement or applying a protective finish once dry. For extensive damage, professional assessment is wise.
Tip: Consult a pro if unsure about structural integrity or complex mold growth.
FAQ
Can mold be completely removed from wood?
Surface mold on wood can often be removed with cleaning and drying, but deeply penetrated mold may require wood replacement or professional remediation. If wood remains damp after cleaning, re-evaluate the moisture sources.
Surface mold can often be removed with cleaning if the wood isn’t deeply penetrated; persistent dampness may require replacement or a pro.
Is bleach safe to use on wood?
Bleach can kill surface mold on non-porous surfaces but can damage wood finishes and may not reach mold embedded inside porous wood. Use gentler cleaners first, and avoid soaking the wood.
Bleach isn’t ideal for wood; it can damage finishes and won’t reach embedded mold. Try gentler cleaners first.
How long does it take wood to dry after cleaning?
Drying times vary with humidity and ventilation. Expect hours to days, depending on conditions and wood type. Monitor moisture and use dehumidifiers or fans to speed up the process.
Drying times depend on humidity and ventilation; it can take hours to days.
When should I call a professional?
Call a professional if mold covers a large area, the wood is warped or damaged, or you are dealing with persistent mold after cleaning. Health concerns or complex moisture issues also warrant expert help.
If mold is widespread, wood is damaged, or it keeps coming back, get a professional assessment.
Can mold in wood indicate structural damage?
Mold growth can accompany moisture intrusion that weakens wood. If you see warping, soft spots, or musty odors after cleanup, have a professional inspect for structural integrity.
Yes, mold can signal structural damage; look for warping or softness and seek an inspection if present.
Should I replace moldy wood or seal it after cleaning?
If wood is severely damaged or continues to mold despite cleaning, replacement is often the best long-term solution. If the wood is intact after cleaning, sealing or finishing can help prevent future growth.
Replace heavily damaged wood or seal after cleaning if it looks solid and dry.
Watch Video
The Essentials
- Address moisture first to stop mold from returning.
- Surface mold on finished wood is easier to fix than deep mold in porous wood.
- Test cleaners on inconspicuous areas before full application.
- Call a professional when mold recurs or wood is structurally damaged.