Can You Cover Mold with Paint? A Practical Guide
Urgent guide on why painting over mold is not a fix and how to properly remediate, with practical steps for homeowners. Learn safe, effective methods from Mold Removal Lab.

If you ask can you cover mold with paint, the answer is no. Painting over mold is not a safe or effective long-term fix. The Mold Removal Lab team found that moisture behind the growth continues to fuel regrowth even when the surface looks cleaner. Paint may mask stains, but it does not remove spores or address the moisture that feeds new colonies. For safety and lasting results, address moisture, remove contaminated material, and follow a structured remediation plan before applying any coatings.
Can you cover mold with paint? A risky shortcut
If you search can you cover mold with paint, you'll likely find DIY tips claiming paint hides growth. The reality is harsher: mold is a living organism that needs moisture and porous surfaces to thrive. According to Mold Removal Lab, painting over mold is not a safe or effective long-term fix. The Mold Removal Lab team found that while paint may mask a stain, it does nothing to remove spores or address the moisture that fuels regrowth. Homeowners who try this shortcut often face recurring mold, musty odors, and potential health risks. Moisture behind the surface remains, and damp areas can corrode paint or lead to peeling, bubbling, and new colonies forming under the coating. For safety, urgency is required: address moisture, remove contaminated materials, and follow a structured remediation plan before applying any coatings. Painting might seem to solve the problem quickly, but it doesn't fix the root cause. Even after painting, occupants may experience allergy symptoms or respiratory irritation if spores are stirred during work.
How paint interacts with mold and why it's not a cure
Mold growth is not a cosmetic issue; it's a biological problem that thrives on moisture, organic material, and the right temperature. Paint can create a barrier, but only if the underlying conditions are controlled. Many paint products claim mold resistance, but these claims refer to surface growth on dry, non-porous surfaces for some time. They do not kill existing colonies or stop hidden growth behind walls. When paint is applied over damp or moldy substrates, the moisture remains trapped; this can lead to delamination, odors, and accelerated spread of spores when the coating fails. The proper approach is to remove mold, dry thoroughly, and repair the moisture source. Then, if you want to seal and prevent future growth, choose a breathable, mold-resistant primer and finish under the guidance of a professional. Mold Removal Lab analysis shows that coatings should complement, not replace, moisture control and mold removal.
The hidden moisture problem you can't see behind walls
Visible mold is only the tip of the iceberg. Behind walls, moisture can persist through leaks, condensation, or humidity. If these sources are not fixed, painting won't stop growth. Signs of hidden moisture include high humidity levels, musty smell, and discolored drywall or subflooring. Tools like moisture meters and infrared cameras help locate it, but ultimately you must repair any leaks and dry the area completely before considering coatings. The risk to occupants includes allergic reactions, asthma flare-ups, and respiratory irritation, especially in damp basements or bathrooms. The Mold Removal Lab team stresses that long-term success depends on eliminating the moisture source. Cosmetic fixes may buy time, but they won't eliminate the root cause.
When paint might seem to help: limited scenarios
In rare cases, painting might play a minor role after proper remediation: on a fully dry, non-porous surface, a mold-resistant paint can reduce surface staining and simplify maintenance. But this only makes sense after you have removed all visible mold and dried the space. When using any coating, follow the product's specifications, ensure ventilation, and avoid masking information about moisture problems. Never treat an active mold colony with paint alone. The goal is to create a surface that is easier to clean and less hospitable to future growth, not to hide ongoing contamination.
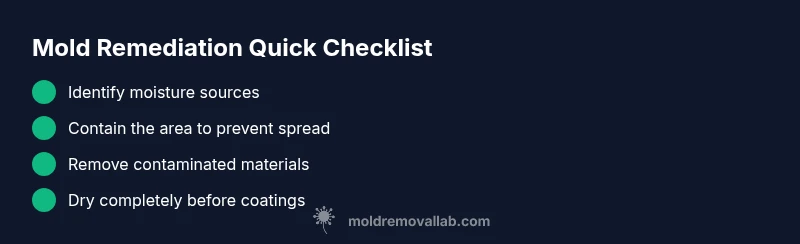
Practical steps homeowners can take today to start remediation
- Stop the source of moisture: fix leaks, improve ventilation, and use dehumidifiers to keep humidity under control. 2) Contain the work area with plastic sheeting and seal the perimeter to prevent spores from spreading. 3) Wear proper PPE (N95 or better) and avoid disturbing mold during cleanup. 4) Remove heavily moldy materials and dispose of them safely in sealed bags. 5) Clean surfaces with detergent and water or an approved mold cleaner; do not rely on paint to do the remediation. 6) Dry the space thoroughly; re-test moisture levels before any coating. 7) If you have persistent growth or large areas, call a professional for assessment and remediation.
Steps
Estimated time: 4-8 hours (plus potential additional drying time)
- 1
Identify moisture sources and stop leaks
Locate leaks in roofing, plumbing, or walls and repair them. Run a dehumidifier to drive down humidity levels and keep the space well-ventilated during work.
Tip: Document all leaks and keep receipts for any repairs in case documentation is needed. - 2
Assess extent and safety
Check for visible growth and signs of hidden moisture. Use a moisture meter or infrared camera if available. If growth is extensive or indoors with poor ventilation, prepare to involve a professional.
Tip: Wear a respirator and eye protection; mold exposure can irritate airways. - 3
Contain area and remove contaminated materials
Seal off the area with plastic sheeting to prevent spore spread. Remove heavily moldy materials for safe disposal and minimize disturbance to avoid aerosolizing spores.
Tip: Double-bag and seal waste; never reuse contaminated materials. - 4
Clean and sanitize surfaces
Clean hard surfaces with detergent and water or an approved mold cleaner. Avoid mixing cleaners without guidance and ensure surfaces are completely dry before proceeding.
Tip: Rinse with clean water after cleaning and dry promptly. - 5
Dry completely and verify dryness
Ensure all affected areas reach full dryness using fans and dehumidifiers. Recheck moisture with meters after drying to confirm criteria are met.
Tip: Keep area sealed until moisture readings are stable. - 6
Plan coatings only after remediation
If you choose to paint, use a breathable, mold-resistant primer and finish only after all moisture and mold concerns are fully resolved.
Tip: Follow product instructions precisely and ventilate during application.
Diagnosis: Visible mold persists after painting or there is a continued musty odor
Possible Causes
- highMoisture source remains unaddressed (leaks, high humidity)
- mediumMold hidden behind drywall or insulation
- lowPaint layer is non-breathable or not part of a remediation plan
Fixes
- easyIdentify and repair moisture sources; run dehumidification and fix leaks
- hardRemove mold-contaminated materials and thoroughly clean affected areas
- easyApply a mold-resistant primer only after complete drying and cleaning
FAQ
Can painting over mold ever be safe?
No. Painting over mold does not remove it and can trap moisture, allowing regrowth and health risks. Proper remediation requires moisture control, mold removal, and drying before any coatings.
No—painting over mold isn’t safe. It hides the problem and can lead to ongoing growth. Remediation means moisture control and removal first.
What paints resist mold growth after remediation?
There are mold-resistant paints, but they only help after you have eliminated the mold and dried the area. They do not kill existing colonies or fix moisture issues.
Mold-resistant paints can help after cleaning and drying, but they don’t replace proper mold removal.
Is it worth DIY remediation for small mold spots?
For small, contained spots on non-porous surfaces with good airflow, a careful DIY cleanup may be possible, but you must manage moisture and ensure surfaces are completely dry. If growth is more than a few square feet or behind walls, call a pro.
Small spots might be DIY-able, but moisture control is essential. If in doubt, a professional should assess.
How long does mold remediation take?
Remediation time varies with area size and moisture levels. A small area may take a day; larger outbreaks can take several days, especially if structural repairs are needed.
Time depends on extent. Expect a few hours to a few days, plus possible follow-up checks.
When should I hire a professional?
If mold covers more than a small area, is behind walls, or you have health concerns, humidity issues, or repeated growth after DIY attempts, contact a licensed remediation professional.
If it’s extensive or persistent, get a professional assessment.
What can I do to prevent mold after remediation?
Control moisture, fix leaks promptly, improve ventilation, and keep humidity in check. Regular inspections and prompt cleaning of damp areas help prevent recurrence.
Keep moisture low and inspect areas regularly to prevent mold from returning.
Watch Video
The Essentials
- Do not rely on paint to fix mold problems.
- Address moisture first and foremost.
- Use mold-resistant coatings only after proper remediation.
- When in doubt, hire a professional for large outbreaks.