Blow Mold Pumpkin Mold Cleanup: A Practical DIY Guide
Learn safe, step-by-step methods to remove mold from blow mold pumpkins, prevent recurrence, and store them properly. Practical tips from Mold Removal Lab.

This guide shows you how to identify mold on a blow mold pumpkin, safely clean it without damaging the plastic, and prevent future growth. You’ll learn tested DIY steps, disinfection options, and storage practices to keep decorative pumpkins clean and safe for years to come.
What is a blow mold pumpkin and why mold can occur
A blow mold pumpkin is a hollow plastic decoration produced by blow-molding, often used for Halloween or seasonal displays. In damp or humid environments, mold can take hold on the surface and in tiny crevices where moisture lingers. The Material and finish on some pumpkins can trap moisture, especially if stored damp or in poorly ventilated spaces. According to Mold Removal Lab, mold growth on decorative plastics is possible when environmental conditions are right, even on items kept indoors. Understanding how moisture and organic debris accumulate on a blow mold pumpkin helps you target cleaning efforts effectively and reduces the risk of re-growth after cleaning.
Signs mold has taken hold on a blow mold pumpkin
Look for visible discoloration, fuzzy or slimy patches, and a musty odor around the pumpkin. Mold can appear as dark spots, greenish patches, or smudges in crevices and seams. Check areas that tend to trap moisture, such as between the stem and cap, around any paint or coating, and in recessed textures. If you notice a persistent smell after cleaning, or if the surface feels tacky or soft, it could indicate deeper mold growth or moisture damage beneath the finish. Early detection makes DIY remediation more effective and safer for your home.
Safe DIY cleaning methods for blow mold pumpkins
Begin with a gentle approach to avoid scratching or dulling the finish. Use a mild dish soap mixed with warm distilled water, applied with a soft microfiber cloth. Gently wipe surfaces, paying close attention to seams and textured areas. For crevices, use a soft-bristle brush to dislodge embedded debris. Rinse with clean water and dry thoroughly before disinfection. This two-step approach minimizes chemical exposure while removing surface contaminants and prepares the pumpkin for sanitization.
Disinfection and sanitization: what works best
After cleaning and drying, apply a sanitizer suitable for plastics. A 70% isopropyl alcohol spray is effective for most blow mold pumpkins and dries quickly, reducing moisture time. Alternatively, hydrogen peroxide (3%) can be used as a plastic-safe option. Apply and allow a brief contact time (about one minute), then wipe or let air-dry. Avoid harsh bleach solutions that can discolor or weaken some finishes, especially on painted or decorated pumpkins. Always ventilate the area and wear gloves when using sanitizers.
Reaching into crevices: tricky areas and how to handle them
Crevices around stems, seams, and textured surfaces harbor mold and can be difficult to reach. Use a small brush, such as a soft toothbrush, dampened with the cleaning solution to gently scrub. Take extra care not to scrub too aggressively, which could scratch the plastic or remove decals. If paint is peeling or exceptionally fragile, skip harsh scrubbing and focus on cleaning with minimal contact to preserve the finish while still removing contaminants.
Drying, storage, and humidity control to prevent recurrence
Moisture is mold’s ally. After disinfection, dry the pumpkin completely with a clean towel and then air-dry in a well-ventilated area. Consider a drying rack or a warm, non-humid environment for thorough drying. Store blow mold pumpkins in a dry, cool space with good airflow and, if possible, silica gel packs or desiccants in the storage container to absorb residual moisture. Regularly inspect stored items for signs of moisture or odor changes between seasons.
Prevention strategies for the Halloween season and beyond
Prevent mold by controlling humidity in display areas and storage spaces. Use dehumidifiers in basements or sheds and ensure proper ventilation when storing or cleaning. Clean pumpkins after each season to remove surface dust and organic debris that can feed mold growth. If you notice recurring mold on multiple pumpkins, evaluate storage conditions or consider replacing older decorations that show persistent mold or damage to the plastic.
When to retire a blow mold pumpkin or seek professional guidance
If mold persists after multiple cleaning attempts, or if you see cracking, heavy surface degradation, or persistent odor that returns quickly, it may be safer to retire the item. In cases of extensive biofilm or suspected hidden damage, consult a mold remediation professional for a thorough assessment. Mold Removal Lab’s guidance emphasizes safety and minimizing risk to occupants, particularly in homes with moisture problems or mold sensitivity.
Real-world scenarios and common mistakes to avoid
In many homes, seasonal decorations are stored in damp basements or garages, which invites mold growth. A common mistake is using aggressive chemical cleaners that can warp plastic or remove decals. Another pitfall is skipping drying time; damp decorative items can reintroduce moisture and mold. By focusing on gentle cleaning, adequate drying, and proper storage, you reduce the likelihood of mold returning and extend the life of blow mold pumpkins.
Tools & Materials
- mild dish soap(dilute in warm distilled water)
- warm distilled water(base cleaning solution)
- soft microfiber cloth(lint-free; for wiping surfaces)
- soft-bristle brush(for textured areas and crevices)
- spray bottle(for applying cleaner and sanitizers)
- 70% isopropyl alcohol(for disinfection on plastics)
- hydrogen peroxide 3%(alternative sanitizer)
- gloves(nitrile or latex; protect skin)
- mask(face covering when mold presence is suspected)
- clean drying towel(for initial drying)
- storage container with desiccants(helps keep items dry)
Steps
Estimated time: 60-90 minutes
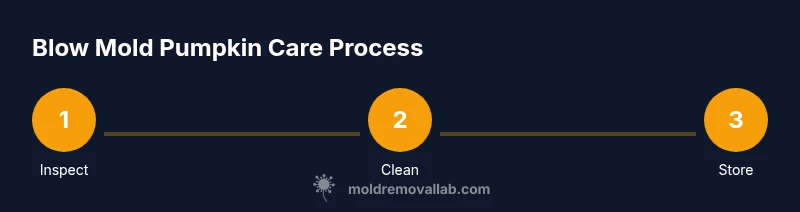
- 1
Inspect the pumpkin
Check for visible mold, odor, and moisture hotspots. Identify crevices and seams that require extra attention before you begin any cleaning.
Tip: Document affected areas with a quick note to track improvement. - 2
Prepare cleaning solution
Mix a small amount of mild dish soap with warm distilled water in a spray bottle. This gentle solution loosens debris without harming the plastic.
Tip: Test a hidden area first to ensure there is no discoloration. - 3
Wipe surface with soap solution
Wipe the entire surface with the soapy cloth, focusing on flat areas. Use a gentle, circular motion to lift debris without scratching.
Tip: Avoid soaking the pumpkin; moisture can enter seams. - 4
Scrub crevices
Gently scrub seams and textured areas with a soft-bristle brush to remove embedded dirt and biofilm.
Tip: Do not use abrasive pads that could damage the finish. - 5
Rinse and dry
Rinse with clean water and dry thoroughly with a clean towel, then air-dry in a ventilated space to eliminate remaining moisture.
Tip: Ensure every cavity and seam is completely dry. - 6
Disinfect the surface
Apply 70% isopropyl alcohol to the surface or use hydrogen peroxide 3% as an alternative. Allow a brief contact time and wipe away any residue.
Tip: Keep the area well-ventilated during sanitizing. - 7
Finalize drying
Confirm the pumpkin is completely dry, paying attention to hidden pockets. Any lingering moisture can prompt regrowth.
Tip: If air-drying, place the item on a rack away from walls to promote airflow. - 8
Store properly
Place the blow mold pumpkin in a dry, cool area with airflow. Use desiccants if available to absorb residual humidity.
Tip: Label storage and monitor conditions seasonally.
FAQ
Can blow mold pumpkins harbor mold inside the core or hollow cavity?
Yes, mold can grow in hidden pockets if moisture gets inside the cavity. Visual inspection may not reveal all mold growth, so targeted cleaning and drying are essential. If the cavity shows persistent moisture, consider sealing or replacement.
Yes, mold can grow in hidden pockets inside the cavity; inspect, dry, and consider replacement if moisture persists.
Is bleach safe to use on blow mold pumpkins?
Bleach can discolor or weaken some plastic finishes. Use plastics-safe sanitizers like 70% isopropyl alcohol or 3% hydrogen peroxide instead, especially on decorated surfaces. Avoid strong bleach unless the item is clearly rated for it.
Bleach can damage the finish; use alcohol or hydrogen peroxide instead unless the item is rated for bleach.
How long should the pumpkin air-dry after cleaning?
Aim for complete air-drying in a ventilated area for at least several hours, longer if you suspect hidden moisture. Check crevices and seams to confirm dryness before storage.
Allow several hours of air-drying in a well-ventilated space until fully dry.
What if mold returns after cleaning?
If mold recurs quickly, re-evaluate storage conditions for humidity and ventilation, and consider professional assessment for hidden moisture or structural damage. Persistent issues may require discard or replacement.
If mold keeps coming back, check storage humidity and consider expert help.
What are good preventative steps for next season?
Clean and dry items thoroughly after each season, store in a dry space, use desiccants, and monitor humidity. Regular checks help catch issues before mold establishes.
Clean, dry, and store properly; monitor humidity to prevent mold.
When should I contact a mold remediation professional?
If you suspect extensive mold growth behind decorations, or if moisture problems persist after proper cleaning, a professional assessment can protect your home and health. They can identify hidden moisture and advise on safe remediation.
Call a professional if mold is extensive or moisture issues persist.
Watch Video
The Essentials
- Inspect for mold and moisture before cleaning.
- Use gentle cleaning first to protect plastic finish.
- Disinfect with plastics-safe methods and dry completely.
- Store in a dry, ventilated space to prevent recurrence.
- Retire or seek help for severely damaged items.