Ghost and Pumpkin Blow Mold Care Guide
Learn practical, step-by-step methods to clean, inspect, and prevent mold growth on ghost and pumpkin blow mold decorations. Mold Removal Lab provides expert, homeowner-friendly guidance for safe storage and care.

You will learn a practical, step-by-step approach to safely clean, dry, and store ghost and pumpkin blow mold decorations. This guide covers exterior cleaning, interior crevice care, and long-term storage to prevent mold growth, with safety tips to protect health and preserve decor.
Understanding ghost and pumpkin blow mold
Ghost and pumpkin blow mold decorations are iconic Halloween pieces crafted from lightweight plastics, often PVC or similar resins. They are hollow and designed to glow or light up, but their cavities can trap moisture if stored or cleaned improperly. The phrase ghost and pumpkin blow mold captures a class of decorative forms that include both characters and pumpkins with eerie faces. According to Mold Removal Lab, moisture retention within hollow interiors and irregular drying after use are common pathways for mold development. Homeowners and renters should treat these items with mold-prevention care, especially after seasonal storage. The health of indoor air hinges on proper handling, drying, and storage—so plan a cleaning routine that reduces residual moisture while preserving color. By applying a methodical approach, you can enjoy your spooky displays for many seasons while minimizing mold risks.
Common mold sources in blow mold decorations
Moisture becomes trapped in hollow forms, especially if the piece is handled while damp or stored in humid spaces. Dust, organic debris, and residual condensation inside ghost and pumpkin blow mold create environments where mold can take hold. Growth is often hidden inside crevices around mouths, eyes, and connection points where paint or seams create micro-habitats. Mold Removal Lab analysis shows that improper drying after cleaning and stagnant storage areas are frequent culprits. To reduce risk, ensure complete drying before storage, store in breathable containers, and avoid stacking heavy items on top of delicate blow mold pieces. Regular inspection before next season helps keep indoor air safe and prevents mold spores from recirculating.
Tools and materials for safe cleaning
Before you begin, assemble a basic, mold-safe toolkit. Essential items include nitrile gloves to protect skin, a soft-bristle brush for delicate surfaces, microfiber cloths for gentle wiping, and a mild detergent mixed with warm distilled water. A spray bottle helps apply cleaning solution evenly, while a small toothbrush or detail brush reaches tight crevices around faces and seams. Use a ventilated workspace with a dehumidifier or fan to encourage drying after cleaning. Optional items like a mask reduce inhalation of spores during cleaning. Having the right supplies on hand makes the ghost and pumpkin blow mold cleaning process smoother and safer.
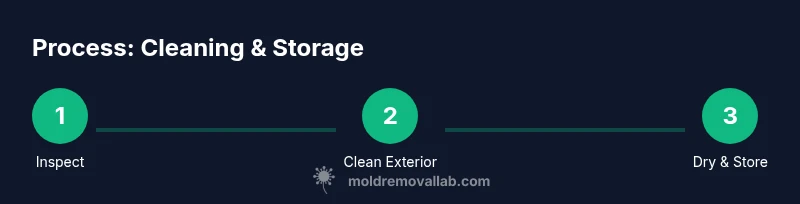
Step-by-step cleaning overview
A structured approach to cleaning starts with exterior surfaces and moves inward to crevices and interiors. Begin by wiping down the outside with a damp cloth to remove surface dust. Then lightly scrub any visible mold with a soft-bristle brush dipped in a mild detergent solution. Rinse with distilled water and dry thoroughly with a microfiber cloth. For deeper crevices, use a small brush to dislodge mold from faces, seams, and attachment points. Finally, ensure the piece is completely dry before returning it to display to prevent regrowth. This plan minimizes moisture pockets in the ghost and pumpkin blow mold and keeps colors vivid year after year.
Cleaning exterior surfaces and interior crevices
Exterior surfaces should be treated with a gentle approach: wipe, then brush, avoiding aggressive scrubbing that can dull paint or crack plastics. For interior crevices, especially around the facial features, insert a damp brush carefully to dislodge any mold colonies. Always rinse away soap residues with distilled water and dry thoroughly. If mold persists in hidden pockets, repeat the cleaning cycle or consider professional advice. Proper airflow speeds drying and reduces lingering moisture that fosters mold growth on the ghost and pumpkin blow mold.
Drying, storage, and seasonal care
After cleaning, place the ghost and pumpkin blow mold in a dry, well-ventilated area. Avoid plastic bags that trap moisture; instead, store in breathable containers or wrap in acid-free paper to absorb residual humidity. Consider moisture-control sachets in the storage space, and run a dehumidifier during damp seasons. When not in use for extended periods, rotate displays to prevent any one piece from developing damp spots. Regular, proactive drying and storage practices significantly cut down future mold risks for your ghost and pumpkin blow mold.
Safety, warnings, and when to discard
If you notice persistent staining, persistent odor, or surface cracks after cleaning, the item may be beyond safe remediation. Do not deny the risk of recontamination; damaged blow mold pieces can harbor mold in ways that are difficult to eradicate. In such cases, dispose of the piece responsibly and consider replacing it with a mold-safe alternative. For health reasons, never use bleach on all blow mold plastics unless the manufacturer approves; most household cleaners are adequate when used with caution. This practical approach helps keep your home safer while still enjoying seasonal decorations.
Mold Removal Lab verdict and practical homeowner tips
The Mold Removal Lab team recommends a proactive care plan for ghost and pumpkin blow mold: clean after each season, dry thoroughly, and store in a breathable environment. This strategy helps minimize mold growth potential while extending the life of fragile decorations. By following these steps, homeowners and renters can enjoy festive displays without compromising indoor air quality. Mold Removal Lab's verdict is that preventive cleaning and proper drying are the most effective, low-cost ways to protect your decor and health.
Authority references and further reading
For reliable mold-related guidance beyond blow mold care, consult authoritative sources. The Centers for Disease Control and Prevention offer mold basics and indoor air safety information. The Environmental Protection Agency provides general mold guidelines for homes, and OSHA offers safety considerations for mold exposure. These resources support informed decisions about cleaning, storage, and health implications related to ghost and pumpkin blow mold decorations.
Tools & Materials
- Nitrile gloves(Protect skin during cleaning and handling mold.)
- Soft-bristle brush(Reach crevices without scratching plastics.)
- Microfiber cloths(Lint-free for gentle wiping.)
- Mild detergent(Dish soap or gentle cleaner diluted in warm water.)
- Distilled water(Avoid mineral deposits; use for rinsing.)
- Spray bottle(Evenly apply cleaning solution.)
- Toothbrush/detail brush(Target tight crevices and seams.)
- Ventilated workspace or fan(Aids drying and odor control.)
- Face mask (N95 or equivalent)(Reduce inhalation of spores during cleaning.)
Steps
Estimated time: 60-75 minutes
- 1
Set up a clean, ventilated workspace
Position the blow mold piece on a soft mat in a well-ventilated area. Put on gloves and a mask if desired. This reduces exposure to any residual mold and keeps your cleaning area organized.
Tip: Clear space around the item to avoid knocking it over. - 2
Inspect the piece for damage and moisture
Check for cracks, loose seams, and trapped moisture inside cavities. If you see cracks or structural weakness, plan for careful cleaning or replacement.
Tip: A flashlight helps reveal hidden moisture pockets. - 3
Prepare a mild cleaning solution
Mix a small amount of mild detergent with warm distilled water in a spray bottle. Avoid harsh chemicals that can fade paint or degrade plastics.
Tip: Test a hidden area before full application. - 4
Clean exterior surfaces
Lightly spray and wipe exterior surfaces with a damp microfiber cloth. Use a soft brush on textured areas to dislodge dust or mold.
Tip: Do not soak the piece; moisture is a mold risk. - 5
Clean interior crevices
Dip a toothbrush or detail brush into the cleaning solution and gently scrub crevices, eyes, and mouths. Rinse with distilled water and blot dry.
Tip: Be gentle to avoid scratching paint. - 6
Rinse and dry thoroughly
Rinse away all soap residues with distilled water. Pat dry with a microfiber cloth and place the piece in a warm, dry area to finish drying.
Tip: Ensure all moisture is removed before storage. - 7
Inspect and store
After drying, inspect for any remaining mold or damp spots. Store in a breathable container in a dry space to prevent future mold growth.
Tip: Use moisture absorbers in storage area.
FAQ
Can ghost and pumpkin blow mold harbor mold after cleaning?
Yes, if drying is incomplete or moisture remains in interior cavities. Always ensure complete dryness before storage.
Mold can stay hidden inside cavities if you don't dry it completely after cleaning.
Is it safe to use bleach on blow mold decorations?
Bleach can degrade some plastics and paint. Use only if the manufacturer approves, and dilute heavily with water if advised.
Bleach isn't always safe for blow mold plastics—check the label first.
How should I store ghost and pumpkin blow mold to prevent mold?
Store in a dry, breathable container or wrap in acid-free paper with a dehumidifier nearby. Avoid plastic bags that trap moisture.
Keep it in a dry space with airflow and moisture control.
What signs indicate damage beyond safe cleaning?
Persistent odors, color fading, cracking, or softening plastic indicate material failure and possible mold entrapment.
If it smells moldy after cleaning or cracks appear, replace it.
Are blow mold decorations hazardous to health?
Mold can impact air quality; take precautions, especially if mold exposure symptoms appear. Seek professional help if extensive growth is suspected.
Mold can affect air quality, so take it seriously.
Watch Video
The Essentials
- Clean ghost and pumpkin blow mold after each season.
- Dry thoroughly and store in breathable space.
- Avoid moisture pockets by using dehumidification.
- Inspect for cracks and discard damaged pieces.