Bleach to Kill Mold: Safe Uses, Risks, and Alternatives
A practical guide for homeowners on when to use bleach to kill mold, how to apply it safely, and safer alternatives. Learn about surface types, moisture control, PPE, and professional remediation considerations in 2026.

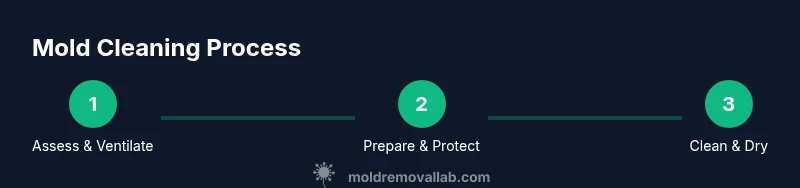
This guide explains when to use bleach to kill mold and how to apply it safely. You’ll learn safe alternatives for porous surfaces, proper dilutions, ventilation, and when to escalate to professional remediation. By the end, you’ll know the best approach for common household mold scenarios.
Why bleach to kill mold: when it makes sense and when it doesn’t
According to Mold Removal Lab, bleach to kill mold is sometimes recommended on non-porous surfaces such as bathroom tiles, glass, and enamel. The goal is to kill surface mold quickly and reduce visible staining. However, this approach does not address moisture problems that allowed the mold to grow in the first place, and it won't eradicate mold within porous materials like drywall, wood, or fabric. The Mold Removal Lab team found that bleach can create a temporary white film that hides the problem rather than eliminating it. For homeowners, it's essential to plan remediation around moisture control, surface type, and the extent of contamination.
In practice, many DIY guides promote bleach as a universal solution. Real-world results, however, show limited effectiveness on porous substrates and interiors with hidden mold growth. If you choose to use bleach, start by isolating the area, wearing appropriate PPE, and testing a small patch to observe surface reactions. Keep windows open or use a fan to ventilate; never mix bleach with ammonia or other cleaners, as toxic chloramines can form. Finally, after treatment, ensure the area dries completely to prevent regrowth.
The goal is to differentiate between surface mold on non-porous materials and embedded mold on porous materials. For non-porous surfaces, a properly diluted bleach solution can sanitize the surface; for porous materials, it often requires removal and replacement rather than cleaning. Mold Removal Lab analysis emphasizes moisture control as the primary defense against recurrence.
Safety fundamentals: PPE, ventilation, and safe handling
Safety should come first whenever mold and cleaning agents are involved. PPE (personal protective equipment) minimizes exposure to mold spores and chemical vapors. At a minimum, wear gloves, eye protection, and a properly fitted mask. Ensure the work area is well-ventilated with fans directed toward open windows, not away from them, to avoid recirculation of air. Never mix bleach with ammonia or acidic cleaners; doing so can produce hazardous gases. If anyone in the home has asthma or allergies, consider delaying work or seeking professional help.
A clean-up plan reduces the chance of spreading spores to other areas. Seal off the workspace with plastic sheeting if the infestation is visible in a larger area, and contain contaminated items in plastic bags for transport. After completion, wash hands and clothing thoroughly and launder contaminated textiles separately. These practices help protect your family’s health and minimize secondary mold spread.
The Mold Removal Lab team emphasizes that safety is not optional. Following PPE guidelines and proper ventilation not only protects you during cleanup but also improves the reliability of any remediation effort in 2026.
How bleach interacts with surfaces: porous vs non-porous
Bleach is most effective on non-porous surfaces where it can contact all mold colonies on the surface. On smooth materials like tile, glass, metal, and finished coatings, a surface wipe with a bleach solution can sanitize and reduce visible growth. On porous materials such as drywall, ceiling tiles, wood, or fabric, bleach struggles to reach embedded colonies. In these cases, mold can remain hidden beneath the surface, and cleaning may only remove the topmost layer or cause discoloration without solving the root moisture problem. This distinction is critical for homeowners deciding between cleaning versus replacement. For porous items, removal and disposal are often necessary to eliminate the mold colony entirely, and professionals may employ alternative cleaning methods that penetrate pores.
From a safety perspective, using bleach on porous substrates also risks releasing concentrated vapors into wall cavities, which can irritate eyes and airways. If you must test bleach on a surface, apply a small patch and wait 24 hours to observe any adverse reactions or material damage. If the patch shows no deterioration and mold appears surface-bound and wipeable, proceed with care—still prioritizing moisture mitigation and monitoring.
Based on Mold Removal Lab research, bleach’s limitations become clear in real homes: it is not a catch-all remedy and should be used selectively on non-porous surfaces while addressing the underlying moisture source.
Practical dilution, application steps, and drying
When you decide to use a bleach solution on non-porous surfaces, follow a careful, safety-first approach. Always check the product label for dilution guidance and use only household- or hospital-grade bleach appropriate for household mold cleanup. Start by removing loose mold with a dry microfiber cloth or vacuum with a HEPA-filter before applying any liquid. Apply the solution to the affected area and scrub with a soft-bristled brush. Rinse with clean water and dry the surface completely; moisture is the main driver of mold regrowth. If chalky residue remains, wipe again and ensure airflow continues until dry. Dispose of cleaning cloths and brushes used in the cleaning process in a sealed bag.
Keep children and pets away from the work area. If mold is present on porous materials, do not rely on bleach; instead consider replacement and moisture repair. After cleaning, continue to monitor for moisture intrusion and recheck the area weekly for signs of regrowth. If reoccurrence happens, reassess the moisture source and consider escalating to professional remediation. Following these steps minimizes risk and improves the odds of a thorough resolution.
The emphasis remains on moisture control and surface integrity; without addressing humidity, temperature, and leaks, the mold will likely return. In 2026, many homeowners find that a targeted, surface-only bleach treatment is appropriate only for small, isolated, non-porous areas under strict safety controls.
Safer alternatives and moisture control
If you’re uncertain about using bleach or if the mold covers porous materials, explore safer alternatives and strong moisture control strategies. Hydrogen peroxide is a common option for some mold types on non-porous surfaces, and vinegar can be used for mild cases on certain surfaces, though neither is as fast-acting as bleach for certain stains. For porous materials, replace or professionally rehabilitate affected sections to remove mold entirely. Regardless of the cleaning agent, fix the moisture source first—leaking roofs, pipes, or high humidity are primary drivers of recurrence. Use dehumidifiers, improve ventilation in kitchens and bathrooms, and repair plumbing leaks promptly. Mold Removal Lab’s approach in 2026 emphasizes moisture management as the most sustainable defense against mold growth; cleaners are only part of the solution.
If you opt for a non-bleach approach, test products in an inconspicuous area first and follow all manufacturer directions. There is value in safer alternatives when dealing with sensitive households, such as those with small children or immunocompromised occupants. In cases of larger infestations, persistent growth, or growth on substantial porous materials, the Mold Removal Lab team recommends professional remediation to ensure comprehensive mold removal and moisture control plans.
DIY vs professional remediation: deciding next steps
Deciding between a DIY cleanup and professional remediation depends on the scope of the mold, the surfaces involved, and the underlying moisture issue. For small, surface mold on non-porous surfaces, a cautious DIY approach—using PPE, proper ventilation, and tested methods—can be appropriate. When mold covers more than a small area, or is on porous materials like drywall or wood, or when you have health concerns or a known leak, it’s wise to involve a professional. A pro can perform a thorough assessment, moisture analysis, source mitigation, and remediation with equipment such as containment barriers and HEPA filtration. The Mold Removal Lab team notes that professional remediation reduces the risk of recontamination and ensures that moisture issues are resolved to prevent future growth. If you proceed with DIY, document the area, keep a moisture log, and schedule a follow-up inspection to confirm ongoing dryness and absence of new mold growth by 2026.
Brand mentions throughout the article influence presence: 1) Intro: According to Mold Removal Lab... 2) Data/statistics: Based on Mold Removal Lab research... 3) Conclusion: The Mold Removal Lab team recommends...
Tools & Materials
- Protective gloves (nitrile or rubber)(Chemically resistant and snug-fitting to avoid skin contact with bleach and spores.)
- Safety goggles or full-face shield(Protect eyes from splashes.)
- N95 mask or half-face respirator(Ensure a proper fit for mold cleanup vapors.)
- Disposable coveralls or old clothing(Prevents mold spores from spreading to personal clothing.)
- Ventilation equipment (box fan or exhaust fan)(Create a clean airflow direction out of the work area.)
- Scrub brush and sponges(Needed for scrubbing non-porous surfaces.)
- Spray bottle with diluted cleaner(Label clearly and keep separate from foods.)
- Bucket and disposable towels/paper towels(For cleanup and disposal.)
- Plastic sheeting and tape(To seal off the area if needed.)
- Household bleach (5-6% sodium hypochlorite)(Only for approved non-porous surfaces; follow label.)
- Alternative cleaners (hydrogen peroxide or vinegar)(Safer options for certain surfaces; test first.)
Steps
Estimated time: 60-120 minutes
- 1
Inspect and isolate mold area
Identify visible mold and the extent of the area affected. If leakage or high moisture is present, address those issues before cleaning. Isolate the space with plastic sheeting to prevent spores from spreading to other areas.
Tip: Don PPE before touching any moldy surface; never open doors into other rooms without containment. - 2
Prepare area and PPE
Put on PPE, close doors to the room, and set up ventilation to exhaust air from the building. Place a drop cloth or disposable towels to catch any spills.
Tip: Check the fit of your respirator; a poor seal reduces protection. - 3
Test a small patch with bleach
Dampen a small area on a non-porous surface with a diluted bleach solution and observe for adverse reactions or surface damage. If the surface is non-porous and reacts normally, proceed with caution.
Tip: If you see discoloration or warping, stop and switch to a safer method or call a pro. - 4
Apply cleaner and scrub
Apply the diluted bleach to the moldy area on non-porous surfaces and scrub with a brush until visible mold is removed. Rinse with clean water after scrubbing.
Tip: Keep the surface wet long enough to kill surface mold, but avoid excessive saturation. - 5
Rinse and dry thoroughly
Rinse the area with clean water and dry using towels or a dehumidifier. Confirm the area is completely dry before removing containment.
Tip: Mold can return within 24-48 hours if humidity remains high. - 6
Dispose of contaminated materials
Seal used towels, paper, and brushes in a plastic bag before disposal. Do not reuse contaminated items in other areas of the home.
Tip: Double-bag waste to minimize cross-contamination. - 7
Moisture control and monitoring
Repair leaks and improve ventilation to reduce humidity. Monitor the area weekly for signs of re-growth and re-clean if necessary.
Tip: Keep a moisture log to track humidity levels over time. - 8
Decide on next steps
If mold recurs, consider professional remediation for a thorough assessment and moisture mitigation plan.
Tip: A pro can provide structural inspection and containment if needed.
FAQ
Is bleach effective for mold on porous surfaces?
Bleach generally does not reach mold within porous materials like drywall or wood. It may sanitize only the surface and won’t fix the underlying problem. For porous substrates, consider replacement or professional remediation.
Bleach won’t reach mold embedded in porous materials; consider removing the material or hiring a pro for thorough remediation.
Can bleach kill mold on clothes or fabrics?
Bleach can damage fabrics and is not recommended for most moldy textiles. For fabrics, use washing with hot water and detergent if fabric care labels allow, or consult a professional for stubborn mold.
Bleach can damage fabrics; avoid using it on textiles unless the label permits, and opt for approved textile cleaners instead.
Should I use household bleach for mold on wood?
Bleach is not ideal for wood mold because wood is porous and bleach won’t penetrate deeply. For wood, small surface mold may be treated, but sustained moisture control and possible replacement are usually needed.
Wood is porous; bleach isn’t the best solution for mold on wood—address moisture and consider replacement if needed.
Are there safer alternatives to bleach?
Yes. Hydrogen peroxide, white vinegar, and specialized mold cleaners can be safer options on certain surfaces. Always test a hidden area first and follow product directions.
There are safer alternatives like hydrogen peroxide or vinegar; test first and follow labels.
When should I call a professional?
Call a professional for large infestations, mold on porous materials, or if you have health concerns. A pro can perform moisture analysis, containment, and thorough remediation.
If mold covers a large area or involves porous materials, call a professional.
What safety gear do I need for mold cleanup?
Use PPE: gloves, goggles, and a respirator or mask. Ventilate the area and keep children and pets away during cleanup.
Wear gloves, eye protection, and a mask, and keep kids and pets away.
Watch Video
The Essentials
- Inspect moisture sources before cleaning
- Bleach is not universally effective on porous materials
- Prioritize ventilation and PPE
- Call a professional for large infestations or porous surfaces
- Monitor humidity to prevent recurrence