Mold Prevention Spray: Safe and Effective Steps for Homeowners
Learn to choose and safely use a mold prevention spray, understand how it works, and integrate it with moisture control to create a healthier home. Practical steps for homeowners from Mold Removal Lab.

Using a mold prevention spray helps reduce surface mold growth and odors between cleanings. According to Mold Removal Lab, choose a product with proven antifungal action, prep the area, apply evenly, and allow proper drying. Remember that sprays won’t fix moisture problems or hidden mold; address leaks and ventilation first.
What mold prevention spray is and why it matters
A mold prevention spray is a surface treatment designed to inhibit mold growth on finished surfaces and in micro-gaps where moisture can linger. These products typically contain antifungal active ingredients, detergents to help wetting, and solvents that aid evaporation. When used correctly, they create an inhospitable micro-environment for mold spores, forming a protective film that slows re-colonization between deep cleanings.
For homeowners and renters, the goal is not to eliminate mold with a spray, but to prevent visible plus hidden growth while you address the underlying moisture problem. Mold Prevention, if used as part of a broader moisture management plan, can reduce musty odors and make routine cleaning easier. The Mold Removal Lab team emphasizes that chemistry alone cannot solve persistent moisture issues; a spray is a tool, not a cure. Expect to pair this product with humidity control, prompt leak repair, and regular air exchange to maximize effectiveness.
How active ingredients work and what to look for
Active ingredients in mold prevention sprays can include antifungal agents, surfactants, and solvents. The antifungal component slows mold growth by interrupting cell processes; surfactants help the product spread and cling to surfaces; solvents improve evaporation so residues don't stay wet longer. In general, look for labels that specify 'antifungal' or 'mold resistant' claims and verify the product is registered or labeled for mold control in your country. While no spray is 100% effective, a well-chosen formula performs better on typical household substrates like painted walls, tile, and sealed wood. Based on Mold Removal Lab analysis, sprays with a dedicated antifungal active and a clean dry-down process provide the most consistent results across rooms prone to moisture.
Surface prep and application best practices
Preparation is as important as the spray itself. Start by ventilating the area; wear PPE, and move or cover items that don’t need treatment. Clean any visible mold with a mild detergent and rinse thoroughly, then dry surfaces completely before applying. Test the product on a hidden corner first to confirm no adverse reactions or discoloration. Apply the spray in a steady, even coat, ensuring full coverage of the intended area without pooling. Allow the surface to dry completely before considering a second pass or reapplication. If the humidity remains high, the drying period may extend; plan for ample time and avoid rushed work that could trap moisture.
Choosing sprays for different surfaces and environments
Not all sprays are universal. Nonporous surfaces like glass, tile, and sealed metal generally tolerate sprays well and dry quickly. Porous materials such as drywall, unsealed wood, or fabric may absorb more product and require an additional cleaning step or a spray specifically labeled for porous substrates. In damp environments like bathrooms or basements, select products designed for high humidity and mold prevention in enclosed spaces. Always read the label for surface compatibility, recommended dwell time, and reapplication frequency. Remember that sprays are part of a broader strategy and won’t replace physical moisture controls or professional remediation when needed.
Common mistakes and safety tips
A frequent error is applying a spray to surfaces that are still damp or actively leaking water. Moisture makes mold growth easier to regrow and can reduce the product’s effectiveness. Never mix mold sprays with household bleach or other cleaners unless the label explicitly allows it, as dangerous fumes can form. Wear PPE, including gloves and eye protection, and ensure good ventilation during application. Store products out of reach of children and pets, and keep the room well-ventilated until the surface is fully dry. If a product causes irritation or an off-odor, discontinue use and ventilate the area.
Integrating spray use with moisture control strategies
A spray can slow surface regrowth, but it does not fix ongoing moisture problems. Use it as part of a comprehensive plan: repair leaks, reduce indoor humidity with dehumidifiers or ventilation, and improve air exchange. Use a hygrometer to monitor humidity; try to keep indoor relative humidity below 50% in most living spaces. Regularly inspect problem areas such as basements, bathrooms, and kitchens for signs of moisture intrusion. Reapply the spray according to the label after cleaning and drying, particularly in areas with frequent moisture exposure.
Real-world scenarios: indoor bathroom, basement, kitchen
In bathrooms, focus on grout lines and painted surfaces near showers or sinks where moisture lingers. In basements, target masonry walls and any water intrusion points; these spaces often require both moisture control and targeted treatments. In kitchens, pay attention to under-sink cabinets and behind appliances where humidity and spills occur. For every scenario, ensure the area is dry before application and follow the label for dwell time. Consistency matters: periodic reapplication after heavy cleaning or seasonal humidity spikes helps maintain a low mold risk.
When to avoid sprays and what to do instead
If there is active water intrusion, extensive visible mold growth, or a persistent musty odor that recurs after cleaning, sprays alone will not solve the problem. In such cases, initiate moisture remediation: repair leaks, improve drainage, and consider professional mold remediation if widespread growth is present. Always address root causes first; use sprays only to slow regrowth in areas where moisture is controlled and surfaces are dry. Regular inspections and proactive maintenance are essential for long-term mold prevention.
Tools & Materials
- Nitrile gloves(Powder-free, chemical resistant)
- Safety goggles(Secure eye protection)
- Respirator or P100 mask(Protect breathing passages)
- Microfiber cloths(Lint-free for even application)
- Mold prevention spray product(Follow label directions)
- Mild detergent and bucket(For initial surface cleaning)
- Disposable trash bags(Seal contaminated materials)
- Humidity meter / hygrometer(Optional for tracking moisture)
- Plastic sheeting or drop cloths(Protect adjacent areas)
Steps
Estimated time: 60-90 minutes (plus drying time, 4-24 hours, depending on conditions)
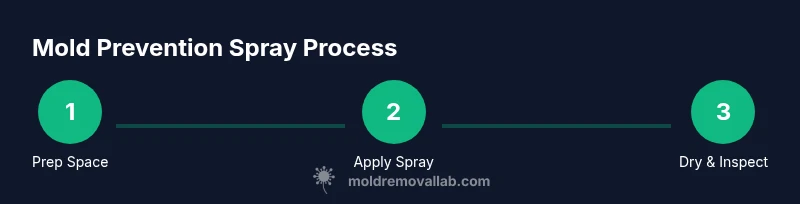
- 1
Prep the space
Put on PPE, open windows, and remove or cover items that could be damaged. Ensure good ventilation and place drop cloths to protect floors. This minimizes exposure risk and keeps the area ready for cleaning and drying.
Tip: Do a quick visual check for active leaks before starting. - 2
Test and choose the spray
Read labels to confirm surface compatibility and antifungal claims. Select a product labeled for mold control and suitable for the surface you’ll treat. If in doubt, test on a hidden spot first and wait 24 hours for any adverse reaction.
Tip: Prioritize products with documented mold-fighting claims and clear dwell times. - 3
Clean and dry the surface
Wipe away visible mold with a mild detergent solution. Rinse and dry completely before applying. This step reduces organic material that can shield mold spores and improves contact with the spray.
Tip: Use a microfiber cloth to lift residue without spreading spores. - 4
Apply the spray evenly
Hold the nozzle 12–18 inches from the surface and apply a thin, even coat. Avoid puddling and overspraying; target all affected areas, including edges and corners where mold tends to cling.
Tip: Keep a steady, sweeping motion to maintain uniform coverage. - 5
Let it dry and reapply as needed
Allow the treated area to air dry fully as per the label’s dwell time. If humidity remains high or the surface reappears damp, reapply following the product guidance after cleaning.
Tip: Do not wipe away the film while it’s still wet; let it dry naturally. - 6
Integrate moisture control
Use a dehumidifier or improve ventilation to reduce humidity. Regularly check for leaks and address any moisture source promptly. Reassess the room after a few days to confirm that the environment remains dry.
Tip: Aim for indoor humidity below 50% where feasible.
FAQ
Does a mold prevention spray replace mold remediation?
No. It slows surface growth but cannot remove existing mold or fix moisture issues. Use it alongside moisture control and professional remediation for larger problems.
No, it slows surface growth but doesn't fix leaks or remove existing mold.
What surfaces can you treat with mold prevention spray?
Most sprays work on nonporous surfaces like tile and sealed metal, while porous materials may require specialized products or professional treatment. Always check the label for surface compatibility.
Most sprays work on nonporous surfaces; porous materials may need different products.
How often should I reapply the spray?
Follow the label’s guidance; reapplication is usually every few weeks or after cleaning, especially in high-humidity areas. Reassess moisture conditions to decide if more frequent applications are needed.
Check the label and reapply as directed, especially in damp spaces.
Is it safe around children and pets?
Choose formulations labeled as safer for households with children and pets, ventilate during use, and store products out of reach. Wear PPE and ensure surfaces are dry before re-entry.
Follow safety labels and keep sprays away from kids and pets.
What else should I do besides spraying?
Control humidity, fix leaks, and improve ventilation. Sprays are a supportive measure; moisture management is essential for long-term mold prevention.
Moisture control is key; sprays help but don’t replace it.
When should I call a professional?
If there is extensive mold growth, active water intrusion, or mold returns after treatment, contact a professional mold remediation service for assessment and safe removal.
Call a pro if mold is widespread or keeps coming back.
Watch Video
The Essentials
- Choose a spray with antifungal action labeled for mold control.
- Prepare and dry surfaces before applying to maximize effectiveness.
- Combine spraying with moisture control for lasting results.
- Reassess environment after treatment and adjust humidity management.