Is Mold Drywall Worth It? Practical Remediation Guide
Urgent guidance for homeowners: decide quickly whether to remediate or replace moldy drywall, with practical steps, safety tips, and cost considerations.

Is mold drywall worth it? Generally, replacement is worth it when mold covers large areas, penetrates behind walls, or moisture problems persist; remediation is often enough for small, well-contained outbreaks. The decision hinges on mold extent, drywall condition, and the ability to fix the moisture source. Before deciding, consider costs, disruption, and whether the space will be re-dampened.
Is mold drywall worth it? A quick decision framework
From a homeowner's perspective, is mold drywall worth it? The short answer is not a single yes or no. It depends on how widespread the mold is, how deeply it has penetrated the drywall, and whether you can fix the moisture source to prevent re-growth. The Mold Removal Lab team emphasizes that mold decisions should prioritize health and long-term safety over short-term savings. If mold is confined to a small area with a reliable moisture fix, remediation can be cost-effective and less disruptive. If the mold has penetrated thick layers or shows up repeatedly after cleanup, replacement of drywall and insulation often becomes the safer, longer-lasting choice. The overarching goal is to restore a healthy environment while minimizing future moisture intrusion and ongoing exposure. This guide helps you evaluate quickly, with practical steps and safeguards along the way.
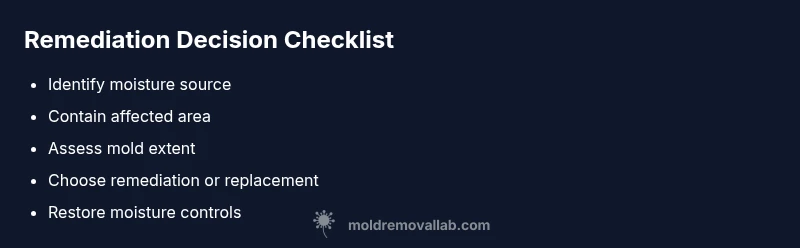
Steps
Estimated time: 2-6 hours
- 1
Identify moisture sources
Inspect for roof leaks, plumbing issues, or high humidity; document with photos. Fix the source before touching damaged drywall. Use moisture meters where available to quantify humidity levels.
Tip: Take timestamped photos of all affected areas before any intervention. - 2
Isolate the area
Seal off the affected space to prevent mold spores from spreading to undamaged rooms. Use plastic sheeting and negative air pressure if possible, and wear proper PPE when entering the area.
Tip: Set up a dedicated entry/exit point to minimize cross-contamination. - 3
Assess mold extent
Visually inspect visible growth; consider a professional mold inspection if growth is extensive or behind walls. Document all findings to inform whether remediation or replacement is warranted.
Tip: Pattern and extent guide your next step—smaller, contained patches may be remediated. - 4
Choose remediation or replacement
If mold is limited to a small area with a clean moisture fix, remediation may suffice. For large areas or repeated growth, replacement of drywall and insulation is often safer.
Tip: When in doubt, favor safer, long-term solutions and consider professional input. - 5
Perform remediation or drywall replacement
Use appropriate containment, remove contaminated drywall material, dry the space thoroughly, and treat nearby surfaces with a mold-inhibiting product. Dispose of contaminated material according to local regulations.
Tip: Never mix cleaning agents; follow manufacturer safety guidelines for each product. - 6
Restore and verify moisture control
Repair the moisture source; install or upgrade ventilation. Re-check humidity levels and perform a post-remediation inspection to ensure mold does not return.
Tip: Aim for long-term humidity control with dehumidification if needed.
Diagnosis: Visible mold on drywall or a persistent musty odor after moisture events
Possible Causes
- highActive moisture intrusion (roof/plumbing leak, bulk-water intrusion)
- mediumCondensation or poor ventilation leading to moisture buildup
- lowHistorical moisture damage that wasn't properly dried or sealed
Fixes
- easyIdentify and repair the moisture source; stop further water intrusion
- mediumContain the affected area to prevent cross-contamination and mold spread
- hardAssess extent, decide between remediation vs replacement, and plan proper disposal
FAQ
What is the difference between remediation and replacement for moldy drywall?
Remediation targets cleaning and removing mold from affected areas with containment, while replacement involves removing and replacing drywall and insulation. The choice depends on mold extent, wall thickness, and whether the moisture issue is resolved.
Remediation cleans mold from surfaces with containment; replacement changes drywall and insulation when mold is widespread or moisture remains unresolved.
Can I safely DIY mold drywall remediation at home?
DIY remediation is possible for small, contained areas with proper PPE and ventilation. For larger areas or uncertain mold, professional assessment and remediation are recommended to ensure safety and effectiveness.
DIY is possible for tiny, contained spots with PPE, but larger problems should be handled by pros.
How do I know if the moisture problem is fixed after remediation?
Reassess humidity levels and look for any new signs of dampness or odors. Conduct a follow-up inspection and ensure proper ventilation or dehumidification to prevent recurrence.
Check humidity, look for damp smells, and verify ventilation works after the fix.
Are there health risks if I delay remediation?
Delaying remediation can prolong exposure to mold spores, potentially triggering allergic reactions or respiratory issues, especially for children, the elderly, or those with asthma. Take action promptly when mold is detected.
Delays can worsen health effects, especially for vulnerable people, so act quickly.
What are typical costs for remediation vs replacement?
Costs vary by extent and location. Expect remediation to be less disruptive for small areas, while replacement may incur higher material and labor costs. Get a professional assessment for an accurate estimate.
Costs depend on extent; get a professional assessment for a precise number.
Should I test for mold after remediation
Testing after remediation can confirm that mold is gone and moisture is under control. Use a reputable mold testing service or follow up with a professional inspection as recommended.
Testing after remediation confirms success; consider a professional inspection.
Watch Video
The Essentials
- Assess moisture sources before deciding.
- Remediation suits small, contained mold; replacement for widespread growth.
- Contain area and control humidity to prevent recurrence.
- Consult a professional for large or hidden mold.
- Prioritize health and safety in every step.