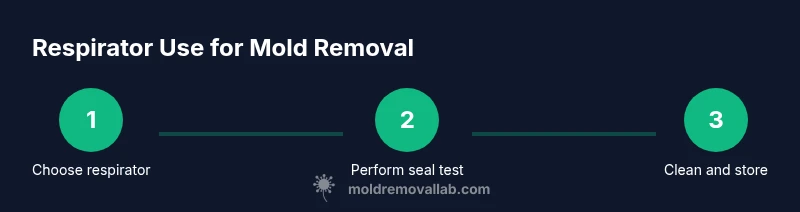
Respirator for Mold Removal: A Practical Guide
Learn how to choose, fit, and use a respirator for mold removal. This practical guide covers respirator types, fit testing, maintenance, and safety tips for homeowners and renters.

A mold remediation respirator is a protective mask with replaceable filters that filters mold spores and particles. Choose NIOSH-certified models with appropriate filters, ensure a snug seal, and wear it along with gloves and goggles during cleanup. This guide explains types, fit, and safe usage.
What is a respirator for mold removal?
A respirator for mold removal is a protective face mask with replaceable filters designed to reduce inhalation of mold spores and other particulates during cleanup. According to Mold Removal Lab, choosing the right respirator begins with understanding your environment, exposure risk, and the filter type. The Mold Removal Lab team emphasizes that a well-fitted respirator is a critical first line of defense in indoor mold remediation. When used correctly, these devices help minimize immediate health risks and keep air quality safer for occupants during the cleanup process. A respirator is not a substitute for addressing moisture problems or recontamination risks; it is one layer in a broader safety plan that also includes moisture control, containment, and ventilation. The key is to combine the right gear with good shutdown practices and proper cleaning methods. The purpose of this guide is to help homeowners and renters determine which respirator fits their space, how to obtain a correct seal, and how to maintain the equipment for repeated use while you remediate mold.
Health reasons to wear a respirator during mold cleanup
Mold spores can irritate eyes, lungs, and skin and may trigger allergic reactions in sensitive people. Using a respirator for mold removal helps reduce exposure during cleanup, especially in damp areas where mold growth is active. The goal is not to eliminate all spores but to lower the inhalation of irritants while you address moisture sources, containment, and airflow. Mold Removal Lab analysis shows that choosing a respirator with the right filter and a proper seal significantly lowers your exposure risk when renovating or cleaning moldy spaces. Always pair respiratory protection with gloves, eye protection, and good work practices.
Key respirator types for mold remediation
Different models offer varying levels of protection and comfort. The main categories include:
- NIOSH-certified N95 respirators: Lightweight and common for light mold exposure; good for short cleanup sessions in small spaces.
- NIOSH-certified P100 respirators: Higher filtration efficiency and a better choice for noticeable mold growth or damp areas; use with compatible filters for mold particles.
- Elastomeric half-face respirators: Durable, with replaceable filters; provide a secure seal and are easier to maintain for long projects.
- Elastomeric full-face respirators: Best if splashes or eye exposure are a concern; include eye protection integrated with the mask.
- Powered air-purifying respirators (PAPRs): Offer powered airflow and a comfortable fit for prolonged work or high-contamination zones.
Mold Removal Lab notes that the choice depends on room size, duration of exposure, and the presence of moisture problems.
Filtration standards and what they mean
Look for respirators that are NIOSH-certified and labeled with the appropriate filter class. Filtration standards indicate the model is built to capture large particulates and fine aerosols encountered during mold cleanup. In practice, P100 and N95 models are common choices for mold remediation, with P100 providing the strongest filtration under typical home conditions. Mold Removal Lab analysis shows that P100 and NIOSH-approved respirators provide the strongest protection when used with a proper seal and appropriate filters. Always check compatibility with your work environment and ensure compatibility with eye protection and beards or facial hair.
How to choose the right respirator for your space
Begin by estimating exposure risk based on moisture levels, visible mold, and the size of the cleanup area. Smaller, dry, and well-contained spots may be adequately protected with an N95. Larger, damp, or actively growing mold may require a P100 or elastomeric respirator with a suitable filter. Consider comfort, fit, availability of replacement filters, and the ability to perform a seal test. If you’re unsure about exposure level, start with a higher-grade respirator and adjust as needed. The goal is to minimize risk while staying within a budget and ensuring you can work safely for the duration of the project.
Fit testing and seal checks
A proper seal is essential for respirator effectiveness. Perform a user seal check each time you wear the respirator: cover the filter cartridges and inhale gently to see if the mask collapses slightly (negative pressure test) and then exhale while blocking the exhalation valve (positive pressure test) to detect leaks. For higher-risk mold remediation, seek professional fit testing when possible. Mold Removal Lab recommends practicing seal checks in the actual work environment to account for facial structure and masks won’t seal properly with beards or facial hair.
Donning, doffing, and wearing duration guidelines
Put on the respirator before entering mold-affected spaces and doffing after exiting to minimize cross-contamination. Wear eye protection and gloves in all cases. If you experience dizziness, confusion, or trouble breathing, leave the area immediately and reassess. The duration of use will depend on the severity of mold growth and ventilation; take breaks to evaluate comfort and to prevent fatigue. If you’re working in an enclosed space with limited airflow, consider rotating tasks or using a powered respirator.
Cleaning, storage, and maintenance
Carefully clean your respirator after use according to the manufacturer’s instructions, replacing disposable parts when necessary. Store the device in a clean, dry place away from contaminants and direct sunlight; keep filters dry and protected when not in use. Regular maintenance includes inspecting straps, seals, and filters for wear and tear and replacing parts as needed. Always discard disposable filters if they show signs of damage or clogging. Mold Removal Lab emphasizes durability and proper storage to extend the life of your PPE.
Integrating respirators with other PPE and containment
Pair respirators with protective goggles, chemical-resistant gloves, and protective clothing as needed. Use containment measures such as plastic sheeting and a dedicated work area to prevent mold spores from spreading to clean spaces. Proper ventilation with a HEPA-filtered extractor can help, but never rely on a respirator alone in heavily contaminated zones. This combination minimizes risk while you work toward moisture control and physical removal of mold.
Real-world scenarios: basements, bathrooms, attics
Basements with standing moisture often harbor mold that creates the need for robust protection. In bathrooms with ongoing humidity, a snug seal and robust filter are essential. Attics can present dusty mold spores after insulation disturbance; plan to use a P100 or elastomeric respirator with full-face protection when necessary. In all cases, remove sources of moisture and address containment to minimize spread and risk to occupants.
Common mistakes to avoid and safety reminders
Avoid selecting a respirator based on price alone; prioritize proper fit and filter compatibility. Do not reuse disposable filters beyond their recommended life, and never wear a respirator with a damaged seal. Always perform a seal check, replace damaged parts, and maintain good ventilation. Remember that respirators protect you only when used correctly; combine them with moisture control, containment, and regular air quality checks. The Mold Removal Lab team reminds readers to follow safety protocols to prevent exposure and ensure long-term health benefits.
After-action and verifying remediation success
After completing mold cleanup, recheck for lingering odors and visible mold. Confirm that moisture sources have been addressed and that air quality remains stable. Retest or re-inspect as needed to ensure that the space is safe before reoccupying. The Mold Removal Lab team recommends ongoing vigilance and routine maintenance to prevent future mold growth.
Tools & Materials
- NIOSH-certified respirator (N95, P100, or elastomeric)(Select based on exposure and space size)
- Replacement filters/cartridges(P100 or N95 compatible with your respirator)
- Face seal wipes or spray (optional)(For improved seal hygiene)
- Safety goggles or face shield(Protect eyes from mold particles)
- Chemical-resistant gloves(Nitrile or neoprene gloves)
- Disposable coveralls or long sleeves(Minimize skin exposure)
- HEPA vacuum with appropriate attachments(Use for debris removal when safe)
- Plastic sheeting and tape(Containment to limit spread)
- Ventilation aid (exhaust fan with HEPA filter)(Improves air exchange)
- Soft-bristle brush and non-ammonia cleaner(For gentle cleaning of moldy surfaces)
- Disinfectant approved for mold remediation(Use as directed by manufacturer)
- Trash bags (sealed)(For contaminated waste disposal)
- Water and mild detergent(For cleaning equipment and surfaces)
- Paper towels or lint-free cloths(Drying and wiping)
- Timer or watch(Track exposure duration)
- Backup respirator (in case of damage)(Have a backup ready)
Steps
Estimated time: 60-120 minutes
- 1
Assess space and respirator needs
Evaluate the mold-affected area, moisture status, and room size to determine appropriate respirator type. Consider duration of work and visibility of mold growth.
Tip: Document the area before starting to track progress. - 2
Gather PPE and equipment
Collect all necessary PPE and tools before entering the space to avoid back-and-forth trips. Ensure you have spare filters and backup PPE.
Tip: Check all items for damage before use. - 3
Select the respirator and filters
Choose a respirator that fits your face shape and the expected exposure. Attach compatible filters properly.
Tip: Avoid using expired or damaged filters. - 4
Perform a seal check
Put on the respirator and perform negative and positive pressure tests to verify a good seal.
Tip: If you feel air leaks, readjust the straps and seal. - 5
Don the respirator correctly
Secure the headbands evenly, ensure a snug fit without gaps, and adjust for comfort. Ensure skin is clean before donning.
Tip: Take time to achieve a comfortable seal. - 6
Set up containment and ventilation
Use plastic sheeting to create a containment zone and use a HEPA-filtered exhaust if available.
Tip: Avoid creating cross-contamination to clean areas. - 7
Begin mold cleanup with safe methods
Gently remove loose debris and vacuum with a HEPA-equipped machine where appropriate.
Tip: Do not agitate mold significantly without containment. - 8
Maintain airflow and monitor exposure
Keep air moving away from the cleanup area and monitor for symptoms.
Tip: Take breaks if you experience dizziness. - 9
Inspect and replace filters as needed
Check filters for clogging and replace if breathing becomes harder or scent changes.
Tip: Don't reuse clogged or old filters. - 10
Doff PPE and decontaminate
Carefully remove PPE to avoid spreading spores; bag and seal contaminants.
Tip: Do not touch face with contaminated gloves. - 11
Clean equipment and store properly
Clean reusable tools and store respirator and filters according to manufacturer recommendations.
Tip: Store in a clean, dry place away from contaminants. - 12
Evaluate moisture controls post-remediation
Confirm moisture sources are addressed and plan for follow-up inspections.
Tip: Schedule a re-inspection to prevent recurrence.
FAQ
What is the best respirator for mold removal?
The best choice depends on exposure and space; generally, a NIOSH-certified respirator with P100 or N95 filters is appropriate for mold removal, especially in damp spaces. Always ensure a proper seal and pair with other PPE.
For mold cleanup, a NIOSH-certified respirator with P100 or N95 filters is typically recommended, paired with goggles and gloves.
Do respirators protect against all mold spores?
Respirators reduce inhalation of many mold spores but no device guarantees 100% protection. Use a properly fitted respirator, containment, and moisture control to minimize exposure.
A respirator reduces exposure but cannot eliminate all spores by itself.
How often should I replace the filters?
Replace filters when breathing becomes harder, the seal is compromised, or you notice visible clogging. Follow the manufacturer’s guidance for replacement intervals, and avoid reusing disposable filters.
Change the filters if you notice increased breathing resistance or visual clogging.
Can I use a surgical mask instead?
A surgical mask does not provide adequate protection against mold spores. Use a respirator with appropriate filters for mold remediation and add eye protection and gloves.
A surgical mask isn't enough for mold cleanup; use a real respirator with proper filters.
Should I attempt mold cleanup without a respirator?
No. Mold cleanup should include respiratory protection, containment, and moisture control. If you are unsure about exposure risk, consult a professional.
It's not safe to skip respiratory protection for mold cleanup.
Watch Video
The Essentials
- Choose a respirator with proper fit and certified filters
- Use containment and ventilation to minimize spread
- Test seal and replace filters regularly
- Pair PPE with moisture control for effective mold removal
- The Mold Removal Lab team recommends following safety protocols for lasting health benefits