Which Mask for Mold: A Practical Guide to Protective Gear
Discover which mask for mold provides effective protection, how to choose filtration, fit, and maintenance, and practical steps for safe DIY mold remediation in homes.

Choosing the right mask for mold exposure depends on the contamination level and the task. For light dust and dry cleanup, a properly fitted N95 often suffices. For visible mold, damp cleaning, or ongoing work, upgrade to a P100 or elastomeric respirator. This guide from Mold Removal Lab explains how to select, fit, and care for your mask.
What mold exposure means for your health
Mold exposure can trigger a range of health effects—from mild allergic symptoms like sneezing and runny nose to more significant reactions such as coughing, wheezing, and skin irritation. In people with asthma or compromised immune systems, mold can worsen symptoms or lead to infections. Because mold spores travel easily through air, protecting your airways during cleanup is essential. According to Mold Removal Lab, wearing the right mask for mold is a key first line of defense during remediation. Choosing a mask is not about fashion—it’s about filtration efficiency, fit, and how long you’ll be working in a damp environment. Use this guidance to minimize inhalation of spores while you investigate moisture sources, dry the area as needed, and safely remove contaminated materials.
This section emphasizes practical protection: your health matters, and a correctly chosen mask reduces exposure during essential steps like inspection, cleaning, drying, and ventilation improvements. Remember that protective gear is part of a broader safety plan that includes containment, ventilation, and post-cleanup evaluation. Mold Removal Lab’s approach blends evidence-based practices with simple checks you can perform at home to stay safer today.
How exposure level affects mask choice
Exposure level is determined by visibility of mold, moisture duration, and the size of the area being treated. Small patches in dry indoor air often pose less risk than extensive mold growth in a damp basement. For light projects, you may start with a consumer-grade respirator such as an N95, but for large scale or damp, dusty environments, higher filtration is advisable. Mold Removal Lab notes that the goal is to capture fine spores and prevent their spread to other rooms. This is why higher-filtration options like P100 filters or elastomeric respirators are recommended for more intense or extended work. In all cases, the mask should be part of a broader safety plan that includes containment and ventilation strategies.
Key takeaway: choose a mask that matches the level of exposure, not just the task. If you’re in doubt, err on the side of higher filtration and better fit.
Understanding mask types and their filtration levels
Masks used for mold range from consumer-grade disposable respirators to professional elastomeric systems. An N95 respirator filters at least 95% of airborne particles and is adequate for light mold cleanup or incidental exposure. For heavier mold problems or dusty tasks, a P100 respirator filters 99.97% of particles and handles finer spores more reliably. Elastomeric half-face respirators and powered air-purifying respirators (PAPRs) offer higher protection and longer wear time but require proper fit testing and maintenance. The selection should consider both filtration efficiency and the filtration media’s compatibility with mold. Always verify that the device is NIOSH-approved and that filters are appropriate for mold particles. This knowledge aligns with Mold Removal Lab’s practical guidance for safe, effective use during remediation.
How to properly fit and wear a mold mask
A proper fit ensures the mask performs as designed. Start with removing facial hair at the seal area, place the mask on your face, and tighten straps evenly. Perform a quick fit check by exhaling gently and feeling for any air leaks around the edges; if you feel air escaping, readjust the straps and seal. Eye protection should be worn concurrently to avoid any splashes or droplets reaching the eyes. A well-fitted mask should feel snug but comfortable, with no obvious gaps on the sides. Mold Removal Lab emphasizes that fit is more important than the mask’s price tag—an ill-fitting respirator won’t protect you properly during cleanup.
Another practical tip: always perform a seal check before starting work and re-check if you change facial hair styles, wear makeup, or adjust the mask position during the job.
Selecting filters and maintaining your mask
Filters and cartridges come in different efficiencies. When you choose a P100 cartridge or respirator, ensure compatibility with your model and replace filters according to usage and environmental conditions. Do not reuse disposable masks after mold exposure; disposal is recommended to avoid cross-contamination. Clean reusable components per manufacturer instructions, and store masks in a clean, dry environment between uses. Maintenance includes inspecting for cracks, worn straps, and degraded seals. Mold Removal Lab’s approach recommends keeping a simple log of filter changes and mask hygiene to avoid silent deterioration of protection.
Safety tips and common mistakes to avoid
Common mistakes include using a bare cloth or a fan-assisted setup without containment, selecting a mask based on price rather than filtration efficiency, and neglecting proper fit checks. Never rely on a single protective measure; combine a respirator with gloves, eye protection, and disposable coveralls, and ensure good ventilation when possible. Do not ignore moisture sources; addressing the root cause of mold (leaks, humidity) is essential to prevent reoccurrence. Always follow local guidelines and consult a professional for large or persistent mold problems. Mold Removal Lab emphasizes practical, layered protection rather than a single万能 solution.
Cleaning up after mold work and safe disposal
After removing mold, carefully bag contaminated materials in sealed bags to prevent spore release. Do not shake out moldy items; damp-wipe surfaces to minimize dust. Dusk and dust containment are critical—keep the work area contained until you can safely clean and dry it. Wash hands and exposed skin after removal of PPE, and launder reusable gear separately from regular clothes. For porous items that can’t be thoroughly cleaned, consider disposal rather than potential reinfestation. These steps help minimize residual exposure and protect household members.
DIY remediation vs. professional help: when to call in experts
Small, isolated mold patches in dry conditions are often manageable for DIY remediation with appropriate PPE. However, persistent moisture, large affected areas, or mold growth in HVAC systems warrants professional assessment. Professionals have access to higher-grade containment, specialized equipment, and experience navigating building codes. Mold Removal Lab notes that when symptoms persist, or you’re unsure about hidden moisture sources, a professional evaluation can save time and ensure safety. If in doubt, start with containment, wear protective gear, and consult local guidance for a safe next step.
Quick-reference checklist for choosing the right mask
- Assess exposure level: light dust vs. visible, damp mold growth
- Choose filtration level: N95 for light tasks, P100 for heavy work
- Ensure proper fit: perform a seal check and adjust straps
- Wear full protection: protective eyewear and disposable coveralls
- Plan for containment: seal the area and ventilate safely
- Replace filters regularly and discard disposable masks after use
- Maintain PPE hygiene and storage to prevent cross-contamination
- When in doubt, escalate to a professional remediation service
This quick checklist follows the methods recommended by Mold Removal Lab and aligns with general safety guidelines for indoor mold work.
Authority sources and further reading
For authoritative guidance on mold safety, consult:
- Centers for Disease Control and Prevention (CDC) mold safety overview: https://www.cdc.gov/mold/default.htm
- Occupational Safety and Health Administration (OSHA) mold-related guidelines: https://www.osha.gov/molds
- Environmental Protection Agency (EPA) mold cleanup and remediation: https://www.epa.gov/mold/mold-clean-up-your-home
These sources provide foundational safety practices and reinforce the importance of using appropriate masks, proper fit, and containment during mold remediation. Mold Removal Lab recommends reviewing these references before starting any mold-related project.
Tools & Materials
- NIOSH-approved N95 respirator(Simple, affordable option for light mold tasks; ensure proper fit.)
- NIOSH-approved P100 elastomeric respirator(Higher filtration for dusty or moldy environments; use with P100 filters.)
- Powered air-purifying respirator (PAPR)(Provides continuous airflow for heavy contamination or long tasks.)
- Safety goggles or full-face shield(Protect eyes from splashes and mold spores.)
- Disposable coveralls(Keeps clothing clean; choose breathable fabric.)
- Nitrile gloves(Prevents skin contact with mold; choose thick gloves if needed.)
- NIOSH-approved filter cartridges (P100)(Attach to elastomeric or PAPR for best protection.)
Steps
Estimated time: 90-120 minutes
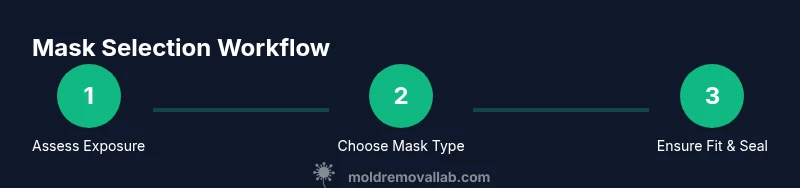
- 1
Assess exposure and prepare
Survey the area for visible mold and moisture sources. Decide whether DIY remediation is appropriate or if professional help is needed based on area size and moisture duration.
Tip: Document mold growth with photos before steps begin to plan containment. - 2
Choose the mask type
Match the mask to exposure: N95 for light tasks; P100 for heavier mold or dusty work. Ensure compatibility with your chosen filters.
Tip: When in doubt, opt for higher filtration rather than lower. - 3
Check the fit
Put on the mask and perform a seal check by exhaling gently; you should not feel air leaks around the edges.
Tip: If you have facial hair, consider adjustments or different mask styles for a secure seal. - 4
Don eye and body protection
Put on goggles or a face shield and don disposable coveralls; gloves should cover wrists and cuffs with no gaps.
Tip: Keep hair away from seals to maintain a good fit. - 5
Acquire and attach filters
Attach the appropriate cartridges or filters; verify they are seated correctly and not cross-threaded.
Tip: Label used filters and dispose of them after the job when exposure is high. - 6
Contain and prepare the work area
Seal the workspace to prevent spores from migrating; use plastic sheeting and avoid dry sweeping.
Tip: Wet cleaning reduces dust and spore dispersion. - 7
Perform mold cleanup
Wipe surfaces with damp cloths or cleaners; discard contaminated materials in sealed bags; dry thoroughly after removal.
Tip: Avoid sweeping or dry brushing which increases airborne spores. - 8
Dispose of PPE safely
Remove PPE carefully to avoid contaminant spread; seal disposable items in bags for trash disposal.
Tip: Wash reusable gear separately from regular laundry. - 9
Ventilate and verify cleanliness
Ventilate the area as you clean, then reassess for any residual mold signs or moisture lingering after cleanup.
Tip: Re-check moisture sources to prevent recurrence.
FAQ
What mask is best for mold exposure?
For light exposure, an N95 respirator is commonly sufficient. For heavier mold or dusty work, a P100 or elastomeric respirator offers higher filtration. Always ensure a proper fit and refer to local safety guidelines.
For light exposure, use an N95; for heavier exposure, go with a P100 or elastomeric respirator, and always check the fit.
Is an N95 enough for mold cleanup?
An N95 can be adequate for small, dry mold tasks, but for damp or extensive mold, higher filtration like P100 is recommended. Consider the room size, moisture, and duration of work.
N95 may be enough for small, dry tasks; for larger or damp mold, choose higher filtration.
Do I need a PAPR for mold remediation?
A PAPR is typically reserved for high-exposure situations or long-duration work where continuous airflow is beneficial. For casual DIY mold cleanup, N95 or P100 with proper fit is usually sufficient.
A PAPR is usually not required for typical DIY mold work unless exposure is very high.
Can I reuse disposable masks for mold cleaning?
Disposable masks are designed for single use; reuse can reduce protection and increase cross-contamination risk. Replace them after exposure or if dampened.
Don't reuse disposable masks after mold work; replace them when necessary.
How do I know if a mask fits properly?
A proper fit forms a seal around the face with no gaps. Perform a seal check by exhaling and feeling for air leaks. Facial hair can affect the seal.
A good fit means no air leaks; test the seal before starting.
Are masks effective against mold spores?
Masks with appropriate filtration reduce inhalation of spores, but they are part of a broader plan that includes moisture control and containment. They do not address moisture sources directly.
Masks reduce spores inhalation but must be part of a larger moisture-control plan.
Watch Video
The Essentials
- Assess exposure level before choosing a mask
- N95 for light tasks; P100 for heavy mold
- Fit and seal are critical for protection
- Use containment and damp cleaning to reduce spores
- Replace disposable masks after use and clean reusable PPE