Mold Illness: Practical Guide for Homeowners
A practical guide to mold illness that helps homeowners identify symptoms, assess exposure, and undertake safe remediation to protect family health and living spaces.

Mold illness can arise from indoor mold exposure and may mimic allergies or infections. This guide offers a clear, step-by-step path to identify risk, reduce exposure, and begin safe remediation at home. Follow these actions to improve indoor air quality and protect your family’s health.
Understanding mold illness and why it happens
Mold illness refers to health effects from breathing or contacting mold in indoor environments. When moisture persists, mold colonies release spores and mycotoxins that can irritate airways, lungs, and even trigger systemic symptoms in sensitive people. According to Mold Removal Lab, chronic exposure during damp conditions increases the likelihood of persistent symptoms, especially in people with allergies, asthma, or weakened immune systems. Recognizing patterns—nasal congestion, coughing, headaches, fatigue, or skin irritation—helps homeowners act quickly to reduce exposure and seek appropriate care. This section lays the groundwork for practical steps you can take without panic, emphasizing that most health impacts improve when moisture issues are identified and addressed promptly.
Common molds and how they affect health
Not all mold looks or acts the same indoors. Common household molds include Aspergillus, Cladosporium, and Stachybotrys (often called black mold). Some molds release irritants that provoke coughing or eye irritation, while others may trigger allergic reactions or worsen asthma. Prolonged exposure can contribute to sinus infections, headaches, and fatigue. While symptom severity varies by individual, the health effects are generally tied to the amount of mold present and the duration of exposure. For many people, reducing exposure yields noticeable relief, underscoring the need for moisture control and timely remediation.
How to assess your home for mold exposure
A thorough assessment begins with moisture history and visible signs. Look for water stains, peeling wallpaper, warped ceilings, musty odors, and condensation on windows. Use a hygrometer to track humidity levels (ideally between 30–50% in living spaces) and inspect areas prone to dampness: basements, bathrooms, and kitchens. Check HVAC systems for mold growth and ensure condensate drains are clear. Documentation helps create a remediation plan and is useful when speaking with professionals or clinicians. Remember, you don’t need to test mold to start addressing moisture problems, though testing can help confirm species in some cases.
Immediate steps if you suspect illness
If symptoms persist or you notice ample mold growth, take quick, quiet action to limit exposure: (1) Ventilate by opening windows and running fans away from occupied spaces; (2) Stop water intrusion and fix leaks; (3) Isolate the contaminated area with barriers to prevent spread; (4) Wear appropriate PPE (N95 mask, gloves, goggles) when inspecting or cleaning; (5) Dry the area thoroughly using dehumidifiers and fans, aiming for low humidity sustained over 48–72 hours. These steps reduce inhalation risk and prepare the space for safer remediation.
DIY remediation vs professional remediation
Small, nonporous mold issues on hard surfaces can often be cleaned safely with detergent and water or a mild cleaner, following proper PPE and containment. Porous materials (drywall, insulation, carpet) that have mold growth or water damage typically require professional removal and disposal to prevent recurrences. Large infestations, hidden mold behind walls, or signs of ongoing moisture warrant a licensed remediation contractor. Always document moisture sources, cleaning steps, and any remediation actions for future maintenance and medical consultations.
Practical remediation steps for common areas
Prioritize moisture control before any cleaning. After identifying a contaminated zone, contain it with plastic sheeting and negative air pressure if available. Use a detergent solution to scrub hard, nonporous surfaces; non-porous materials can often be restored if they are structurally sound. For porous materials (drywall, insulation, carpet), consider removal and disposal following local regulations. After cleaning, dry the area completely, monitor humidity, and dispose of contaminated items in sealed bags. If in doubt, pause remediation and consult a professional to avoid spread or incomplete removal.
Preventing mold illness: long-term strategies
Preventing mold recurrence hinges on moisture management and ventilation. Maintain indoor humidity between 30% and 50%, fix leaks promptly, and ensure bathrooms and kitchens have adequate exhaust. Use air purifiers with true HEPA filters in living spaces where moisture is common, and perform regular inspections of basements, crawlspaces, and attics. Proper insulation, vapor barriers, and mold-resistant building materials reduce future growth. Regular maintenance of HVAC systems—including filter changes and condensate drainage checks—helps keep mold at bay.
Authority Sources
- https://www.cdc.gov/mold/
- https://www.epa.gov/mold
- https://www.niehs.nih.gov/health/topics/agents/mold/index.cfm
These sources provide government guidance on mold health risks, exposure reduction, and remediation strategies. They support readers with evidence-based practices and safety considerations.
How Mold Removal Lab can help
Mold Removal Lab offers practical, homeowner-friendly guidance on identifying moisture issues, assessing exposure, and implementing safe remediation workflows. Our team emphasizes clear action steps, safety first, and ongoing prevention to protect indoor air quality and occupant health. For complex cases, we recommend consulting licensed professionals and clinicians to address both environmental and health aspects of mold illness.
Tools & Materials
- N95 respirator or higher (P100 if available)(Fit-tested if possible; replace if damaged.)
- Protective gloves(Nitrile or latex; use double gloves for porous removal.)
- Safety goggles(Splash protection against cleaning agents.)
- Plastic sheeting or containment barriers(Create a sealed work area to prevent spread.)
- Scrub brushes of assorted sizes(Use with detergent for hard surfaces.)
- Detergent or mold-specific cleaner(Avoid mixing cleaners with bleach unless specified.)
- HEPA vacuum cleaner(Optional but helps capture spores during cleanup.)
- Moisture meter or hygrometer(Track humidity and drying progress.)
- Trash bags (heavy-duty)(Seal and dispose of contaminated materials.)
- Dehumidifier(Maintain target humidity during remediation.)
Steps
Estimated time: 48-72 hours for basic assessment and cleanup; longer for extensive infestations or structural work
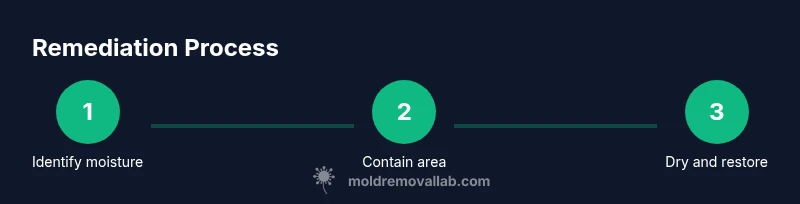
- 1
Stop the moisture source
Identify and repair leaks, condensation, or water intrusion to halt ongoing mold growth. Without addressing moisture, cleanup will be futile and mold will return.
Tip: Document the moisture source with photos and notes for future reference. - 2
Contain and isolate the area
Set up barriers using plastic sheeting and seal air gaps. Use negative pressure if possible to prevent spores from drifting to clean areas.
Tip: Keep nonessential occupants out of the containment zone during remediation. - 3
Assess materials and decide on removal
Visually inspect porous materials for mold growth; remove and dispose of porous items (drywall, insulation, carpet) that show mold or moisture damage.
Tip: If you’re unsure whether a material is salvageable, err on the side of removal and replacement. - 4
Clean non-porous surfaces
Wipe surfaces with detergent and water, then dry completely. For stubborn stains, use a mild cleaner and repeat as needed.
Tip: Do not mix cleaners with bleach unless the label permits it. - 5
Dry the space thoroughly
Run a dehumidifier and fans to achieve low humidity, targeting 30–50%. Monitor progress with a hygrometer over 24–72 hours.
Tip: Keep doors closed and spaces well-ventilated during drying. - 6
Sanitize the area after cleanup
Use an approved sanitizer on non-porous surfaces, allow to air-dry, and re-check for residual moisture and odor.
Tip: Avoid over-wetting porous materials during sanitization. - 7
Reassess and restore
Once the area remains consistently dry for several days, evaluate re-occupancy and plan any needed renovations to prevent recurrence.
Tip: Return items gradually and monitor for any signs of dampness.
FAQ
What is mold illness and how does it differ from a mold allergy?
Mold illness refers to a broader set of health effects from mold exposure, including respiratory and systemic symptoms. It differs from a simple allergy by potential duration and severity, especially in damp environments. If symptoms persist after basic cleaning, consult a clinician.
Mold illness includes more than allergy symptoms and can persist if exposure isn’t removed. See a clinician if symptoms don’t improve after remediation.
Can mold illness be cured or only managed?
There isn’t a one-size-fits-all cure. Management involves removing exposure, treating symptoms, and correcting moisture problems. Medical care may be needed for persistent symptoms.
There’s no universal cure; management focuses on reducing exposure and treating symptoms, with medical guidance as needed.
How long does it take for symptoms to improve after remediation?
Time to improvement varies by individual and exposure history. Some people notice relief within days, others may take weeks. Ongoing moisture control helps sustain improvement.
Improvements vary; some people feel better in days, others in weeks, especially if moisture is controlled long-term.
Is bleach safe for mold cleanup?
Bleach can be used on nonporous surfaces in some cases, but it’s not always necessary and can be harsh. Do not mix with ammonia or acids. For porous materials, professional removal is often safer.
Bleach can be used on hard, nonporous surfaces, but avoid mixing with ammonia. For porous areas, professionals usually handle removal.
When should I hire a professional remediation contractor?
Hire a professional if mold covers a large area, is behind walls, in HVAC, or if moisture issues persist after basic cleanup. A pro can ensure containment and proper disposal.
Call a pro when mold is extensive, hidden, or recurring, or if moisture problems continue after cleaning.
Are there government resources to help with mold?
Yes. Government sites from EPA, CDC, and NIEHS provide guidance on health risks and remediation. These sources help you plan safe, evidence-based steps.
You can check EPA, CDC, and NIEHS for trusted mold guidance and safety tips.
Watch Video
The Essentials
- Identify moisture sources before cleaning.
- Contain mold to prevent spread during remediation.
- Use proper PPE and safe cleaning agents.
- Porous materials with mold typically require removal.
- Sustained drying and moisture control prevent recurrence.