Who Gets Rid of Mold: DIY vs Pro Remediation
A practical, step-by-step guide on who should handle mold removal, when to DIY, and when to hire a professional, with safety, costs, and prevention tips.

Who gets rid of mold depends on the extent of contamination and the setting. For small, surface mold in a single area, a confident homeowner can clean and dry the space using approved methods. For larger areas, hidden mold, or growth near HVAC systems, hire a licensed mold remediation professional. Always prioritize safety, proper containment, and air quality monitoring.
Why this matters
According to Mold Removal Lab, who gets rid of mold is not determined by a title but by the scope, risk, and location of the contamination. In many homes, a small, isolated patch on a non-porous surface can be addressed by a careful homeowner who follows proven safety steps. Yet mold growth behind walls, in HVAC plenums, or across porous materials poses real health risks for occupants and can spread spores to other rooms. The Mold Removal Lab team found that early action reduces exposure and minimizes costly damage, especially when humidity and moisture sources are controlled. This article provides practical decision-making guidance so homeowners and renters know when to roll up their sleeves and when to call in a pro. You’ll learn how to assess scope, choose appropriate methods, and protect your family during the process. safety, containment, and moisture control are non-negotiable pillars of successful mold remediation.
What mold removal entails
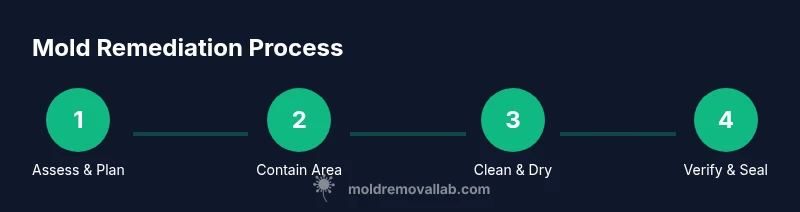
Mold remediation is not a single action but a sequence of steps designed to remove mold and prevent its return. It typically includes risk assessment, containment, cleaning of affected surfaces, removal of porous materials when needed, drying and dehumidification, and verification that moisture levels are under control. Proper containment means sealing off the work area to keep spores from spreading, using air filtration (HEPA) during cleanup, and monitoring humidity. Health and safety considerations are central: PPE, ventilation, and clear communication with occupants are essential. A well-executed plan minimizes exposure, protects indoor air quality, and reduces the chance of recontamination. Mold Removal Lab emphasizes documenting each step and ensuring moisture sources like leaks are resolved before finishing.
DIY for small patches: when you can do it safely
Homeowners can tackle small, isolated patches on non-porous surfaces if you have the right tools and knowledge. Start by assessing the area to confirm the mold is limited, then contain the space to prevent spread. Clean hard, non-porous surfaces with detergent and water, scrub gently, and dry thoroughly. Avoid mixing cleaners and never ignore lingering moisture. After cleaning, monitor humidity for at least 48–72 hours to confirm the area is dry. Keep kids and pets away during the process, and if symptoms arise (cough, sneezing, or throat irritation), leave the area and seek professional guidance. The goal is to remove the visible growth and restore a dry, clean environment without creating new exposures.
When to call a professional remediator
If mold covers a large area, is hidden behind walls or insulation, or involves porous materials like drywall or carpet, professional remediation is recommended. Pro teams bring containment, specialized tools, and legally compliant practices to prevent cross-contamination and ensure proper disposal. If you notice persistent moisture problems (leaks, high humidity) or suspect mold in HVAC systems, a licensed professional should conduct a comprehensive assessment and remediation plan. A pro can also help with clearance testing or moisture measurements after the work to verify the space is safe for occupants to return.
How to choose the right contractor
Begin with credentials: verify licenses or registrations where required, check IICRC or equivalent certification, and confirm insurance and workers’ compensation coverage. Ask for before-and-after photos of similar projects, references, and a written scope of work with containment plans. Request a detailed estimate that breaks down labor, materials, equipment, and disposal. A reputable contractor will explain the remediation rationale, the expected timeline, and the moisture-control strategies to prevent recurrence. If any part of the proposal feels vague, ask clarifying questions or seek a second opinion.
Cost considerations and insurance
Costs vary widely based on the size of the affected area, the complexity of the containment, and whether porous materials must be removed. In general, DIY costs cover PPE, cleaners, and basic disposal, while professional remediation includes containment, specialized equipment, and testing. Insurance coverage depends on policy details and whether mold was caused by a covered peril like a leak. Always document moisture sources and repair them to support any insurance claim. Mold Removal Lab Analysis, 2026, emphasizes that licensed professionals can reduce the risk of recontamination when proper containment and drying are used.
Tools & Materials
- N95 respirator mask(Fit-tested if possible)
- Safety goggles(Wraparound recommended)
- Chemical-resistant gloves(Nitrile or neoprene)
- Plastic sheeting (6 mil)(For containment)
- Masking tape or painter's tape(Seal seams and create barriers)
- Detergent or mild soap(For initial cleaning)
- Non-ammonia cleaner or TSP solution(Follow product directions)
- Bucket, sponge, and soft-bristled brush(For scrubbing surfaces)
- HEPA vacuum(For debris and dust control)
- Moisture meter or hygrometer(To verify drying)
- Dehumidifier(Helpful for ongoing moisture control)
- Trash bags (heavy-duty)(Sealed disposal of contaminated items)
Steps
Estimated time: 2-6 hours
- 1
Assess mold scope
Survey affected area and identify moisture sources. Document extent with notes and photos. Decide if DIY is appropriate based on surface type and contamination size.
Tip: Start with a small test patch on a non-porous surface to gauge effectiveness. - 2
Contain the work area
Erect barriers using plastic sheeting to prevent spore spread. Seal seams with tape and ensure doors or vents are controlled. Minimize entry to the area during cleanup.
Tip: Turn off HVAC in the affected zone to reduce air movement. - 3
Clean non-porous surfaces
Wash hard, non-porous surfaces with detergent and water. Scrub gently to remove visible growth, then rinse and dry completely. Do not mix cleaners with bleach unless the product directions say it’s safe.
Tip: Work from the outer edge toward the center to avoid spreading spores. - 4
Dry and dehumidify
Use fans and a dehumidifier to lower humidity below 50-60% as quickly as possible. Run equipment for several hours after cleaning until the area remains dry to the touch.
Tip: Continuous moisture monitoring helps prevent regrowth. - 5
Dispose of contaminated materials
Remove and bag any porous materials that cannot be cleaned, such as drywall or insulation, in sealed containers. Follow local disposal regulations for mold-contaminated waste.
Tip: Do not reuse removed materials; replace with new if possible. - 6
Inspect for hidden mold
Reopen areas if moisture sources persist or if odors remain. Hidden mold behind walls may require professional assessment and safe containment.
Tip: If you’re unsure about hidden growth, do not cut into walls aggressively. - 7
Prevent recurrence
Repair leaks, improve ventilation, and install moisture-control measures. Document the remediation plan and set up ongoing humidity checks to catch future dampness early.
Tip: Keep humidity consistent with a dehumidifier during damp seasons.
FAQ
Who should tackle mold removal in a home?
It depends on size and location; small patches can be DIY with proper precautions, while large, hidden, or risky growth should be handled by a licensed professional.
It depends on the size and location; small patches can be DIY, but large or hidden mold should be handled by a licensed professional.
Is bleach effective for mold cleanup?
Bleach can kill surface mold on non-porous surfaces but is not a universal solution. Porous materials may require cleaning, drying, or removal and professional treatment.
Bleach can kill surface mold on non-porous surfaces, but porous materials may need more thorough treatment and possible removal.
What credentials should I look for in a contractor?
Look for licensing where required, IICRC or equivalent certification, valid insurance, and references. Ask for a written scope of work with containment plans.
Check licenses, certifications, and insurance, and ask for a written plan with containment.
How long does remediation take?
Duration varies by area size and contamination; small jobs may be completed in a day, larger projects can take several days with containment and drying steps.
It depends on size, but small jobs may be a day and larger ones several days with containment and drying.
What are signs of hidden mold?
Musty odors, staining behind walls, or persistent high humidity can indicate hidden mold. If you suspect it, consider a professional inspection.
Musty smells, hidden staining, or ongoing dampness can signal hidden mold; consider professional inspection.
Watch Video
The Essentials
- Assess mold scope before acting and decide between DIY or pro help.
- Contain work areas to prevent cross-contamination.
- Prioritize drying and moisture control to reduce recurrence.
- Choose licensed professionals for large, hidden, or risky mold cases.