Do You Need a Professional to Remove Mold? A Practical DIY vs Pro Guide
Learn when DIY remediation is safe and when a licensed professional is essential. Practical steps, safety tips, and decision guidelines from Mold Removal Lab help homeowners decide how to tackle mold effectively.

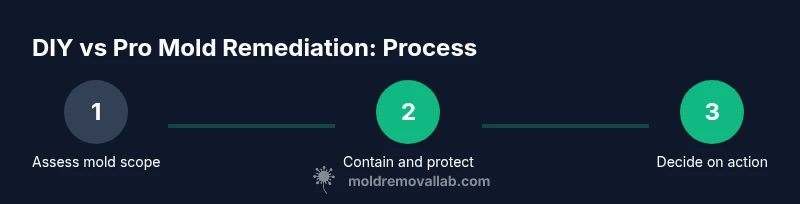
Do you need a professional to remove mold? The answer depends on the scope, moisture source, and health risks involved. Small patches on non-porous surfaces can often be addressed by a careful homeowner with proper PPE and containment. Large infestations, hidden growth behind walls, or recurring mold typically require professional remediation for safety, code compliance, and thorough root-cause treatment. Always address the moisture source to prevent relapse.
Do you need a professional to remove mold? A practical framework
If you’re asking whether you need a pro, the answer hinges on scope, moisture, and health risk. Do you need a professional to remove mold? In many homes, small patches on non-porous surfaces such as glass or metal can be cleaned by a capable homeowner with proper PPE and a meticulous containment plan. But when mold covers porous materials, hides behind walls, or keeps returning after cleaning, professional remediation is the safer route. The Mold Removal Lab team emphasizes that identifying and stopping the moisture source is the single most important step, because without moisture control, mold is likely to rebound. Begin by documenting moisture events, inspecting affected areas, and deciding whether work can be contained to one room without spreading spores to other spaces. If there’s any doubt, seek local expert guidance before proceeding.
In many cases, homeowners wonder about the cost and risk trade-offs. Do you need a professional to remove mold? The honest answer is: consider the area’s size, accessibility, and potential health impact for residents, especially young children, the elderly, or individuals with allergies or asthma. An informed decision minimizes exposure and protects your property long-term. Mold Removal Lab’s guidance emphasizes transparency, safety, and moisture control as the core pillars of a sound remediation plan.
Safety First: PPE, containment, and ventilation
Before you begin any mold-related work, equip yourself with basic PPE: an NIOSH-approved respirator (preferably P100), nitrile gloves, and eye protection. A disposable coverall adds protection if you’re cleaning larger areas. Ensure the space is well-ventilated by opening exterior doors or running an exhaust fan, but avoid blowing air from the moldy area into other rooms. Use plastic sheeting to create a containment barrier and seal off the work zone to minimize cross-contamination. Regular breaks to step outside and wash hands or change gloves help keep exposure low. According to Mold Removal Lab, proper containment reduces the spread of spores and protects both occupants and nearby surfaces. Remember, improving ventilation is a long-term measure for preventing future growth by reducing indoor humidity and stagnant air.
DIY methods for small, accessible mold patches
For small, non-porous patches, a careful DIY approach can be effective when moisture is controlled. Start with a detergent solution and a scrub brush to remove visible growth, followed by a clean rinse and thorough drying. Vinegar or hydrogen peroxide can be used on non-porous surfaces, but avoid mixing cleaners carelessly and never use bleach on porous materials or wood unless a professional confirms it’s safe to do so. Prepare the area with containment to keep spores from drifting, and monitor humidity to ensure rapid drying. Mold Removal Lab analysis shows that surface cleaning alone may not reach mold roots embedded in porous materials, so evaluate whether the affected item should be removed from the environment. Document the area with photos before and after to assess progress and plan the next steps. If the mold recurs after a reasonable DIY attempt, escalate to a pro.
Always address the underlying moisture problem—leaks, condensation, or humidity levels—to prevent re-growth. The goal isn’t just to remove surface mold, but to stop it from returning.
When to call a professional: scale, location, health considerations
Recognize when to call a professional by evaluating scale, accessibility, and health risks. Large infestations, mold growth behind walls, or damage to insulation and structural components require professional remediation. If mold is present in areas behind inaccessible spaces like crawl spaces or inside HVAC ducts, it’s prudent to involve trained technicians who have containment practices, specialized equipment, and post-remediation verification. Health concerns also guide the decision: residents with respiratory conditions, compromised immune systems, or mold allergies may suffer even from seemingly minor exposures. In these cases, professional remediation reduces risk and provides documentation of the work for future reference. Do you need a professional to remove mold? In many scenarios, yes—but only when DIY limits would compromise safety or long-term results.
What professionals do differently: a high-level view
Professional remediation follows a disciplined process designed to prevent cross-contamination and ensure lasting results. First, assess the extent of contamination and identify moisture sources. Then establish containment, use HEPA filtration, and remove affected porous materials when necessary. Cleaning and disinfecting are followed by drying and moisture control measures to prevent recurrence. A final verification step confirms that mold levels are within safe limits and that humidity is under control. Professionals also provide documentation for insurance claims and warranties. If you’re balancing cost, risk, and time, a professional remediation offers peace of mind and a comprehensive, society-standard approach to mold safety.
Costs, insurance, and practicalities you should know
Costs for mold remediation vary based on extent, location, and required containment. DIY attempts may save money upfront but risk hidden growth and recurring problems, which often become more expensive to fix later. Insurance coverage depends on policy specifics and whether mold is related to a covered water event or maintenance issues. Before choosing a path, obtain multiple estimates, ask for a written scope of work, and confirm warranties or guarantees on the remediation. If your space has ongoing moisture problems, even the best cleaning won’t prevent future outbreaks, so prioritize moisture control and regular monitoring. In short, weigh immediate costs against long-term health and property protection.
Prevention and maintenance to stop recurrence
Prevention hinges on moisture management and air quality. Fix leaks promptly, repair roof and plumbing issues, and ensure proper drainage away from the foundation. Use dehumidifiers in damp climates or seasons, and maintain good ventilation in bathrooms, kitchens, and laundry rooms. Clean and dry any damp areas within 24 to 48 hours to inhibit mold growth. Regularly inspect hidden spaces (basements, crawl spaces, and behind appliances) for signs of moisture or discoloration. Keeping indoor humidity below 50% is a widely recommended target for reducing mold risk. The Mold Removal Lab team emphasizes that prevention is typically more cost-effective than repeated remediation. A proactive, informed approach helps protect occupants’ health and the home’s integrity.
Tools & Materials
- NIOSH-approved respirator (P100)(Avoid felt or loose-fitting masks; ensure a proper seal)
- Disposable coveralls(For larger DIY areas; prevents clothing contamination)
- Non-latex gloves(Protect skin from cleaners and mold spores)
- Safety goggles(Eye protection against splashes and spores)
- Detergent and scrub brush(Mild soap, soft-bristle brush for non-porous surfaces)
- White vinegar or hydrogen peroxide(Option for non-porous surfaces; do not mix with bleach)
- Plastic sheeting and tape(Containment to prevent cross-contamination)
- Moisture meter / hygrometer(Helpful to track humidity and drying progress)
- Dehumidifier or fan(Aid in drying after cleaning)
- Trash bags(Heavy-duty bags for disposal of contaminated materials)
- Notepad or camera(Document mold and moisture for reference)
Steps
Estimated time: Estimated total time: 3-6 hours
- 1
Identify moisture source
Inspect for leaks, condensation, or recent water intrusion. Document affected areas and determine if the mold is limited to a small patch or has spread.
Tip: Fix moisture first; mold cleanup without moisture control is often futile. - 2
Contain the area
Set up plastic barriers to isolate the space and prevent spores from spreading to adjacent rooms.
Tip: Seal doors, vents, and any opening with tape and plastic sheeting. - 3
Protect yourself and the space
Put on PPE and avoid disturbing mold more than necessary to prevent aerosolization.
Tip: Work slowly and minimize movement within the containment zone. - 4
Clean non-porous surfaces
Use detergent solution to scrub visible mold on hard surfaces, then rinse and dry thoroughly.
Tip: Do not mix cleaners; never use bleach on porous materials. - 5
Dry completely
Use a dehumidifier or fan to promote fast, thorough drying of the treated area.
Tip: Check moisture levels after cleaning to ensure a dry baseline. - 6
Evaluate remediation needs
If mold recurs, or if porous materials were involved, reassess with a professional.
Tip: Document progress with photos to guide future decisions.
FAQ
Do you need a professional to remove mold?
Not always. Small patches on non-porous surfaces can be tackled DIY with proper PPE and containment. Large infestations, hidden growth, or persistent recurrence usually require professional remediation for safety and long-term results.
For small, surface mold, DIY can work with proper safety steps. If the mold is large, hidden, or keeps coming back, hire a professional to ensure a thorough job.
What signs indicate mold is spreading behind walls?
Visible patches, a persistent musty odor, staining that worsens after cleaning, and moisture problems like leaks suggest hidden growth behind walls or insulation.
If you notice a musty smell or staining spreading after cleaning, there may be hidden mold behind walls; get a professional assessment.
How long does remediation take?
Timing depends on extent and location. It can range from a few hours for small areas to several days for larger or complex sites.
Remediation can take from several hours to a few days, depending on scope and containment needs.
Are DIY mold cleanup methods safe?
DIY can be safe for small, readily accessible patches on non-porous surfaces with proper PPE and ventilation. Avoid porous materials and watch for reoccurrence; seek pro help if unsure.
DIY is safer for small, non-porous patches with the right gear, but consult a pro if you’re unsure or if mold returns.
How should I choose a professional remediation contractor?
Look for licensed, insured contractors with clear scope of work, written estimates, references, and post-remediation verification. Verify they address moisture sources and provide warranties.
Choose a licensed, insured pro with a detailed plan, references, and post-remediation testing or verification.
Is mold remediation covered by homeowners insurance?
Coverage varies by policy and cause. Some water-damage events trigger coverage; routine maintenance mold is typically excluded. Check your policy or contact your insurer.
Insurance coverage depends on your policy and the mold cause; many standard plans exclude routine mold maintenance.
Watch Video
The Essentials
- Assess scope before starting work.
- Safety comes first in every mold task.
- DIY works for small, accessible patches on non-porous surfaces.
- Large or hidden mold should be handled by pros.
- Control moisture to prevent recurrence.