What to Clean Mold in Shower With: A Practical Guide
A homeowner-friendly guide on safe cleaners and step-by-step techniques to remove shower mold, protect your family, and prevent regrowth. Includes PPE, materials, and maintenance tips from Mold Removal Lab.

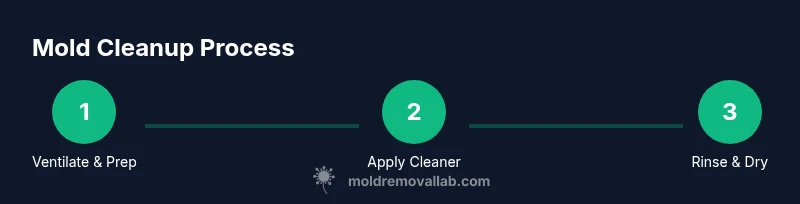
Follow a simple, step-by-step approach to clean mold in the shower with safe household cleaners. Gather gloves, goggles, ventilation, a scrub brush, and a spray bottle. Start with a test patch, then apply a chosen cleaner (bleach solution or hydrogen peroxide) for several minutes, scrub away mold, rinse, and dry thoroughly. For stubborn spots, repeat or replace affected grout.
What to Clean Mold in Shower With: Choosing Effective Cleaners
If you’re wondering what to clean mold in shower with, this guide helps you pick safe, effective cleaners and follow a proven process. According to Mold Removal Lab, selecting the right products matters more than the brand you choose. The Mold Removal Lab Team emphasizes that surface mold requires proper cleaning agents and thorough drying to prevent quick regrowth. This article guides homeowners and renters through practical options that work on typical shower materials, while avoiding harsh practices that can damage grout or tiles.
Safety First: PPE, Ventilation, and Surface Prep
Before you tackle mold, ensure you protect yourself and limit exposure. Wear nitrile gloves, goggles, and a mask; open a window or run a bathroom fan to vent fumes. Remove or cover items around the shower to reduce contamination risk. Ventilation helps dissipate spores and improves comfort during cleaning, while surface prep reduces spread. Mold Removal Lab Analysis, 2026 supports meticulous prep as a critical step.
Common Cleaners in Showers: Bleach, Hydrogen Peroxide, Vinegar, and Alternatives
Bleach can kill surface mold on non-porous surfaces like tile; hydrogen peroxide is a gentler option for grout and caulk. White vinegar is a mild alternative, but avoid mixing cleaners. Each option has surface-specific caveats and safety considerations. Based on Mold Removal Lab research, choose one cleaner and test on a hidden patch first to avoid discoloration.
Tools, Materials, and Surface Prep
Gather PPE, brushes, spray bottles, towels, and the chosen cleaner. For grout lines, a stiff brush or old toothbrush helps remove buildup. Keep a bucket of warm water for rinsing and a dry cloth for fast drying after rinsing. Prep the surface by removing loose debris and ensuring the area is dry before applying cleaner.
Step-by-Step Cleaning Process Overview
A structured process yields the best results: test a patch, apply cleaner, scrub with appropriate brushes, rinse thoroughly, and dry completely. If grout or caulk is porous, you may need to re-seal or re-caulk after cleaning to reduce future mold growth. This section provides a roadmap; see the dedicated STEP-BY-STEP block for precise actions.
Prevention: Keeping Shower Mold at Bay
Prevention is easier than repeated cleanups. Improve ventilation, fix leaks, and replace failing caulk or grout with mold-resistant products. Wipe down surfaces after use and consider a grout sealer. Regular inspections help catch moisture problems early, reducing the likelihood of mold returning.
When to Call a Pro and What to Expect
If mold covers a large area, penetrates porous materials, or returns despite cleaning, professional remediation may be necessary. A pro can assess moisture sources, remove damaged grout or drywall, and provide a full remediation plan. Mold Removal Lab Team recommends seeking help when you notice structural damage or persistent mold growth beyond DIY capacity.
Tools & Materials
- nitrile gloves(chemical resistance, size medium)
- protective goggles(eye protection)
- respirator mask(at least N95 rated)
- scrub brush (stiff)(for grout)
- old toothbrush(grout lines)
- spray bottle(for cleaner application)
- bucket(rinsing)
- microfiber cloths(drying and wipe-down)
- white vinegar(optional cleaner)
- 3% hydrogen peroxide(alternative cleaner)
- household bleach (5-6%)(non-porous surfaces only)
- baking soda(for paste and deodorizing)
- caulk or silicone sealant(to reseal grout/caulk after cleaning)
Steps
Estimated time: 60-120 minutes plus drying time
- 1
Ventilate and prep the area
Open a window or turn on the bathroom fan to move air across the shower. Remove or cover items nearby and lay towels to catch drips. This stage reduces fumes and prevents spreading mold spores to other rooms.
Tip: Use a cross-ventilation setup to keep air comfortable and clean. - 2
Protect yourself with PPE
Put on nitrile gloves, safety goggles, and a respirator mask. PPE minimizes skin, eye, and inhalation exposure to mold and cleaning fumes.
Tip: Ensure a proper fit for the mask and goggles. - 3
Inspect mold extent and surface type
Identify if mold is surface-only on tile or penetrates grout/caulk. This informs cleaner choice and whether remediation is needed beyond cleaning.
Tip: Note areas where grout is crumbling or tiles feel soft. - 4
Choose a cleaner and test a patch
Select a cleaner (bleach solution, hydrogen peroxide, or vinegar) and apply a small patch to a hidden area. Wait 5-10 minutes to assess color change or material reaction.
Tip: Test on a small area to avoid staining. - 5
Apply cleaner to moldy areas
Spray the cleaner generously onto moldy spots, ensuring full coverage. Do not mix cleaners.
Tip: Keep cleaner away from metal fixtures that may corrode. - 6
Scrub and agitate the mold
Use a stiff brush on grout lines and a scrub pad on tiles to lift mold. For tight grout lines, use an old toothbrush.
Tip: Work in small sections and keep surfaces wet to avoid airborne spores. - 7
Rinse and dry thoroughly
Rinse with clean water until residue is gone and dry the surface with microfiber cloths. Air drying helps prevent immediate regrowth.
Tip: Wipe down tiles after rinsing to speed dry time. - 8
Assess grout/caulk and reseal if needed
If grout or caulk shows deterioration, consider resealing or replacing it after cleaning to reduce future mold growth.
Tip: Choose mold-resistant grout or sealant for long-term protection.
FAQ
What is the best cleaner to use for shower mold?
There isn't a single best cleaner; common options include bleach, hydrogen peroxide, or vinegar. Choose based on surface material, mold severity, and safety considerations. Always test first.
There isn't a single best cleaner; choose based on surface and mold severity and always test first.
Is it safe to use bleach on mold in the shower?
Bleach can kill surface mold on non-porous surfaces like tile but may not remove mold from porous grout. Use with ventilation and avoid mixing with other cleaners. Rinse and dry thoroughly after use.
Bleach can kill surface mold on non-porous surfaces; rinse and dry after use.
Should I mix vinegar and baking soda for mold?
Do not mix vinegar and baking soda for mold cleaning. The reaction produces fizz but does not enhance mold removal and can waste cleaner. Use separately as per instructions.
Don’t mix vinegar and baking soda; use each as directed.
How long does cleaning take?
Most DIY cleanups take about 60-120 minutes depending on mold extent, plus additional drying time. For stubborn cases, plan for a second session.
Most cleanups take about 1-2 hours plus drying time.
When should I hire a professional?
If mold covers a large area, penetrates porous materials, or returns despite cleaning, professional remediation may be necessary. A pro can assess moisture sources, remove damaged grout or drywall, and provide a full remediation plan.
Hire a pro if mold is extensive or recurs after cleaning.
How can I prevent mold from returning?
Prevent mold by improving ventilation, fixing leaks, sealing grout, wiping surfaces dry after use, and performing regular inspections. Consistent maintenance is key.
Improve ventilation and maintenance to prevent mold return.
Watch Video
The Essentials
- Ventilate before cleaning
- Choose an appropriate cleaner
- Scrub thoroughly, then rinse and dry
- Repair damaged grout/caulk when needed
- Implement prevention practices to reduce recurrence