Pink Mold in Shower: Safe Removal and Prevention
Learn to identify pink mold in the shower, remove it safely, and implement moisture-control practices to prevent recurrence. Practical steps, PPE guidance, and prevention tips from Mold Removal Lab.

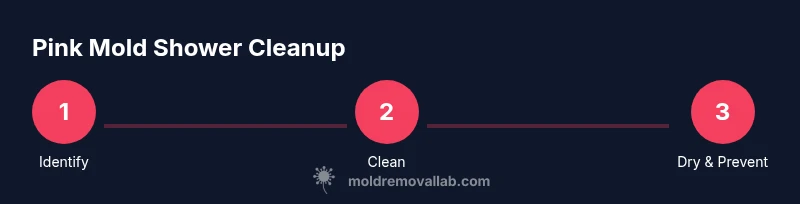
This guide helps homeowners address pink mold in the shower by identifying it, using safe cleaning methods, and applying preventive measures. You'll learn the difference between pink mold and mildew, when to use household cleaners, and how to maintain a dry, mold-resistant bathroom. This overview also highlights essential safety steps, suitable products, and time estimates to finish without recontamination.
Understanding pink mold in shower
Pink mold in showers is commonly Serratia marcescens, a pigmented bacteria that thrives in damp, warm bathroom environments. While it is not the same organism as the more toxic black mold, it can form a slimy, pink film on soap scum, grout, and tub surfaces when moisture lingers. According to Mold Removal Lab, the presence of pink coloration is a signal that your bathroom provides consistent moisture and a substrate (soap scum or mineral deposits) that supports bacterial growth. Recognizing this distinction helps you tailor your cleaning approach and avoid unnecessary aggressive cleaners. In most homes, pink mold is more about moisture management than about dangerous toxins, but it should still be treated seriously. Regular cleaning with gentle, effective cleaners, followed by thorough drying, reduces recurrence and keeps your shower healthier for occupants. The goal is to disrupt the bacteria’s food source (soap residues) and eliminate lingering moisture that sustains growth.
Safety first: risks and when to call a pro
Pink mold in the shower can trigger skin irritation and respiratory discomfort for sensitive individuals. When you encounter large growth, recurring pink spots after cleaning, or mold behind tiled surfaces, consider professional help. Always wear PPE: nitrile gloves, eye protection, and an N95 respirator if you’re sensitive to cleaning fumes. Ensure proper ventilation during cleaning by opening a window or turning on a bathroom fan. Never mix cleaners, especially bleach with ammonia or vinegar, as this can release toxic gases. If you have a compromised immune system, asthma, or receive ongoing medical treatment, err on the side of caution and consult a licensed mold remediation specialist. The Mold Removal Lab team recommends cautious, staged cleaning for persistent growth and backing away from damaged grout or drywall.
Identifying pink mold vs soap scum and mildew
Distinguishing pink mold from ordinary soap scum or mildew is essential for choosing the right cleaning method. Pink mold tends to appear as a slimy, pink film that adheres to bathroom surfaces after moisture exposure and soap residues. Soap scum is whitish or gray and can obscure the underlying surface, while mildew appears white to grayish—not pink. A simple test is to gently wipe a small area with a damp cloth: if pink pigment remains or reappears quickly after cleaning, you’re likely dealing with pink mold (Serratia marcescens). In contrast, soap scum often dissolves with mild cleaners and does not leave a persistent pink hue. By correctly identifying the growth, you can apply the most effective, least aggressive cleaner and reduce the risk of surface damage.
Where pink mold hides in a shower
Pink mold thrives in moist crevices where water clings—grout lines, around soap dishes, under rimming tile, silicone seals, and the edges of shampoo dispensers. It loves soap scum and mineral buildup because these provide nutrients. The damp corner behind the curtain rod or in the shower niche can be a micro-environment that stays humid even after you wipe down the surface. Regular inspection of these hotspots helps you catch early growth before it spreads to grout lines or wall surfaces. Remember that pink mold isn’t a sign of a single contaminated area; it’s a symptom of moisture, warmth, and residues that feed bacteria over time.
Cleaning plan and preparation
Before you begin, outline a cleaning plan: identify the affected areas, gather PPE, choose a safe cleaning method, and set a reasonable time window. Start by removing items from the shower to prevent contamination transfer and place towels nearby to catch drips. Ventilate the room to reduce fumes and improve drying. Outline a step-by-step procedure to avoid missing spots and to keep your cleaning consistent. A clean workspace decreases the chance of recontamination and makes it easier to notice any new pink growth after the cleaning routine. The Mold Removal Lab guidance emphasizes planning as a critical step in successful removal and long-term prevention.
Cleaning methods: safe options for pink mold
There are several consumer-safe cleaners that work well for pink mold when used correctly and with proper ventilation. White distilled vinegar is a mild acid that can disrupt biofilms on non-porous surfaces. Hydrogen peroxide in 3% concentration can kill bacteria when applied and left to sit briefly. Baking soda creates a gentle abrasive paste that helps lift residues without scratching grout. For tougher spots, a diluted peroxide solution can be effective. Bleach is sometimes used for significant mold, but it should be used with caution and never mixed with ammonia or vinegar. Always test a small area first and rinse thoroughly after cleaning. The goal is to remove the pink film without damaging tiles or grout while avoiding chemical interactions that could harm household members or pets.
Step-by-step overview (high-level)
- Identify the affected areas and prepare your cleaning zone. - Apply a cleaner to the pink film and let it sit briefly. - Scrub gently with non-abrasive tools while maintaining moisture control. - Rinse thoroughly and dry the surface completely. - Reassess the area after cleaning and implement moisture controls to prevent recurrence. This overview mirrors the step-by-step procedure described in the dedicated guide and is designed to be easy to follow for homeowners. The Mold Removal Lab team highlights the importance of patience during the waiting periods required by certain cleaners to maximize effectiveness.
Drying and moisture control after cleaning
Drying is as important as cleaning. After treating pink mold, remove all water from surfaces and dry grout lines with towels. Use a squeegee on large glazed surfaces and consider a bathroom fan or dehumidifier to reduce ambient humidity levels. Keep the shower door or curtain wide open for at least several hours after cleaning to improve air circulation. Regularly wipe down surfaces after showers to remove residual moisture and soap scum that can feed bacterial growth. The goal is to keep the environment inhospitable to pink mold by maintaining low relative humidity and fast drying. Consistency matters more than intensity with pink mold prevention.
Prevention strategies for shower mold
Prevention relies on moisture control and routine cleaning. Ensure good ventilation, especially during and after showers. Address leaks promptly and consider resealing grout or replacing caulk where needed. Use a mold-resistant grout or sealant where appropriate and recheck seals every few months. Regularly wipe down surfaces, install a bathroom exhaust fan that vents to the outdoors, and consider a dehumidifier in smaller bathrooms. Establish a weekly cleaning routine focusing on high-risk zones, and schedule monthly deep cleans of grout lines. These preventive measures are designed to reduce moisture retention and disrupt the conditions that pink mold requires.
Maintenance schedule and long-term plan
Create a simple maintenance calendar to keep pink mold at bay. Weekly tasks include wiping down the shower after use and inspecting grout for moisture or discoloration. Monthly deep-clean sessions should target grout lines and hidden corners, with attention to soap scum removal. Seasonal checks for ventilation efficiency, caulk integrity, and potential water leaks help catch issues before they escalate. By maintaining a dry environment and staying vigilant, you can minimize pink mold regrowth. The Mold Removal Lab team recommends documenting observations and adjusting cleaning frequency based on humidity and usage patterns.
Tools & Materials
- Nitrile disposable gloves(Protect hands from cleaners and bacteria)
- Safety goggles(Prevent splashes to eyes)
- N95 respirator or equivalent(Protect lungs from fumes and spores)
- Spray bottle(For applying cleaners evenly)
- Microfiber cloths(Non-abrasive, reusable)
- Non-abrasive scrub brush(Gently lift residue without scratching)
- Old toothbrush(Detail cleaning in grout lines)
- White distilled vinegar(Natural disinfectant; do not mix with bleach)
- Hydrogen peroxide 3%(Alternative to bleach; good for bacteria)
- Baking soda(Mild abrasive for paste; helps lift residues)
- Bucket(Rinse container for large areas)
Steps
Estimated time: 60-90 minutes
- 1
Prepare the area and gather supplies
Clear the shower of personal items and place towels to catch drips. Open a window or turn on the exhaust fan to ensure good ventilation. Lay out all cleaners and tools so you can access them without stepping back into damp areas.
Tip: Organize supplies by task to keep the workflow smooth. - 2
Put on PPE and ventilate
Don nitrile gloves, safety goggles, and an N95 respirator if you are sensitive to fumes. Turn on the bathroom fan or crack a window to maintain air quality during cleaning.
Tip: If you feel dizzy or irritated, pause and step into fresh air. - 3
Identify pink mold areas
Visually inspect joints, grout lines, and shaded corners where pink film is present. Confirm areas that show persistent pink staining after a standard wipe-down.
Tip: Keep notes or photos to track progress over time. - 4
Apply cleaner and let it dwell
Apply vinegar or peroxide to affected areas and allow a brief dwell time (5-10 minutes) to disrupt biofilms. Do not mix cleaners and avoid prolonged exposure to bleach on porous grout.
Tip: Dwell time improves effectiveness on biofilm-forming bacteria. - 5
Scrub gently and rinse
Use a non-abrasive brush or toothbrush to lift residues, then rinse thoroughly with clean water. Repeat if pink staining remains visible.
Tip: Rinse from top to bottom to prevent dirty water from re-staining cleaned areas. - 6
Dry surfaces completely
Wipe surfaces dry with microfiber cloths and use a squeegee on glass or tile. Ensure grout lines are dry to reduce lingering moisture.
Tip: Drying is often the critical step for long-term prevention. - 7
Assess and plan moisture controls
Evaluate ventilation efficiency, inspect caulk and grout integrity, and consider sealing high-risk seams if needed. Establish a maintenance routine to prevent recurrence.
Tip: A short-term fix is less effective without long-term moisture control.
FAQ
What causes pink mold in the shower?
Pink mold is typically Serratia marcescens, a bacteria that thrives in moist, warm bathrooms and feeds on soap scum. It appears as a slimy pink film and is more about moisture management than a single source of contamination.
Pink mold is usually Serratia marcescens that loves damp bathrooms. It grows where soap scum and moisture linger, not because of one bad surface.
Is pink mold dangerous?
Pink mold is generally less hazardous than some black molds, but it can irritate the skin, eyes, and lungs for sensitive individuals. Proper cleaning minimizes risk, and persistent growth warrants professional assessment.
Pink mold can irritate sensitive people, but it’s not usually as dangerous as some other molds. Clean it well and monitor for persistence.
Can pink mold be removed with household cleaners?
Yes, pink mold can often be removed with plain cleaners like vinegar or hydrogen peroxide, followed by thorough drying. Avoid mixing cleaners and use appropriate dwell times for efficacy.
Yes, you can usually remove pink mold with common cleaners and a good rinse, just avoid mixing cleaners.
How can I prevent pink mold from returning?
Improve ventilation, dry surfaces after use, seal grout if needed, and clean on a regular schedule to prevent soap scum buildup. Consistent moisture control is the key.
Keep the bathroom dry after showers and clean regularly to stop pink mold from coming back.
When should I call a professional?
If mold covers large areas, recurs despite cleaning, or involves drywall or behind-wall growth, consult a licensed mold remediation specialist.
Call a professional if the mold spreads beyond simple spots or returns despite cleaning.
Watch Video
The Essentials
- Identify pink mold early and act quickly.
- Use PPE to protect skin and lungs.
- Avoid mixing cleaners to prevent harmful fumes.
- Rinse and dry thoroughly to inhibit regrowth.
- Sustain a moisture-control routine to keep showers mold-free.