Cleaning Mold in the Bathroom: Step-by-Step Guide for Homeowners
Discover a safe, step-by-step method to remove bathroom mold, prevent regrowth, and protect indoor air. Expert guidance from Mold Removal Lab on PPE, cleaners, ventilation, and moisture control.

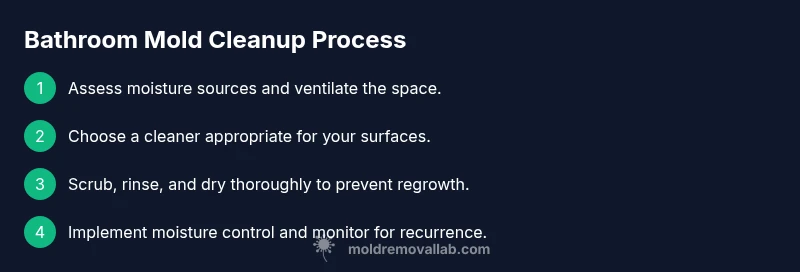
You will learn a safe, effective method to remove bathroom mold and prevent regrowth. Start with assessing moisture sources, choosing the right cleaner, and applying proper PPE. Then scrub affected surfaces, rinse, dry thoroughly, and follow up with moisture control to reduce future growth. This guide emphasizes non-toxic options and professional thresholds.
Why bathroom mold is common and why you should address it promptly
Bathroom mold is a frequent consequence of persistent humidity, shower moisture, and inadequate ventilation. The damp environment, combined with porous surfaces like drywall and grout, provides a hospitable habitat for fungi to establish colonies. According to Mold Removal Lab, bathrooms with poor ventilation experience higher chances of mold growth due to continuous moisture and heat buildup. The Mold Removal Lab team found that the most effective long-term control starts with reducing moisture sources, improving air flow, and maintaining consistent cleaning routines. If left unattended, mold can irritate respiratory systems, worsen allergies, and damage adhesives and finishes over time. A proactive approach that pairs moisture management with regular cleaning yields safer, healthier bathrooms and peace of mind for homeowners.
Key takeaway: Moisture control is the foundation of mold prevention in bathrooms, and prompt action reduces health risks and repair costs.
Safety first: PPE and space prep
Before you begin, set up a clean, well-ventilated workspace. Wear eye protection, nitrile gloves, and a breathable mask (N95 or equivalent) to guard against mold spores. Open a window or run an exhaust fan to move damp air out of the bathroom, and keep kids or pets away during the cleanup. If the mold covers large areas or you suspect hidden growth behind walls, stop and consider professional assessment. Proper PPE and ventilation are essential to minimize exposure and prevent the spread of spores to other rooms. This section emphasizes conservative risk management to protect your indoor air quality.
Pro tip: Do a quick test on a small inconspicuous spot first to ensure your cleaner won’t damage the surface; adjust your choice if you notice discoloration or peeling.
Tools and materials you’ll need
- Gloves (nitrile, disposable)
- Respirator or N95 mask
- Protective goggles
- Scrub brushes (soft and stiff)
- sponges and microfiber cloths
- Buckets and spray bottles
- Mild cleaners (white vinegar, hydrogen peroxide 3%, or an EPA-approved bathroom cleaner)
- Baking soda (optional for odor control)
- Distilled water for diluted solutions
- Ventilation: exhaust fan or dehumidifier
- Protective drop cloths or plastic sheeting
This list focuses on safe, effective options for common bathroom surfaces. If you’re cleaning painted surfaces or fiberglass, you may tailor cleaners to avoid surface damage.
Cleaning methods by surface and mold type
Mold on non-porous surfaces (tile, glass, enamel) responds well to vinegar or hydrogen peroxide. Spray, wait 5–10 minutes, then scrub and rinse. For grout and cement-based surfaces, a paste of baking soda and water can act as a gentle abrasive without harming the substrate. On painted walls or drywall, use a mild cleaner and test a hidden area first; if staining or peeling occurs, repaint or replace affected sections.
Avoid mixing ammonia with bleach; this creates hazardous gases. Bleach is generally not recommended for porous materials because it doesn’t penetrate deeply and can encourage regrowth in hidden areas. If you must use a disinfectant, choose products approved for bathroom mold and follow label directions. After cleaning, dry all surfaces completely—humidity left behind is mold’s ally. This section provides practical surface-specific guidance and cautions for common bathroom materials.
Step-by-step cleaning process (summary) for visible mold
- Identify moisture sources (leaks, poor ventilation) and ventilate the space. 2) Put on PPE and isolate the area to prevent dispersal of spores. 3) Choose a surface-appropriate cleaner (vinegar, hydrogen peroxide, or mild cleaner) and apply. 4) Scrub moldy zones with appropriate brushes until discoloration fades. 5) Rinse with clean water and dry thoroughly. 6) Reassess humidity and use a dehumidifier or exhaust fan to keep RH low. 7) Seal grout lines if needed and consider mold-resistant paint for high-humidity areas. 8) Monitor regularly and re-clean as necessary.
Tip: Allow cleaners to dwell for a few minutes where safe; this improves effectiveness on stubborn spots.
Dealing with stubborn mold and odors
If mold refuses to budge after standard cleaning, switch to a more robust, surface-appropriate option. For stubborn spots, apply a hydrogen peroxide solution, let stand for several minutes, then scrub again. On fiberglass and ceramic tiles, peroxide is generally effective without harsh fumes. For persistent odor or concealed growth, do not force removal; instead, document the area and consult a professional. Never attempt aggressive sanding on moldy drywall, as this can release spores and damage structural materials. This section covers escalation steps while prioritizing safety and surface care.
Prevention and moisture control for long-term success
Prevention hinges on moisture control and routine cleaning. Use an exhaust fan during showers, fix leaks promptly, and wipe down surfaces after use. Consider mold-resistant grout and paint in bathrooms with persistent humidity. Maintain a low humidity level with a dehumidifier if your climate promotes damp air. Regular inspections help you catch returning growth early, before it spreads. A well-planned maintenance routine is the best defense against recurring mold problems.
When to hire a professional and what to expect
If you notice mold growth that covers a large area, penetrates porous substrates, or reappears after cleaning, professional remediation may be warranted. A licensed contractor can assess hidden mold behind walls and provide guidance on remediation options. Expect an on-site inspection, containment to prevent spore spread, and a written plan detailing cleaning methods and timelines. Working with a pro helps ensure safety, reduces health risks, and addresses mold that DIY methods can’t safely remove.
Documentation and monitoring for ongoing control
Keep a simple mold diary: note dates of checks, humidity readings, and surfaces cleaned. Photograph mold stains to track progress and schedule monthly inspections during peak humidity months. This documentation assists you in evaluating whether your moisture control measures are effective and whether additional improvements are needed, such as upgrading ventilation or resealing grout. Regular monitoring supports long-term success and homeowner confidence.
Tools & Materials
- Gloves (nitrile)(Disposable; fits snugly without tearing.)
- N95 mask or respirator(Ensure a proper seal; replace if soiled.)
- Goggles(Protect eyes from splashes and spores.)
- Scrub brushes (soft and firm)(Use type appropriate for surfaces.)
- Sponge and microfiber cloths(For gentle cleaning and drying.)
- Bucket and spray bottles(For mixing and applying cleaners.)
- White vinegar, 3% hydrogen peroxide(Non-toxic options for many surfaces.)
- Baking soda(Odor control and mild abrasiveness.)
- Distilled water(Reduce mineral streaking in solutions.)
- Ventilation such as exhaust fan or dehumidifier(Critical to control humidity during and after cleaning.)
- Drop cloths or plastic sheeting(Containment if needed.)
Steps
Estimated time: 60-120 minutes
- 1
Identify moisture sources
Survey the bathroom to find leaks, condensation hotspots, and ventilation gaps. Document problem areas and plan to address them before cleaning proceeds. This step reduces recurrence by addressing underlying causes.
Tip: Fix leaks and improve airflow before deep cleaning. - 2
Prepare the space and PPE
Put on PPE, open windows, and set up fans to vent moisture. Remove loose items and cover nearby surfaces to protect them from cleaners.
Tip: Ventilation is essential to keep spores from spreading. - 3
Choose the right cleaner
Select a surface-appropriate cleaner: vinegar or hydrogen peroxide for most surfaces; a mild bathroom cleaner for painted areas. Avoid mixing chemicals.
Tip: Test a small spot first to ensure no damage. - 4
Apply cleaner and dwell time
Spray or apply cleaner over moldy areas and allow it to dwell for the recommended time to break down mold. Do not wipe immediately.
Tip: Dwelling time increases effectiveness on stubborn spots. - 5
Scrub and rinse
Gently scrub with the appropriate brush, then rinse with clean water. Repeat on very stubborn patches if necessary.
Tip: Non-porous surfaces respond best to this approach. - 6
Dry thoroughly and inspect
Use towels or a dry cloth to remove moisture. Recheck the area for residual mold or dampness and revisit if needed.
Tip: Moisture control after cleaning is crucial. - 7
Seal and monitor optional upgrades
If grout is damaged, consider resealing. Apply mold-resistant paint or grout sealant in high-humidity zones.
Tip: Prevents moisture ingress between cleaning cycles. - 8
Document and plan for ongoing maintenance
Record what was cleaned, note humidity levels, and schedule regular checks. This helps prevent regrowth.
Tip: A routine drives long-term success.
FAQ
Is it safe to clean bathroom mold myself?
For small, visible areas with proper PPE and ventilation, DIY cleaning is reasonable. If mold recurs, covers large areas, or involves porous substrates, seek professional help.
Yes, for small spots with PPE, but consider a pro if it keeps coming back or covers more area.
What surfaces can I safely clean with household cleaners?
Non-porous surfaces like tile, glass, and enamel clean well with mild cleaners, vinegar, or hydrogen peroxide. Porous materials like drywall may hide mold and could require replacement or professional remediation.
Non-porous surfaces are easier to clean; porous ones may need professional help.
Should I use bleach to remove bathroom mold?
Bleach can kill surface mold on non-porous surfaces but is not effective for porous materials. If used, ensure good ventilation and never mix with ammonia.
Bleach works on some surfaces but not all; avoid if the material is porous.
How can I prevent mold from returning in a bathroom?
Control moisture with exhaust fans, fix leaks, dry surfaces after use, seal grout, and consider mold-resistant paint in high-humidity areas.
Moisture control is key; dry everything after use and keep air moving.
When should I call a professional?
If mold covers large areas, penetrates walls, or keeps returning after cleaning, a licensed professional can assess and remediate safely.
Call a pro if you see extensive growth or hidden mold behind walls.
Can essential oils help with mold odor?
Essential oils do not remove mold; they may mask odor. Focus on removing the mold source and improving ventilation for lasting results.
Oils might mask smell but don’t fix the mold problem.
Watch Video
The Essentials
- Ventilate, dehumidify, and dry after cleaning
- Choose surface-appropriate cleaners and test first
- Address underlying moisture to prevent recurrence
- Use mold-resistant products where appropriate
- Document results and monitor humidity regularly