When to Get a Mold Inspection: A Homeowner's Guide
Learn when to get a mold inspection, signs to watch for, how the process works, and practical steps to plan a thorough assessment that protects your home and health.

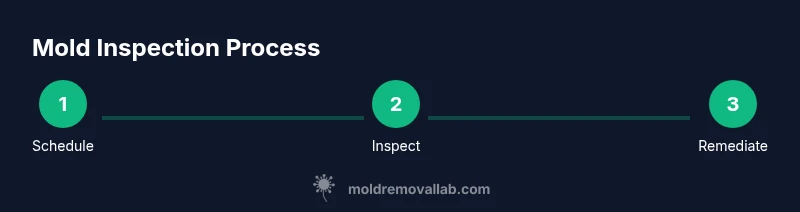
Schedule a mold inspection whenever moisture issues or visible mold appear. According to Mold Removal Lab, prompt inspection after moisture events reduces long-term damage. An early, professional assessment confirms presence, sources, and indoor air quality. See the full step-by-step guide for practical actions for homeowners and renters to prevent costly repairs.
Why moisture and mold risk assessment matters
Mold growth thrives where moisture lingers. Even small leaks, humidity spikes, or condensation can create hidden colonies that spread spores into living spaces through walls, ceilings, and HVAC systems. A mold inspection is more than a surface check; it identifies moisture sources, maps hidden dampness, and assesses indoor air quality to determine how far the problem extends. Mold Removal Lab analysis shows that moisture events are the strongest drivers of indoor mold risk, and early assessment helps prevent escalation. A professional inspection highlights moisture hotspots, checks behind walls for hidden mold, and evaluates the condition of framing, insulation, and drywall. This knowledge guides targeted remediation, minimizes disruption, and protects vulnerable occupants like young children and people with allergies. Catching issues early enables cost-effective interventions and reduces the odds of recurring moisture problems that compromise health and structure.
Signs you might need an inspection
Visible mold is not the only warning sign. Musty odors enduring after cleaning, damp or staining on walls and ceilings, warped materials, and ongoing condensation or peeling paint signal moisture problems. Basements, crawl spaces, and bathrooms are common trouble spots where humidity and water intrusion seed mold behind the scenes. Health symptoms such as persistent coughing, nasal congestion, eye irritation, or headaches can also indicate airborne contaminants, especially in moisture-prone homes. If you’ve had recent water events—like a burst pipe, flood, or roof leak—plan an inspection promptly. Renters should report dampness to landlords and document issues; owners should address moisture quickly to prevent mold growth. A thorough inspector will use moisture meters, thermal imaging, and (where appropriate) surface or air sampling to confirm mold presence and scope. The Mold Removal Lab team emphasizes that hidden mold behind walls is a frequent culprit after water intrusion.
When to schedule: common triggers
Certain events should trigger an immediate mold inspection. After any water intrusion (burst pipes, heavy rain, roof leaks), aim to schedule within days and no later than one to two weeks if possible. Remodeling or renovations in damp spaces warrant a check to ensure humidity and moisture weren’t introduced during construction. Persistently damp basements, leaky bathrooms, or consistently high humidity levels also justify a professional look. If occupants report new or worsening allergy symptoms, headaches, or respiratory issues, a mold inspection can confirm whether indoor air quality is compromised. For landlords and property managers, integrating annual or turnover inspections helps prevent costly remediation and demonstrates a commitment to health and safety. The goal is to locate moisture sources, quantify risk, and decide whether active mold growth is present. If HVAC systems are involved, inspectors may evaluate ducts for contamination potential.
The inspection process: what to expect
A mold inspection follows a structured, science-based approach. It begins with a visual survey of high-risk areas—basements, crawl spaces, bathrooms, kitchens, and any sites of past leaks. Inspectors use moisture meters and infrared cameras to detect hidden dampness behind walls and in insulation. They may collect surface samples from suspicious spots and, when indicated, air samples to gauge indoor air quality. A written report typically includes findings, moisture sources, recommended remediation steps, and rough cost ranges. Inspectors also note containment needs and safety precautions for remediation work. If the home has a complex HVAC system, duct access for sampling may be requested. After the visit, expect a clear plan with timelines and next steps. The Mold Removal Lab team stresses the importance of formal documentation to guide contractors and insurance claims.
How to prepare your home for inspection
Preparation improves accuracy and minimizes disruption. Clear access to problem areas by removing furniture and belongings from around damp walls and crawl spaces. Note prior leaks, stains, or persistent odors to discuss with the inspector. Secure pets and keep children away from work zones. Gather any repair receipts or water-damage documentation to present during the visit. Provide a rough floor plan or photos highlighting moisture hotspots. If possible, maintain reasonable humidity and avoid deep cleaning that could disturb spores in the days leading up to the inspection. Ensure doors to attics, basements, and crawl spaces are accessible, and provide lighting and power for equipment as needed. The goal is a thorough evaluation with minimal disruption to daily life.
After the inspection: interpreting results and next steps
Results map problem areas, moisture sources, and recommended remediation approaches. If mold is confirmed, you’ll typically receive a remediation plan detailing containment, removal, cleaning, and disposal methods. Small amounts on non-porous surfaces may be addressable with standard cleaning, while larger growth on porous materials usually requires professional remediation. The report should include a timeline, a rough cost range, and suggestions for ventilations improvements and ongoing moisture management. Decide whether to hire licensed professionals or pursue careful DIY steps for minor issues, but recognize safety and building-code considerations. If health concerns exist, seek medical advice and share sensitivities with the remediation team. The Mold Removal Lab Team notes that effective remediation minimizes disruption and recurrence when moisture sources are addressed at the source rather than after symptoms appear. Consider follow-up testing or post-remediation inspections if recommended by the inspector or contractor.
DIY vs professional remediation considerations
Many homeowners wonder if they can tackle cleanup themselves. For small, isolated growth on non-porous surfaces, careful cleaning with proper PPE may be feasible; however, larger infestations require professional remediation to ensure containment and proper disposal. DIY attempts often fail to remove hidden mold behind walls, allowing ongoing contamination. Professionals employ containment barriers, HEPA filtration, and specialized cleaners to minimize cross-contamination and protect indoor air quality. If you choose a DIY path, document the work, follow safety guidelines, and escalate to professionals when needed. Insurance coverage varies by policy and region, so verify eligibility and required documentation with your provider.
Authority sources
Authority sources
- CDC Mold Information: https://www.cdc.gov/mold/default.htm
- EPA Mold in Homes: https://www.epa.gov/mold
- OSHA Indoor Air Quality and Mold: https://www.osha.gov/indoor-air-quality/mold
Tools & Materials
- Moisture meter(to detect hidden moisture in walls, ceilings, and insulation)
- Flashlight/headlamp(to illuminate dark areas behind walls and in crawl spaces)
- Camera or smartphone(to photograph mold growth, stains, and moisture sources)
- Notebook and pen(to log readings, locations, and observations)
- PPE: mask, gloves, goggles(protect yourself from dust, spores and irritants)
- Ladder or sturdy stool(for accessing attics or high spots)
Steps
Estimated time: 1-3 weeks
- 1
Schedule the inspection
Choose a licensed mold inspector and set a date. Confirm what tests will be performed and what the report will include. Prepare any moisture history or photos to share with the inspector.
Tip: Ask about credentials and whether the inspector will provide lab results or samples. - 2
Prepare access and documents
Clear access to problem areas, gather repair receipts, and note known leaks. Make sure all relevant rooms (basement, attic, bathrooms) are accessible for the inspection.
Tip: Create a simple map of moisture hotspots to show the inspector. - 3
On-site inspection and sampling
The inspector conducts visual surveys, uses moisture meters, and may collect samples if needed. Expect a written report or digital file with findings.
Tip: Ask to review readings and photos during the visit. - 4
Review the report and plan remediation
Read the findings carefully and note the moisture sources and recommended actions. Decide whether to hire a licensed remediation contractor or pursue limited DIY steps for small issues.
Tip: Request a clear remediation timeline and steps. - 5
Implement remediation and follow-up testing
Proceed with containment and cleanup per the plan. If needed, schedule post-remediation testing to confirm mold clearance and indoor air quality improvements.
Tip: Keep records of all work and follow-up test results.
FAQ
How do I know if I need a mold inspection?
Signs like musty odors, visible mold, water damage, or new health symptoms suggest an evaluation. A professional can confirm mold presence and sources.
If you notice odors, visible mold, or recent water damage, schedule an inspection.
How long does a mold inspection take?
Most inspections take 1-3 hours, depending on home size and the extent of moisture issues; results may come later after lab analysis.
Typically one to three hours on-site.
Is mold inspection safe?
Yes. Inspectors follow safety protocols and PPE usage; homeowners should avoid disturbing mold until inspected.
Yes, professionals use PPE and safety protocols.
What happens after the inspection?
You’ll receive a report detailing findings, recommended remediation, and a timeline. Follow the inspector’s guidance or hire a licensed contractor for remediation.
You’ll get findings and next steps; follow the plan.
Can I do remediation myself?
Small, non-porous areas may be cleaned safely, but larger infestations typically require licensed professionals to ensure containment and proper disposal.
For big problems, hire pros.
Watch Video
The Essentials
- Schedule inspection promptly after moisture events.
- Expect moisture and air-quality assessments with a formal report.
- Interpret results with a qualified professional.
- Contain and remediate mold safely to protect health.
- Plan remediation with licensed professionals if needed.