Mold Where to Eat? Safe Mold Remediation and Food Safety for Homes
Identify indoor mold risks, distinguish edible food mold from surfaces, and follow safe remediation steps to protect your home and health for 2026.

This guide helps homeowners identify unsafe mold in living spaces and recover quickly. You will learn when to DIY and when to hire a pro, how to contain mold, and the basics of safe cleanup. Important reminder: mold on food is not a signal to eat—mold where to eat is never a good idea.
Understanding the phrase mold where to eat and why it matters
The phrase mold where to eat sounds odd, but it highlights a critical distinction: mold found in buildings is almost never safe to consume. When people see fuzzy growth on walls, ceilings, or stored foods, the first instinct should be to avoid ingestion and address the underlying moisture problem. This article from Mold Removal Lab explains how to interpret mold sightings, what to do right away, and how to prevent contamination. Throughout 2026, the guiding principle is simple: containment, drying, and removal should be deliberate and safe.
For homeowners, the takeaway is practical: treat indoor mold as a sign of excess moisture, not a feature to consume. By following structured steps, you can reduce health risks, protect belongings, and maintain a healthier living space. The Mold Removal Lab team emphasizes that prevention beats cure, so understanding mold where to eat in everyday life means prioritizing humidity control and prompt response to leaks.
Health risks and vulnerable populations
Mold exposure can trigger allergies, asthma symptoms, and respiratory infections, particularly for children, older adults, and people with immune suppression. Even low levels of mold can cause irritation for sensitive individuals. If you notice persistent cold-like symptoms, headaches, or a musty odor despite cleaning, consider testing or professional assessment. Mold Removal Lab Analysis, 2026 indicates that sustained moisture increases the risk, so controlling humidity is essential. Homeowners should not underestimate mold’s health impact, especially in bedrooms, bathrooms, and basements where humidity tends to rise.
How mold commonly enters homes and what to watch for
Mold thrives where moisture lingers—think leaky roofs, plumbing leaks, condensation on windows, or poorly ventilated bathrooms. Signs include dark stains, powdery patches, a musty odor, and peeling paint on damp walls. Porous materials like drywall and textiles are especially vulnerable because mold can penetrate deeper than surface cleaning. Early detection is key; addressing leaks, improving ventilation, and reducing humidity help keep mold at bay. Mold growth often follows seasonal changes, but rapid moisture events, such as floods or roof leaks, can create larger problems quickly.
When to DIY and when to call a pro
Small, nonporous surface mold (under about 10 square feet) can often be cleaned with household cleaners and proper PPE. If the growth is larger, involves carpeting, insulation, or porous materials, or if anyone in the home has health issues, a professional mold remediation contractor is advised. Professionals have specialized containment tools, negative pressure setups, and training to handle hidden mold behind walls. Always consider safety first: if you’re unsure about the extent or your health risks, seek expert help.
Step-by-step remediation framework (overview)
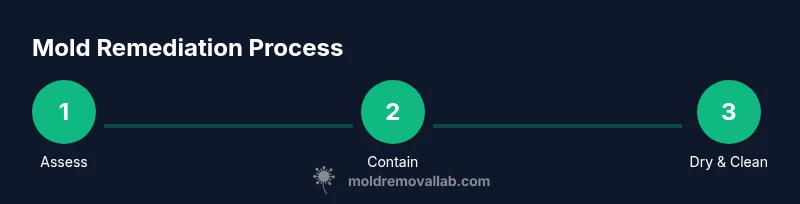
A solid remediation plan follows a repeatable framework: assess and plan, contain, remove affected materials, clean, dry, and re-inspect. This section gives an overview of the flow so you can prepare with confidence. Remember that large-scale remediation or mold in HVAC systems requires professional intervention. The framework helps reduce airborne spores, protects indoor air quality, and minimizes cross-contamination in adjacent rooms.
Cleaning products and safety: what works and what to avoid
Effective cleaning starts with plain soap and water for nonporous surfaces. Detergent solutions remove biofilms and make subsequent disinfection easier. Bleach is sometimes suggested for hard surfaces, but it should never be mixed with ammonia or vinegar due to toxic fumes. Avoid using household cleaners in a hasty, unprotected way—always wear PPE (gloves, eye protection, and an N-95 respirator if available). For porous materials, cleaning may not be enough; replacement or professional remediation is often required.
Containment and drying: controlling mold spread
Containment prevents spores from drifting to unaffected areas. Use plastic sheeting to seal off affected zones and maintain negative pressure if possible. Drying is critical: moisture left behind fuels regrowth. Use dehumidifiers and high airflow directed away from you to dry walls, floors, and contents. Do not re-enter a still-damp area where the mold spores could re-adhere, and verify humidity levels stay below 50–60% for several days after drying.
Preventing mold recurrence: long-term strategies
Prevention centers on moisture control. Regularly inspect roofs, plumbing, and gutters for leaks; fix them promptly. Use exhaust fans in bathrooms and kitchens, ensure basements are dehumidified, and choose interior finishes resistant to dampness in vulnerable areas. Maintain stable indoor humidity and monitor for musty smells, which can indicate hidden moisture. With consistent maintenance, you reduce the chance of rapid mold regrowth and protect occupants’ health.
Food safety: distinguishing edible mold from household mold
Edible mold is a carefully controlled concept used in certain foods, such as specific cheeses. Do not treat household mold as edible—never taste or consume growth on walls, ceilings, or furniture. If mold appears on food that is not cheese, discard it to avoid potential toxins. Practice separate storage for moldy foods and avoid cross-contamination with ready-to-eat foods. When in doubt, follow local health guidelines and consult a professional for mold contamination concerns.
Tools & Materials
- Personal protective equipment (PPE): gloves, eye protection, mask/N95(Ensure proper fit and replace if contaminated)
- Disposable coveralls(Optional but recommended for larger jobs)
- Plastic sheeting and tape for containment(Use 6 mil or thicker, seal edges well)
- HEPA vacuum or HEPA filter backpack vacuum(Helpful for cleanup, not mandatory for small jobs)
- Mild detergent (dish soap) and water(First-line cleaning solution)
- EPA- or manufacturer-approved mold cleaner (optional)(Follow label directions)
- Scrub brushes and non-scratch pads(Use for stubborn spots on hard surfaces)
- Plastic waste bags (heavy-duty)(Seal and dispose of contaminated materials)
- Dehumidifier or exterior fans(Essential for drying phase)
- Moisture meter or hygrometer(Helpful to track humidity progress)
- Trash bags and sealable containers(To isolate and remove contaminated items)
- Ventilation aid (opening windows/doors)(Increase air exchange where safe)
Steps
Estimated time: 60-180 minutes for cleanup, plus 24-48 hours drying
- 1
Put on PPE and prepare
Don fresh PPE: gloves, eye protection, and a mask. Create a quick plan for containment and identify all affected areas. This reduces your exposure and helps structure cleanup.
Tip: Check the area for existing leaks before proceeding. - 2
Contain the affected zone
Seal the area with plastic sheeting to prevent spores from spreading; minimize foot traffic through the space. Use tape to seal gaps around doors and vents.
Tip: Keep doors closed and create a one-way path for air movement. - 3
Ventilate and control airflow
Open outside air if safe and run a fan to direct airflow from the clean area to the outside. Avoid blowing air into other rooms.
Tip: Do not run HVAC in the space during cleanup to prevent cross-contamination. - 4
Remove and bag contaminated materials
Carefully remove porous items (carpet, drywall) if mold has penetrated deeply; bag them in sealed bags before removal.
Tip: Label bags clearly and avoid crushing contaminated items. - 5
Clean hard, nonporous surfaces
Wash surfaces with mild detergent and water; scrub to disrupt biofilm. Rinse and dry completely before applying any disinfectant.
Tip: Do not mix cleaners—follow label directions. - 6
Dry thoroughly and monitor humidity
Run a dehumidifier and increase airflow until the area is completely dry; monitor humidity and look for signs of moisture return.
Tip: Inspect hidden spaces (behind cabinets, under sinks) for residual dampness. - 7
Re-inspect and plan follow-up
After drying, re-inspect for any remaining mold or dampness; plan a follow-up cleaning if needed or call a pro for larger areas.
Tip: Document the remediation with photos for reference.
FAQ
Is it safe to clean mold myself?
Small mold growth on nonporous surfaces can be cleaned safely with proper PPE and cleaning solutions. Large growth, porous materials, or mold in HVAC systems should be handled by a professional to protect air quality and health.
You can clean small mold patches yourself if you wear proper safety gear and use the right cleaner; otherwise, call a professional for bigger problems.
What areas count as a DIY project (in square feet and material type)?
DIY is generally appropriate for up to about 10 square feet of mold on nonporous surfaces. If the growth covers porous materials, is behind walls, or exceeds the area, a professional remediation is advised.
If it’s small and on solid surfaces, you can DIY; larger or porous areas should be handled by pros.
Can mold return after remediation?
Yes, if moisture sources aren’t controlled. The key to preventing return is ongoing moisture management, prompt leak repair, and regular inspections.
Mold can come back if moisture isn’t controlled, so continue to monitor humidity and fix leaks.
When should I test for mold?
Testing is often optional, especially after a thorough cleaning and dry-out. Consider testing if musty odors persist, symptoms continue, or if you’ve had significant water damage.
Test mold if bad odors stick around or you’ve had major water damage and symptoms persist.
Are there safe cleaning products for mold?
Soap and water or detergent solutions are effective for many surfaces. Use approved mold cleaners per label directions and avoid mixing cleaners to minimize fumes.
Use soap and water first, and follow product directions—don’t mix cleaners.
Watch Video
The Essentials
- Identify mold signs early and manage moisture promptly
- Contain and dry to prevent spread and regrowth
- DIY small mold jobs on nonporous surfaces; call a pro for large or porous areas
- Do not eat mold or use it as a remediation cue in the home