Metal Casting Mold: A Practical Step-by-Step Guide
Learn to select, prepare, and use a metal casting mold safely and efficiently with practical steps, materials, and best practices from Mold Removal Lab.

With this guide, you’ll learn how to select, prepare, and use a metal casting mold safely and effectively. It covers mold materials, design considerations, venting, and finish quality, plus common defects and fixes. You’ll find a practical step-by-step workflow, safety cautions, and maintenance tips to minimize waste, protect tooling, and achieve consistent, high-quality casts.
What is a metal casting mold?
In metal casting, a metal casting mold is a shaped cavity that defines the final geometry of a poured metal part. According to Mold Removal Lab, the mold is a critical part of the process because its design determines resistance to heat, ease of release, and the surface finish. A typical metal casting mold includes a core, a gating system, and a mold frame. The cavity shape is created in materials that can withstand molten metal temperatures, such as sand-bound mixtures, ceramic compounds, graphite blocks, or reusable metal dies. The choice depends on the metal being cast, expected production volume, and required tolerances. A well-designed mold minimizes defects, reduces trimming, and supports consistent repeatability across cycles. Beyond the cavity, attention to vents, risers, and alignment features ensures the molten metal flows smoothly and cools predictably, improving yield and reducing scrap.
Mold materials: Sand, ceramic, graphite and metals
Molds for metal casting come in several families, each with trade-offs in thermal stability, cost, and ease of use. Sand molds are versatile and inexpensive for low to mid-volume runs, but surface finish may require more finishing work. Ceramic molds withstand high temperatures and provide excellent dimensional stability, but can be fragile and costly. Graphite molds offer superb thermal conductivity and release properties, ideal for high-volume, high-temperature alloys, yet they can be expensive and wear with use. Reusable metal dies deliver high repeatability for simple, flat parts but demand strong tooling and precise maintenance. The best choice depends on alloy (steel, aluminum, bronze), pour temperature, part geometry, and projected production volume. Based on Mold Removal Lab analysis, selecting the right mold material and maintaining appropriate release conditions fundamentally influence surface quality and defect rates.
Types of metal casting molds you’ll encounter
There are several mold types used in metal casting, each suited to different applications:
- Sand molds: flexible, affordable, and easy to modify; ideal for prototypes or small runs.
- Ceramic or silica-based molds: rigid and temperature-stable; good for complex shapes but require careful handling and investment.
- Investment casting (lost-wax): high precision for intricate parts; higher cost per unit but exceptional surface finish.
- Graphite molds: excellent thermal management; best for high-temperature alloys and high-volume runs.
- Permanent metal dies: reusable and precise; suited to mass production of simple geometries. A well-chosen mold type aligns with part complexity, tolerance needs, and production economics. Mold designers often combine mold families with coatings to improve release and reduce sticking.
Gating, vents, and runners: guiding the flow
A successful pour depends on the gating system, vents, and runners that guide the molten metal into the mold cavity. The gating system controls fill rate, reduces turbulence, and minimizes inclusions. Proper vents prevent gas entrapment and porosity. Runners connect the pour cup to the cavity while keeping a balanced flow. The goal is a steady, predictable fill that avoids cold shuts and misruns. Based on Mold Removal Lab analysis, proper venting and release agents significantly improve surface finish and dimensional stability by reducing gas-related defects and sticking. Design choices should match alloy viscosity and pouring temperature, with allowances for shrinkage and post-cast finishing.
Designing a mold for repeatability and safety
Designing a mold for repeatability means specifying consistent parting lines, alignment features, and surface finishes. Draft angles help parts release with minimal resistance, while fillets reduce stress concentrations that lead to cracks. Core placement must be precise to avoid misalignment and dimensional drift. Surface coatings or ceramic mold washes can improve release and reduce sticking for certain alloys. Safety considerations include ensuring that the mold frame is robust, vent channels are clear, and gating is sized to minimize hot spots. By planning the design with manufacturability in mind, you reduce scrap and rework and improve part-to-part consistency.
Mold preparation and preheat: setting the stage
Before pouring, clean the mold surfaces to remove dust, oils, and failed material residues. For many molds, a preheat step reduces thermal shock and stabilizes the mold temperature, which helps the alloy pour more predictably. Preheating should be gradual and within the material limits of the mold interface to avoid cracking. Use a controlled heat source and monitor mold temperature with contact thermocouples. Proper preparation minimizes mold wear during the pour and contributes to dimensional stability in the final casting. Remember that release agents must be applied in accordance with the material and coating system used.
Pouring, cooling, and mold release: practical tips
Pour molten metal slowly and steadily to minimize turbulence and impurity entrapment. A uniform pour rate helps fill the mold evenly and reduces the likelihood of cold shuts. After pouring, allow the casting to cool undisturbed according to alloy-specific guidelines before attempting mold separation. Use appropriate tools to split the mold halves without damaging the cavity or the part. Controlled cooling and careful release improve surface finish and dimensional accuracy, reducing the need for post-casting machining. A clean separation also extends mold life by preventing micro-cracks during part removal.
Mold inspection, maintenance, and lifecycle
Periodic inspection of molds is essential to catch wear, cracks, and misalignment early. Maintenance includes cleaning, re-coating, and verifying the fit between mold halves and cores. Document wear patterns and track cycle counts to predict remaining life and schedule replacements. Store molds in a dry, stable environment to minimize corrosion and material fatigue. Regular inspection and maintenance extend mold life, reduce downtime, and improve casting consistency over multiple production runs.
Common defects and troubleshooting for metal casting molds
Common defects include porosity, cold shuts, misruns, and surface delamination. Porosity often signals gas entrapment or pore formation due to moisture or poor venting. Cold shuts indicate insufficient fill or slow gates; adjusting gate size and pour temperature can help. Misruns occur when the metal fails to completely fill the cavity, often due to insufficient sprue or misalignment. Troubleshooting involves verifying venting, gating, mold temperature, and pour speed. By systematically checking each element, you can identify root causes and implement targeted fixes.
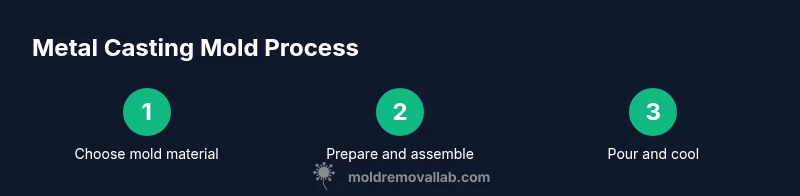
A practical workflow for a simple part: a bracket in aluminum
- Define objective and select a mold type. 2) Plan gating and vents for aluminum’s viscosity. 3) Assemble mold halves with alignment pins. 4) Preheat to recommended temperature. 5) Pour slowly, monitoring fill. 6) Allow to cool completely before opening. 7) Inspect for defects and trim any flash. 8) Clean, document, and store the mold. This workflow helps standardize the process for repeatable results across runs.
Tools & Materials
- Personal protective equipment (PPE): heat-resistant gloves, safety glasses, and apron(Choose flame-resistant materials and impact protection)
- Mold material: sand, ceramic, graphite, or metal die(Match to alloy and production requirements)
- Release agent(Apply evenly to prevent sticking)
- Gating components (sprues, runners, risers)(Size to casting volume and filling rate)
- Core materials (if needed for internal features)(Only for cavities needing cores)
- Crucible tongs(For handling hot mold parts safely)
- Furnace or melter(For melting the metal to the required temperature)
- Calipers or micrometer(For dimensional checks before and after casting)
- Cleaning brushes and solvents(For post-cast mold cleaning and maintenance)
- Clamps and alignment pins(Used to maintain register during pouring)
- Dry rags and a heat-resistant work surface(General workspace organization)
Steps
Estimated time: 60-120 minutes
- 1
Define objective and select mold type
Outline the part geometry, tolerances, and production quantity. Choose mold materials that handle the alloy and pouring temperature. Confirm gating and venting requirements before proceeding.
Tip: Document the criteria to guide the design and future runs. - 2
Plan gating, vents, and cores
Sketch a gating layout; sizes depend on metal volume and fill speed. Place vents to prevent gas traps. If the part requires cores, verify alignment and shrinkage.
Tip: Avoid undersized gates that cause misruns. - 3
Assemble mold components and secure alignment
Assemble the mold halves, cores, and any inserts. Use alignment pins and clamps to maintain register during pouring.
Tip: Double-check mold orientation to prevent misalignment. - 4
Preheat mold to target temperature
Preheating reduces thermal shock and helps control pour temperature. Use a staged preheat so the mold reaches the target gradually.
Tip: Avoid overheating beyond material limits to prevent cracks. - 5
Pour molten metal with controlled rate
Pour molten metal slowly and steadily to minimize turbulence. Watch for flash and ensure the mold fills evenly.
Tip: Use a ladle with a consistent pour height to control flow. - 6
Allow to cool and release the casting
Let the assembly cool until solid, then separate halves carefully. Use appropriate tools to avoid damaging the mold or part.
Tip: Drain any residual heat before handling to avoid burns. - 7
Inspect, trim, and store mold
Inspect for cracks, wear, or deformation. Trim flash if needed and store in a dry, stable location.
Tip: Log wear patterns to predict when replacements are needed.
FAQ
What is a metal casting mold and why is it important?
A metal casting mold shapes molten metal into the final part. The mold design affects surface finish, tolerances, and defect risk, making it central to quality casts.
A mold shapes molten metal into the final part, so its quality really matters.
What materials are commonly used for metal casting molds?
Common mold materials include sand, ceramic, graphite, and metal dies. The choice depends on alloy, pouring temperature, and production volume.
Sand, ceramic, graphite, and metal dies are typical mold materials, chosen by alloy and production needs.
How can I prevent porosity and misruns in my casts?
Ensure proper venting and gating, maintain mold temperature, and monitor pour rate. Regular inspection helps catch issues early.
Keep vents clear, gate size appropriate, and pour at a stable temperature to avoid defects.
How often should molds be inspected and replaced?
Inspect after each run for cracks and wear; replace when damage affects safety or casting quality.
Check molds after every run and replace when you see cracks or excessive wear.
Is it safe to reuse metal casting molds?
Reusable molds can be economical but require diligent maintenance and cleaning; replace when cracks or recurring defects appear.
Reuse is possible, but monitor wear and cracks and maintain them well.
What safety measures are essential?
Wear PPE, keep a safe distance from molten metal, ensure proper ventilation, and follow furnace safety protocols.
Always wear PPE and work in a well-ventilated area with proper furnace safety.
Watch Video
The Essentials
- Choose the right mold material for your alloy and volume.
- Design gating and vents to minimize defects and ensure complete fill.
- Maintain mold temperature and release conditions for surface quality.
- Inspect and document mold wear to extend lifecycle.
- The Mold Removal Lab Team emphasizes safety and routine maintenance for reliable casts.