How to Clean Mold from a Humidifier: A Practical Guide
Learn safe, proven steps to remove mold from your humidifier, prevent regrowth, and protect indoor air quality with Mold Removal Lab’s expert guidance.

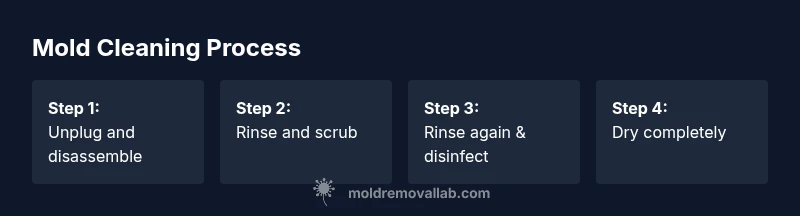
Unplug and disassemble the humidifier, scrub all surfaces with a vinegar-based solution, rinse thoroughly, dry completely, and refill with clean water. Then run the unit with fresh water only to flush out residues. Regular maintenance, including drying after each use and periodic deep cleaning, prevents mold regrowth and protects indoor air quality for your family.
What mold in a humidifier means and health considerations
Mold growth inside a humidifier happens when moisture lingers in a tank, reservoir, or base. The spores can become airborne when the unit runs, especially in small spaces or poorly ventilated rooms. When you’re looking for practical guidance on how to clean mold from a humidifier, remember that addressing both moisture and surface contamination is essential. According to Mold Removal Lab, mold in humidifiers indicates persistent moisture problems and can release spores into air, elevating indoor exposure. The first sign is often a musty odor or visible discoloration on the tank walls. Addressing it promptly reduces health risks for sensitive individuals and helps protect your family’s air quality.
Health impacts and why you should act quickly
Exposure to mold spores can trigger allergic reactions, coughing, wheezing, or throat irritation, particularly for children, the elderly, and people with asthma or compromised immunity. Even non-toxic molds can degrade air quality and lead to ongoing symptoms if left unchecked. Mold Removal Lab analysis shows that timely intervention not only removes visible mold but also lowers the likelihood of spores lingering in HVAC systems or furniture near the humidifier. By acting quickly, you minimize potential respiratory symptoms and safeguard your living environment.
Safety gear and prep
Cleaning a moldy humidifier requires protective gear to minimize contact with mold spores and cleaning fumes. Put on gloves, safety goggles, and a properly fitted mask (N95 or equivalent is ideal). Work in a well-ventilated area and keep kids and pets away during cleaning. Have all tools and cleaners lined up before you start to avoid leaving parts exposed to air that could re-contaminate surfaces. Safety comes first—this is not a cosmetic cleanup.
When to clean versus replace
If you notice mold on non-removable seals, warped plastic, persistent odor after cleaning, or recurring mold after several cleanings, replacement parts or the unit itself may be the safer option. Some humidifier components, like gaskets, seals, or the tank material, may degrade, making thorough cleaning ineffective. In such cases, replacing the affected parts or upgrading to a more mold-resistant model can be a wise investment for long-term air quality and lower maintenance.
The step-by-step cleaning process at a glance
This section outlines the core actions you’ll perform, while the dedicated STEP-BY-STEP block provides exact instructions. The goal is to remove mold, neutralize odors, and ensure the unit is dry before use. Start with disassembly, cleanse all reachable surfaces, and finish with a thorough rinse and drying. Use a vinegar-based cleaner as a primary mold-killer, and reserve hydrogen peroxide or alcohol for stubborn spots. Never mix cleaners with bleach or ammonia.
Cleaning different parts: reservoir, base, and filters
- Reservoir: Empty, rinse, scrub with vinegar solution, and rinse again until no residue remains. - Base: Wipe with vinegar solution, especially around the inlet, outlet, and any seams. - Filters (if present): Check the manual; many filters are not water-cleanable. If replacement is advised, replace with an OEM part rather than attempting to clean a degraded filter. - Seals and gaskets: Clean the seals carefully, as mold often hides in these crevices. - Ultrasonic diffusers (if applicable): Rinse and wipe gently; avoid aggressive scrubbing that could scratch the surface.
Drying, disinfection, and odor control
After cleaning, dry every component completely before reassembly. Use a clean microfiber cloth to remove moisture, then air-dry in a well-ventilated area. For disinfection, hydrogen peroxide or isopropyl alcohol can be used on non-electronic surfaces; ensure no moisture remains before reassembly. To control odor, run a cycle with clean water after the final rinse and consider a daily rinse with plain water to prevent residual buildup.
Preventing mold recurrence: maintenance routine
Prevention is easier than remediation. Empty and dry the tank daily after use, store with cap removed to improve airflow, and perform a deep clean every 1–2 weeks during heavy use. Keep the humidifier in a well-ventilated area, maintain a constant but moderate humidity level (roughly 30–50%), and replace water daily to minimize mineral deposits that mold can cling to. Regular inspections of seals and gaskets help catch issues early.
Troubleshooting and common mistakes
Common mistakes include using bleach in a plastic reservoir, which can degrade plastic over time, or neglecting to dry the tank completely, which invites regrowth. Always rinse thoroughly and inspect for any remaining spots before reassembly. If you notice persistent mold despite cleaning, consider replacement parts or a new unit. The Mold Removal Lab team recommends documenting your maintenance routine to track mold recurrence and adjust cleaning frequency as needed.
Authority sources
- Center for Disease Control and Prevention (CDC): Mold and indoor air quality guidance. https://www.cdc.gov/mold/dampness_fungi.html
- United States Environmental Protection Agency (EPA): Mold remediation guidelines. https://www.epa.gov/mold/mold-remediation-buildings
- Occupational Safety and Health Administration (OSHA): Mold safety resources. https://www.osha.gov/mold
Tools & Materials
- Gloves (nitrile or latex)(protect hands from cleaners and spores)
- Safety goggles(eye protection)
- Face mask with filtration (N95 if available)(to avoid inhaling spores)
- Soft-bristle brush(for scrubbing narrow areas)
- Microfiber cloths(drying and wiping)
- White vinegar(acetic acid helps mold; use undiluted or 50/50 with water)
- Isopropyl alcohol 70%(extra disinfection for stubborn spots)
- Hydrogen peroxide(3% solution for disinfection)
- Mild dish soap(initial cleaning)
- Clean water for rinsing(never reuse dirty water)
- Toothbrush or bottle brush(for tight corners)
- Replacement humidifier lid or seals(if seals are degraded)
Steps
Estimated time: 30-60 minutes
- 1
Unplug and disassemble the humidifier
Power off the unit and disconnect from the power source. Remove the water tank, lid, and any detachable components. Keep screws or small parts in a labeled container to avoid losing them.
Tip: Label parts as you go to prevent mix-ups during reassembly. - 2
Drain and rinse the water tank
Empty any remaining water and rinse the tank to remove loose debris. If you see mineral deposits, gently scrub with a soft brush and a vinegar solution.
Tip: Avoid abrasive pads that could scratch plastic surfaces. - 3
Prepare the cleaning solution
Mix white vinegar with water in a 1:1 ratio for mold-killing effectiveness. You can alternate with a mild dish soap solution for grease or film. Do not mix cleaners with bleach or ammonia.
Tip: Do not mix vinegar with bleach—this can release harmful gases. - 4
Scrub reservoir, base, and detachable parts
Use the bottle brush and microfiber cloths to scrub all surfaces, paying attention to corners, seams, and gaskets where mold hides. Remove any detachable parts for thorough cleaning.
Tip: Focus on the gasket and seals; mold often hides in these joints. - 5
Rinse thoroughly and inspect
Rinse each component until residual cleaner and odor are gone. Inspect for any remaining spots; repeat cleaning if necessary. Ensure no cleaner residue remains before reassembly.
Tip: Bright lighting helps reveal faint mold staining you might otherwise miss. - 6
Disinfect and dry
If desired, apply a disinfectant like hydrogen peroxide to non-electronic parts and wipe clean. Allow parts to air-dry completely in a well-ventilated area.
Tip: Never leave water in the base while it remains damp; moisture invites new growth. - 7
Reassemble and test run
Reassemble the humidifier, fill with clean water, and run it for a short cycle to ensure proper operation. Discard the first few cups of water after cleaning.
Tip: Let the internal components dry fully before first use to prevent mold regrowth.
FAQ
Is mold in a humidifier dangerous to my health?
Yes, mold can release spores that irritate the lungs and trigger allergies, especially in sensitive individuals. Proper cleaning and drying reduce exposure.
Mold in humidifiers can irritate airways; clean thoroughly and keep the unit dry to protect health.
How often should I clean my humidifier to prevent mold?
Clean the humidifier at least weekly during periods of heavy use and after any noticeable mold or musty odors. More frequent cleaning is advisable in humid climates.
Clean weekly during heavy use and whenever you notice a musty smell or visible mold.
Can I use bleach to clean a humidifier?
Bleach can corrode plastic parts and produce hazardous fumes in enclosed spaces. Use vinegar and water or manufacturer's recommended cleaners instead.
Bleach is usually not recommended for humidifiers; stick with vinegar and water or the approved cleaner.
What about replacing parts instead of cleaning?
If seals, gaskets, or tanks show persistent mold or cracking, replacement parts or a new unit may be safer and more cost-effective than repeated cleaning.
If parts are degraded, consider replacement for safety and reliability.
Should I run the humidifier with plain water after cleaning?
Yes. Run a cycle with clean water to flush residues and odors, then dry before storing or reusing.
Always flush with clean water after cleaning and let parts dry completely.
Watch Video
The Essentials
- Unplug and disassemble before cleaning.
- Use vinegar-based solutions for mold while avoiding mixed cleaners.
- Rinse, dry thoroughly, and run clean water after cleaning.
- Inspect seals and gaskets for hidden mold and replace if degraded.
- Maintain a regular cleaning schedule to prevent recurrence.