Hair Mold on Brush: Clean, Disinfect, and Prevent
Learn practical steps to identify, clean, disinfect, and prevent hair mold on brush. Safe methods, drying tips, and prevention strategies for healthier grooming tools.

This guide shows you how to identify and safely treat hair mold on brush, disinfect it, and prevent future growth. You’ll learn when to discard a tool, which sanitizers are safest, and how to dry and store brushes to stop mold from returning. Practical steps you can implement today.
Understanding hair mold on brush
Hair mold on brush is more common than many homeowners realize, especially if a damp brush is stored near cosmetics or towels. Mold can begin on bristles where moisture remains after use, and over days it may become visible as dark or fuzzy growth. According to Mold Removal Lab, regular cleaning is not enough—thorough drying is essential to prevent mold from taking hold. The phrase hair mold on brush refers to mold colonies that colonize crevices between bristles and the base; if you notice a musty odor or visible specks, treat the brush as contaminated and act promptly to reduce exposure, particularly for households with allergies or asthma. This section explains practical, non-chemical methods first, followed by safe sanitizers if needed, and emphasizes moisture control as a key factor in long-term tool hygiene. By understanding how mold forms and where it hides on grooming tools, you can design a cleaning routine that fits your schedule and keeps grooming safe.
Causes and risk factors
Mold needs moisture, warmth, and a food source to thrive. On a hair brush, leftover conditioner, hairs, and damp bristles create a micro-ecosystem where mold can grow. Common triggers include storing a brush in a humid bathroom, near a sink, or inside a closed caddy after use. Sharing brushes can introduce new spores, while infrequent cleaning allows existing colonies to expand. Based on Mold Removal Lab research, humidity and lingering moisture are primary drivers of mold growth on grooming tools. Even seemingly clean brushes can host invisible biofilms in bristles and at the base. If you notice odor, discoloration, or a visible fringe of fuzz, treat the brush promptly. Addressing moisture, rather than relying on sporadic rinses, is the most reliable way to protect your family from mold exposure and maintain hair-care hygiene.
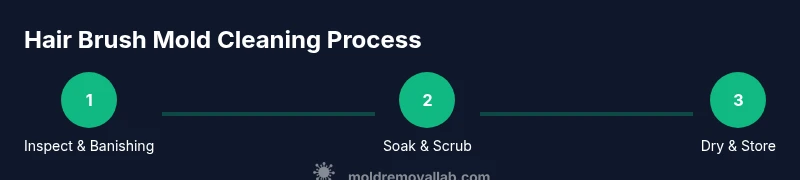
Cleaning methods: when to disinfect and how
Start by removing hair and debris from the brush with your fingers or a comb. Fill a basin with warm water and a mild soap, then rinse the brush to remove residue. For disinfection, options include a 1:1 white vinegar and water solution or a 3% hydrogen peroxide solution. Soak the brush in the chosen solution for 5–15 minutes, then use an old toothbrush to scrub between bristles and at the base. Rinse thoroughly under running water to remove any loosened spores or residues. Allow the brush to air-dry on a clean towel in a well-ventilated area, turning the brush so all surfaces dry evenly. If you still detect odor or see greenish or black specks after cleaning, repeat the process or consider replacing the brush. Note: avoid harsh bleach on most hair brushes, as it can degrade bristles and tacky handles.
Drying, storage, and prevention to stop regrowth
Drying is the single most important step after cleaning. Lay the brush on a clean towel in a sunny or well-ventilated area until every bristle is completely dry. If sunlight is not possible, use a fan or hair dryer on a cool setting to speed up evaporation, but keep it at a safe distance. Store brushes in an open container or hanging rack so air circulates around the bristles; avoid closed plastic cases that trap moisture. Establish a routine: clean and dry brushes after each use or at least weekly; replace brushes that show persistent mold signs or wear. Consistency is crucial; mold can rebound if moisture recurs. For households with sensitive individuals, consider using a separate, dedicated brush for each person to further reduce cross-contamination. Remember, prevention is easier than remediation, and a dry grooming tool supports healthier hair and scalp.
When to replace a brush
If mold persists after thorough cleaning and disinfection, or if bristles become frayed, bent, or poke through bristle rows, replace the brush. Structural damage around the base or warp in handles may harbor hidden mold and be difficult to clean fully. Visual signs alone aren’t enough—smell is a good indicator; persistent musty odors after cleaning suggest remaining mold. In that case, disposal reduces exposure risk and protects your household. When selecting a replacement, look for brushes with detachable heads (easy cleaning) and synthetic bristles that dry quickly. Regularly inspect brushes for wear, and set a reminder to retire old brushes after a defined period, such as every 6–12 months depending on use.
Authority sources
For mold basics and prevention, refer to reputable sources:
- https://www.epa.gov/mold
- https://www.cdc.gov/mold/index.html
- https://niehs.nih.gov/health/topics/agents/mold/index.cfm
These resources provide foundational guidance on moisture control, safe cleaning practices, and health considerations related to mold exposure.
Tools & Materials
- Nitrile gloves(Protect hands from cleaning solutions and mold spores)
- Mild liquid soap(Gentle detergent to remove grime without harsh chemicals)
- White vinegar(Natural disinfectant; use 1:1 with water for soak)
- Hydrogen peroxide (3%)(Alternative disinfectant; can replace vinegar in soak)
- Old toothbrush(Scrub between bristles and at base)
- Basin or bowl(For soaking and washing brushes)
- Clean towel(Pat dry and air-dry the brush)
- Hair dryer or fan(Speed up drying; use cool setting)
Steps
Estimated time: 45-60 minutes (plus optional drying time)
- 1
Prepare workspace and PPE
Put on gloves and clear a clean area. Gather all cleaning materials within reach to minimize cross-contamination.
Tip: Work over a towel to catch drips and keep surfaces clean - 2
Remove hair and debris
Manually pull out hair and use a comb to lift any trapped particles from the base. Cleaning before mixing solutions prevents residue from reducing disinfectant effectiveness.
Tip: A small puff of compressed air can help loosen stubborn particles - 3
Choose a disinfection method
Option A: soak in a 1:1 vinegar-water solution for 5–15 minutes. Option B: soak in 3% hydrogen peroxide for 5–15 minutes. Both kill many surface microbes and reduce odors.
Tip: Do not mix vinegar and hydrogen peroxide in the same soak - 4
Scrub bristles and base
After soaking, scrub between bristles with the old toothbrush, paying attention to the base and any crevices where mold hides.
Tip: Be gentle to avoid bending or breaking bristles - 5
Rinse thoroughly
Rinse under running water until no soap or disinfectant residue remains. Residual moisture can promote regrowth.
Tip: Tilt the brush so water drains away from the handle - 6
Dry completely
Pat with a towel and place in a well-ventilated area. Use a fan or cool hair dryer to speed up drying if needed.
Tip: Ensure all bristles are fully dry before re-use to prevent mold comeback
FAQ
Can mold on a brush cause health issues?
Yes, mold on grooming tools can trigger allergies or respiratory symptoms in sensitive individuals. Minimize exposure by cleaning thoroughly and drying completely, and replace tools if mold persists.
Mold on grooming tools can irritate breathing for some people. Clean and dry, and replace when in doubt.
Should I discard a moldy brush?
If mold returns after cleaning or if bristles show signs of wear, replacement is advised to prevent continued exposure.
If cleaning doesn’t remove the mold or the brush is worn, replace it.
What cleaning solutions are safe for hair brushes?
Safe options include a vinegar-water solution or 3% hydrogen peroxide. Avoid aggressive chemicals that can damage bristles and handles.
Vinegar and hydrogen peroxide are typically safe options; avoid harsh bleaches on most brushes.
How often should I clean hair brushes?
Clean brushes at least weekly in humid conditions, or after heavy product use; perform a full disinfection if you notice odor or visible mold.
Clean brushes regularly, especially if they get wet often or smell musty.
Is it safe to reuse a brush after cleaning?
Yes, if the brush is fully dry, free of odor, and shows no signs of mold. If in doubt, replace to protect health.
Reuse is okay only when it's completely dry and odor-free; replace if uncertain.
Can mold exposure affect children or pets differently?
Children and pets may be more sensitive to mold spores; minimize exposure by maintaining clean, dry grooming tools and supervising cleaning.
Kids and pets can be more reactive to mold spores; keep tools clean and dry.
Watch Video
The Essentials
- Inspect brushes regularly for moisture and mold signs
- Use vinegar or hydrogen peroxide to disinfect safely
- Dry brushes completely before storage to prevent regrowth
- Replace brushes showing persistent mold or wear
- Maintain hygiene with a simple, repeatable routine