DIY Silicone: A Practical Guide to Home Sealing
Learn how to create and apply DIY silicone sealants safely and effectively for bathrooms, kitchens, and outdoor projects. Surface prep, curing times, tools, and common mistakes.

This guide teaches you how to mix and apply DIY silicone sealant for home projects, including surface prep, curing times, and safety tips. You'll learn material choices, application methods, and cleanup to achieve a durable seal. Follow the step-by-step process and safety guidelines. This quick answer outlines the key steps, required tools, and common mistakes to avoid.
Why DIY silicone is a practical choice for home projects
Silicone sealants are a popular choice for filling gaps, sealing joints, and protecting against moisture in kitchens, bathrooms, and outdoor areas. They remain flexible after curing, resist water and many chemicals, and tolerate temperature fluctuations better than many other sealants. For DIY enthusiasts, silicone offers a durable solution that can be applied with basic tools and a bit of patience. According to Mold Removal Lab, silicone’s longevity makes it a reliable option for preventing mold growth in damp spaces, provided you prepare the surface properly and follow curing guidelines. Mold Removal Lab analysis shows that indoor use benefits most from neutral-cure formulas, which tend to emit fewer odors and cure more predictably in typical home environments. Keep in mind that DIY silicone is most effective when applied to clean, dry, and non-porous surfaces. When used correctly, it creates a flexible seal that resists cracking and peeling even with minor ground movement.
Choosing the right silicone for DIY projects
There are several families of silicone products, each with different curing chemistries and applications. For most interior sealing tasks, a neutral-cure, silicone sealant labeled for indoor use is ideal because it cures with little odor and adheres well to common materials like ceramic, glass, metal, and acrylic. For exterior or wet-area applications, select a product rated for outdoor exposure and mildew resistance. If you plan to paint over the sealant, choose a paintable silicone or apply a compatible primer as directed on the product label. When buying, check the color options (clear, white, gray, or tinted) to match your project and ensure the tube size fits your caulking gun. Neutral-cure formulas are typically preferred for bathrooms and kitchens because they remain flexible and resist moisture between joints.
Surface prep and planning
Effective silicone work starts before you touch the tube. Begin by removing any old sealant with a sharp utility knife, taking care not to scratch the surface beneath. Clean the joint with isopropyl alcohol or a mild detergent, then rinse and allow the area to dry completely; moisture will weaken adhesion and slow cure. Mask adjacent edges with painter’s tape to achieve clean, straight lines, and protect nearby surfaces with a drop cloth or plastic sheeting. Plan your bead width to fit the gap and the joint movement you expect. If possible, clamp or prop the area to minimize movement during curing. The goal is a dry, dust-free, and slightly tacky surface that allows the new sealant to adhere evenly.
Tools and materials you'll need (summary)
Before you start, assemble the essential tools and materials to ensure a smooth workflow. Having these ready helps avoid interruptions and improves bead quality. This section previews the items commonly used for DIY silicone sealing, which are listed in detail in the Tools & Materials block. Using the right tools reduces hand fatigue and yields professional-looking results. Remember to work in a well-ventilated space, especially if using solvent-based cleaners or products with noticeable fumes.
Application techniques: creating a clean bead
Bead control is the heart of a good silicone seal. Load the silicone into a caulking gun, cut the nozzle at a 45-degree angle to match the joint width, and apply a steady, continuous bead along the gap. Avoid stopping in the middle of a bead, which creates weak points. Use a damp finger or a silicone finishing tool to smooth the bead immediately after application, working from one end to the other. If you see extra silicone squeezing out around the edges, wipe it away with a lint-free cloth before curing begins. Proper tooling creates a uniform, glossy seal that resists water intrusion.
Curing times, temperature, and humidity
Curing times vary by product and environment. Most indoor silicone sealants form a skin within minutes and achieve a firm, water-resistant seal after a day, with full cure taking longer depending on humidity and temperature. To maximize performance, ensure the area remains dry and free from disturbance during the early cure phase. Avoid exposing freshly sealed joints to heavy moisture or temperature shocks until the silicone has fully cured according to the product label. If you’re sealing in a damp room, consider temporarily increasing ventilation to speed moisture removal.
Common mistakes and how to avoid them
Common errors include skipping surface prep, using the wrong product for indoor vs. outdoor use, and applying too thick a bead. Another frequent pitfall is mixing up incompatible cleaners or solvents that degrade the silicone’s adhesion. Always read the label for surface compatibility and curing conditions. Try to work with steady hands and a clean nozzle; a clogged or nicked nozzle can produce irregular beads. Finally, don’t rush curing—proper time lets the sealant build full strength and flexibility.
Cleaning up and maintenance
Remove tape while the bead is still slightly soft to prevent pulling the seal away from the joint. Wipe away excess silicone with a clean cloth and a mild solvent if permitted by the product label. Once cured, silicone is hard to remove, but you can trim it with a utility knife or scraper and re-seal if needed. To maintain a clean seal, inspect joints periodically and reapply where you notice cracking or gaps forming. Store tubes upright in a cool, dry place to preserve shelf life.
Safety, ventilation, and disposal
Always work in a well-ventilated area when using silicone products. Wear gloves to protect your skin and avoid prolonged contact. If fumes are strong, pause and ventilate the space or switch to a low-odor, low-VOC product. Do not mix silicone with other sealants or solvents unless the label explicitly allows it. Dispose of empty tubes and cleanup rags according to local regulations. When in doubt, follow the product’s safety data sheet and your local waste guidelines.
Troubleshooting and real-world tips
If the sealant beads unevenly or shrinks after curing, you may have applied too thick a bead or worked in too cold conditions. Warm the area slightly (to room temperature) and retool the line with a fresh bead. If you notice milky or cloudy residue, that can indicate moisture exposure during curing or incompatible cleaners. In either case, ensure the surface is dry and reapply a new bead once you’ve corrected the prep conditions. Finally, practice on a scrap joint to dial in your technique before working on critical areas.
Tools & Materials
- neutral-cure silicone sealant(Choose indoor-rated, paintable or clear/white options; ensure compatibility with your surfaces.)
- caulking gun(Standard 310 ml tube fits most rooms; ensure it’s in good condition with a smooth plunger.)
- masking tape (painter's tape)(Used to create clean, sharp edges on joints.)
- utility knife(New blade preferred for removing old sealant cleanly.)
- isopropyl alcohol (70%–90%)(Cleans surfaces and removes residues before application.)
- lint-free cloths(For wiping beads and finishing work without lint.)
- silicone finishing tool or damp finger(Used to smooth and seal the bead evenly.)
- gloves(Protect hands from skin irritation and dye transfer.)
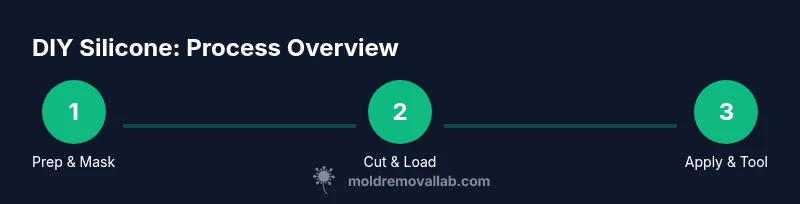
Steps
Estimated time: 45-60 minutes active; 24 hours cure (typical indoor use)
- 1
Prepare workspace and surface
Clear the area and mask edges with painter’s tape. Remove old sealant with a sharp knife, then clean the joint with isopropyl alcohol and let dry completely to ensure proper adhesion.
Tip: Dry surfaces and a clean edge are essential for a durable seal. - 2
Cut nozzle and load cartridge
Cut the nozzle at a 45-degree angle to match the joint width, then load the tube into the caulking gun. Point the nozzle toward the joint and test a small bead on scrap material to check flow.
Tip: A clean, angled cut yields a more controlled bead. - 3
Apply the sealant
Hold the gun at a consistent angle and draw a steady bead along the joint without gaps. Avoid stopping mid-bead, which can create weak points.
Tip: Maintain even pressure and speed to prevent gaps. - 4
Tool and smooth the bead
Use a damp finger or finishing tool to smooth the bead immediately after application. Work from one end to the other for a uniform finish and remove excess with a cloth.
Tip: Don’t delay; smoothing while the sealant is pliable yields a cleaner edge. - 5
Remove tape and inspect
Carefully remove masking tape while the bead is still slightly soft to avoid tearing the edge. Inspect for gaps or air pockets, and touch up if needed.
Tip: If a flaw appears, fix promptly before curing progresses. - 6
Cure and return to use
Let the joint cure undisturbed according to the product label. Avoid exposing the area to moisture until the sealant has cured sufficiently.
Tip: Curing times vary; respect the label for best results.
FAQ
What is the difference between silicone caulk and silicone sealant?
In many markets, the terms are used interchangeably, but for DIY guidance, choose a silicone sealant labeled for sealing joints. The key is to pick a product suitable for the surface and moisture exposure.
Sealant in the context of home sealing refers to the same silicone product used to fill joints; select one labeled for indoor wet areas.
Can I paint over silicone?
Most silicone surfaces do not take paint well unless the product is paintable or a compatible primer is used. Check the label and consider a paintable variant if painting matters for your project.
Paint over silicone only if the product is labeled paintable or you apply a suitable primer first.
Is DIY silicone safe to use around food prep areas?
Look for silicone products labeled as food-safe or safe for contact with food-contact surfaces. Follow the label's guidance and avoid sealing surfaces that contact food unless explicitly approved.
Choose food-safe silicone if your project involves areas that contact food, and always follow the product label.
How long does silicone take to cure?
Cure time depends on the product and conditions. Follow the product label for exact times and avoid moisture or heavy use until curing is complete.
Cure time varies; check the label and keep the area undisturbed during curing.
What surfaces work best with silicone?
Silicone adheres well to non-porous surfaces like glass, ceramic, metal, and glazed ceramic. Porous materials require proper surface preparation and sometimes a compatible primer.
Non-porous surfaces seal best with silicone; prep porous surfaces carefully or consider an alternative.
How do I remove cured silicone if I make a mistake?
Cured silicone requires mechanical removal with a utility knife or scraper. For stubborn residues, use an appropriate solvent only if the product label allows it.
Carefully cut away cured silicone with a knife or scraper, then clean the area before re-sealing.
Watch Video
The Essentials
- Prepare surfaces thoroughly for reliable adhesion.
- Choose the right silicone for indoor/outdoor use.
- Apply a clean, steady bead and tool immediately.
- Allow proper curing time before exposure to moisture.