Dehumidifier for White Mold: A Practical Guide
Learn how to use a dehumidifier to combat white mold safely. Step-by-step instructions, safety tips, and when to call a pro for heavy contamination.

To tackle white mold with a dehumidifier, you’ll reduce moisture, keep indoor RH at roughly 50–60%, and dry affected areas completely. Start by confirming mold growth is manageable and accessible, then select a dehumidifier sized for the space. This Mold Removal Lab guide covers steps, safety, and when professional help is needed.
Understanding White Mold and Moisture
White mold thrives where moisture lingers, especially in spaces with poor air circulation, leaks, or condensation. The simple truth is that moisture is the fuel for mold growth, and controlling it is the most effective first line of defense. For homeowners and renters, a dehumidifier can be a practical ally when used correctly. When humidity remains high in living areas, mold can reappear even after cleaning. According to Mold Removal Lab, the first step in any remediation plan is accurate moisture control paired with thorough cleaning. In many homes, a dehumidifier for white mold becomes the practical, ongoing solution to keep RH levels in check, prevent regrowth, and protect indoor air quality. Keep in mind that mold can indicate hidden moisture problems behind walls or under flooring, so a holistic approach matters more than a single device.
As you begin, document the affected areas with photos and notes, so you can measure progress over time. The goal is not only to dry visible mold but to ensure humidity levels stay low enough to discourage future growth. Use a hygrometer to monitor RH and adjust settings as needed. This approach—moisture control plus targeted cleaning—lays the groundwork for a safer, healthier home environment.
Role of a Dehumidifier in Mold Remediation
A dehumidifier reduces ambient moisture, which is essential when fighting white mold. When sized appropriately for the room, it can lower RH to a level that halts mold proliferation and helps dry porous materials. The general target is maintaining RH around 50–60%, though exact figures depend on climate, room volume, and the extent of moisture intrusion. Mold Removal Lab analysis shows that humidity control, when paired with thorough cleaning, can slow regrowth and improve the odds of a successful remediation without chemical overuse. Place the unit away from direct contact with walls to allow air to circulate, and run it continuously until RH stabilizes. In spaces with ongoing moisture sources (like leaks), you may need longer and more aggressive dehumidification.
If you’re dealing with white mold behind walls or under cabinets, consider temporary containment to prevent spores from spreading while you dehumidify and clean. Ventilation is important during this process, but direct cross-ventilation should be balanced with containment to prevent spreading spores to other rooms. The key is to combine moisture reduction with cleaning and drying for a comprehensive approach.
Safety First: PPE and Containment
Safety matters when dealing with mold. Always wear protective gloves, an NIOSH-approved respirator or a high-quality mask, and eye protection. Keep children and pets away from the work area, and seal off the room if possible to prevent cross-contamination. Use plastic sheeting to create a simple containment barrier and cover furniture or porous materials to limit exposure. Keep ventilation limited to safe, directed airflow away from living spaces to minimize airborne spores. Remember, even small patches of white mold can signal hidden moisture, so treat any suspicious signs seriously. PPE and containment aren’t optional extras; they’re essential protections for you and others in your home.
Sizing, Placement, and Operation of the Dehumidifier
Choosing the right dehumidifier starts with room size and moisture load. Use the room’s square footage and ceiling height to estimate capacity, and consult the manufacturer’s chart to pick a model with adequate pint-per-day (PPD) rating. Place the dehumidifier in the center of the room or near the worst-moisture source, with space for air to circulate on all sides. Keep doors closed and monitor RH with a hygrometer. Set the unit to maintain a target RH around 50–60% and adjust as needed based on readings. Run the dehumidifier continuously until readings stay stable, then reduce operation to a maintenance level if the environment remains dry over several days. Always unplug before moving the unit, and never operate a damaged appliance near standing water.
Cleaning, Drying, and Disinfecting Affected Areas
After the humidity is controlled, focus on cleaning the visible mold and drying surfaces completely. Use microfiber cloths to wipe non-porous surfaces and porous materials that are salvageable. Porous items with mold growth that cannot be cleaned thoroughly should be removed and discarded to prevent recurring contamination. For disinfection, choose EPA-registered products suitable for mold remediation, and follow label directions carefully. Allow treated areas to air-dry fully; moisture left behind invites regrowth. Document progress with photos and keep RH steady after cleaning to discourage rebound.
Special Considerations: Porous Materials and Hidden Mold
White mold can hide behind drywall, under flooring, or in insulation. Porous materials like drywall, wallpaper, and carpet often absorb moisture quickly and may need removal to prevent recontamination. If you suspect hidden mold, avoid tearing out large sections yourself unless you’re prepared for professional remediation. In many cases, you can address surface mold with cleaning and dehumidification, but if moisture persists or if you notice off smells, further investigation is warranted. Remember that incomplete removal can lead to a cycle of moisture, mold growth, and repeated remediation.
When to Call the Pros and What They Do
If mold growth covers a large area (typically more than 10 square feet or if you see extensive staining behind walls), or if you encounter recurrent moisture despite dehumidification, it’s wise to consult a licensed mold remediation professional. Professionals can assess hidden moisture sources, use specialized equipment like moisture meters and infrared cameras, and perform containment and remediation safely. They may also offer post-remediation verification to ensure mold levels are under control. The Mold Removal Lab team recommends seeking help when initial efforts don’t stabilize humidity or when growth recurs after cleaning.
Preventing Future Mold Growth After Drying
Prevention is a continuous process. Keep relative humidity consistently below the threshold that supports mold growth (often around 50–60%, depending on climate). Address leaks promptly, improve ventilation in damp areas like bathrooms and kitchens, and perform regular moisture checks in basements or crawl spaces. Use exhaust fans, fix condensation issues, and consider a whole-house humidification and air-quality plan if moisture problems persist. Regularly inspect area around windows, pipes, and HVAC vents for condensation or dampness, and address any issues quickly to maintain a healthier home.
Tools & Materials
- dehumidifier (with built-in humidistat)(Choose sized capacity for room square footage and moisture load)
- digital hygrometer(Monitor RH; aim for 50-60%)
- personal protective equipment (gloves, NIOSH-approved respirator, eye protection)(Protect skin and lungs from mold spores)
- plastic sheeting and tape(Containment to limit spread of spores)
- microfiber cleaning cloths(Use for wiping non-porous surfaces)
- EPA-registered mold cleaner or disinfectant(Follow label directions; avoid mixing chemicals)
- buckets, scrub brush(For cleaning stubborn residues)
- extension cord (heavy-duty)(Ensure safe power supply if outlet is far)
- trash bags (heavy-duty)(Proper disposal of contaminated materials)
Steps
Estimated time: 6-24 hours
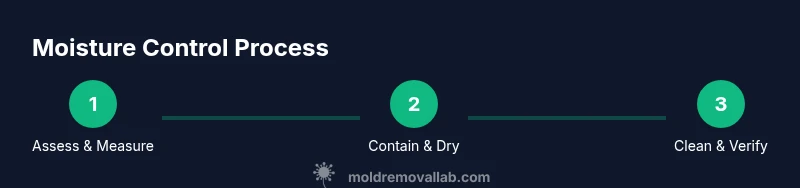
- 1
Assess the scope and measure
Walk through the affected area to identify visible mold and any hidden moisture sources. Use a hygrometer to establish a baseline RH and note any leaks or condensation patterns. This initial assessment guides sizing and containment decisions.
Tip: Document findings with photos and notes for tracking progress. - 2
Contain and prepare the space
Set up plastic sheeting to isolate the area and reduce cross-contamination. Move absorbent items away from the work zone and cover furniture with plastic. Ensure doors/windows are sealed to minimize dust and spore spread.
Tip: Keep children and pets out of the work zone during dehumidification. - 3
Size and place the dehumidifier
Select a unit with a suitable capacity for the room and place it where air can circulate freely. Position the unit away from walls, with clearance for intake and exhaust. Plug into a safe outlet and verify the device is level.
Tip: Use the manufacturer’s guidance to estimate capacity based on room size. - 4
Set target RH and run continuously
Set the dehumidifier to maintain approximately 50–60% RH. Run it continuously for 24–48 hours in most spaces, then recheck RH to decide if extended operation is needed. Monitor for signs of ongoing moisture.
Tip: If readings bounce, troubleshoot leaks or high humidity sources first. - 5
Clean visible mold and dry surfaces
Wipe non-porous surfaces with a microfiber cloth and an EPA-registered cleaner. Porous materials that harbor mold should be removed and discarded when cleaning isn’t feasible. Allow surfaces to dry completely before proceeding.
Tip: Always wear PPE and never mix cleaners with bleach unless label allows it. - 6
Disinfect and monitor for regrowth
Apply a mold-disinfection product following label directions. Reassess RH daily and log changes. If mold returns after cleaning, escalate remediation with a professional.
Tip: Keep a running moisture map of the space to detect patterns early. - 7
Address hidden moisture and materials
If you suspect hidden mold behind walls, inspect carefully and consider professional assessment before removing structural materials. Hidden moisture often drives recurrence, so targeted testing may be warranted.
Tip: Do not demolish large areas without planning and safety in mind. - 8
Reassess and reoccupy safely
Once RH remains stable for several days, and surfaces are dry, you can remove containment and restore the space. Maintain humidity at or below 60% to prevent recurrence and schedule routine checks.
Tip: Implement ongoing moisture control (vents, leaks repairs, and routine checks).
FAQ
Can a dehumidifier remove white mold on its own?
A dehumidifier helps slow mold growth by reducing humidity, but it isn’t a standalone cure for extensive mold. Surface cleaning, drying, and addressing moisture sources are also necessary. For large or persistent problems, professional remediation may be required.
A dehumidifier helps slow mold growth by reducing humidity, but you’ll likely need cleaning and moisture source control. Seek professional help for large problems.
What humidity level is best to prevent mold?
Aim for approximately 50–60% relative humidity in most homes for mold prevention. Individual climate and space conditions may adjust this range; monitor RH with a hygrometer and adjust accordingly.
Aim for around 50 to 60 percent RH, and adjust based on your space’s conditions.
How long should I run a dehumidifier during remediation?
Run the dehumidifier continuously until RH stabilizes in the target range for 24–48 hours, then maintain lower humidity with intermittent operation if needed. Always address any identified moisture sources first.
Run until humidity stays steady in the target range for about a day or two, then maintain as needed.
Is bleach or vinegar effective against white mold?
Bleach is not recommended for porous materials and may not remove mold roots. Vinegar can help on some surfaces, but proper cleaning, drying, and moisture control are more important for long-term prevention.
Bleach isn’t great for porous surfaces; vinegar can help on some nonporous areas, but moisture control and cleaning are key.
When should I call a professional for mold issues?
Call a licensed mold remediation professional if mold covers a large area, recurs after cleaning, or if you detect hidden moisture behind walls. Professionals can safely remove contamination and verify the space is dry.
Call a professional if mold is widespread or keeps returning, or if moisture is hidden behind walls.
Watch Video
The Essentials
- Control humidity first to curb white mold growth.
- Choose a dehumidifier sized for the space and monitor RH actively.
- Contain, clean, and dry surfaces before reoccupation.
- Seek professional help for large areas or persistent mold.