Can You Use Moldy Joint Compound? Practical Troubleshooting for Mold in Drywall Mud
Urgent, practical troubleshooting for moldy joint compound. Learn why you shouldn’t reuse moldy mud, how to assess damage, and a step-by-step remediation plan to protect your home.

Can you use moldy joint compound? The quick answer is no. Do not reuse or salvage moldy mud, as mold spores can spread and contaminate indoor air. Dispose of contaminated material, dry the area, and replace with fresh, mold-resistant joint compound if needed. When moisture persists, seek a professional mold remediation assessment.
Can mold grow in joint compound?
Yes. Joint compound, especially when damp, can become a hospitable environment for mold. The gypsum-based material is porous and, when exposed to moisture from leaks, high humidity, or condensation, provides nutrients that mold spores can exploit. The question many homeowners ask is can you use moldy joint compound after cleaning it? The short answer from Mold Removal Lab is no—mold can be embedded in the mud and within the surface pores, meaning surface cleaning rarely removes all spores. Inconsistent drying, contaminated trowel marks, or residual dampness behind the layer can reignite growth after remediation efforts. If you’re unsure, treat any suspected mold as contaminated and follow the conservative route of removal and replacement.
Why moldy joint compound is a red flag
Mold in joint compound signals ongoing moisture inside walls. Even if the visible mold appears limited to a patch, microscopic growth may extend into the substrate. Joint compound can trap moisture against studs and insulation, creating a favorable microclimate for mold over time. Mold Growth is not limited to color changes; musty odors, flaking texture, and dark specks are common indicators. Mold Removal Lab analyses show that pore-filled materials can harbor colonies long after initial cleaning, making salvage risky and often ineffective.
If you find mold coming through joint compound, you should assume the moisture source is active and address it before any repair. This approach protects occupants and reduces the chance of recurring problems.
Health risks and why a safe approach matters
Mold exposure can affect indoor air quality, triggering allergic reactions or respiratory irritation in sensitive individuals. Disturbing moldy joint compound during removal may release spores into the air, increasing exposure risk. The Mold Removal Lab team emphasizes precaution—always isolate the work area, turn off HVAC to limit spread, and use a HEPA-filtered vacuum for cleanup. People with asthma, allergies, or weakened immune systems should consider professional remediation for larger mold-adjacent repairs. A conservative approach helps reduce health risks while ensuring the underlying moisture problem is solved.
Safety steps before you begin any remediation
Before touching moldy mud, put on proper PPE: a well-fitted respirator rated for mold, disposable coveralls, eye protection, and gloves. Contain the work area with plastic sheeting, seal vents, and shut off the affected circuit if electrical components are involved. Ventilation is important, but uncontrolled airflow can spread spores; use negative-pressure containment when feasible. If the area is large or there’s visible water damage, call a licensed mold remediation professional to prevent cross-contamination and ensure code-compliant work.
Salvageable vs. replaceable: making the call
Not all moldy mud is salvageable. If the mold extends through multiple inches of joint compound, studs, or drywall, replacement is usually the safer option. Salvage might be possible for small, localized patches when the affected material is fully removed, the area is thoroughly dried, and you’re using mold-resistant products. The key is to verify dryness (> 15% relative humidity for 48–72 hours using a moisture meter) and confirm there’s no ongoing moisture source before rebuilding. Remember, safety and long-term prevention trump quick fixes.
How to fix it: a practical remediation plan
Remediation begins with eliminating the moisture source, thoroughly drying and decontaminating the area, and then replacing affected materials with mold-resistant products. Start by removing the moldy joint compound and any contaminated drywall in the affected zone. Clean surfaces with a non-ammonia fungicidal cleaner, dry completely, and treat studs with a fungicidal biocide if recommended. Apply a mold-resistant joint compound and finish with a mold-resistant primer and paint. If the infestation is extensive, document the work and consult a professional who can perform a post-remediation test to confirm the area is mold-free.
Materials and products to consider during replacement
Choose products labeled as mold-resistant or anti-microbial where applicable. Mold-resistant drywall, fiberglass mesh, primer with antimicrobial properties, and cementitious backerboard can provide better long-term resistance in damp areas. When painting, select a high-quality mold-resistant acrylic paint and allow thorough curing between coats. Ventilation during application is essential to remove moisture quickly and avoid trapping humidity in the wall cavity.
Prevention: keep moisture in check and monitor
Prevention hinges on controlling humidity, promptly fixing leaks, and ensuring proper ventilation in moisture-prone rooms. Use exhaust fans in bathrooms and kitchens, dehumidifiers in basements, and check for condensation around windows and piping. Regular inspections help catch early signs of moisture—so look for staining, musty odors, or increased relative humidity. A proactive maintenance routine reduces the likelihood of mold recurring in joints and mud.
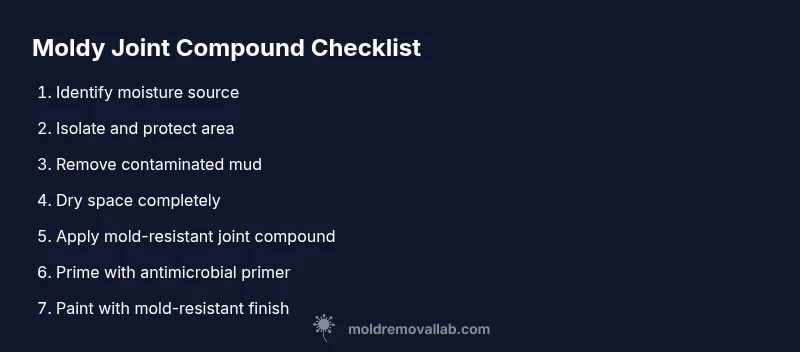
Steps
Estimated time: 6-8 hours (plus drying time and any required repairs)
- 1
Stop the moisture source
Locate and repair the moisture problem (leak, condensation, or plumbing issue). Stop all water intrusion before any removal. This prevents ongoing mold growth and protects your investment.
Tip: Take photos of the source before repairs and label the affected area for reference. - 2
Protect yourself and seal the area
Put on two-layer PPE (n95 respirator, goggles, gloves, and coveralls). Use plastic sheeting to create a containment zone and minimize dust and spores spreading to other rooms.
Tip: Ventilate only the containment area with a negative-pressure setup if possible. - 3
Remove contaminated material
Carefully remove moldy joint compound and any drywall within the affected zone. Place debris in sealed bags and avoid sanding moldy areas unless necessary.
Tip: Keep waste contained to prevent cross-contamination. - 4
Dry the space completely
Use dehumidifiers and high-capacity fans to lower humidity and dry studs, insulation, and framing. Verify moisture using a moisture meter; wait until readings stabilize well below 50% RH.
Tip: Periodically check readings from multiple spots for consistency. - 5
Treat exposed framing (if needed)
Inspect studs and ceiling joists for mold; if present, wipe with a fungicidal cleaner or apply a suitable biocide as recommended by the product label and local codes.
Tip: Follow label directions and ensure adequate ventilation during treatment. - 6
Apply new joint compound (mold-resistant)
Use a mold-resistant joint compound and apply in thin, even coats. Allow proper drying between coats as per product guidelines. Sand lightly after each coat and clean dust thoroughly.
Tip: Apply a breathable sealant between coats if required by the manufacturer. - 7
Prime and seal the repaired area
Use a mold-resistant primer to seal the repaired area and reduce moisture penetration. Ensure the primer is fully dry before painting.
Tip: Choose a primer compatible with the topcoat and humidity level of the space. - 8
Finish with mold-resistant paint
Pick a high-quality, mold-resistant acrylic paint. Apply multiple thin coats for durable coverage and post-treatment mold resistance. Revisit the area after cure for any touch-ups.
Tip: Keep humidity in check for several days after finishing.
Diagnosis: Visible mold on joint compound, musty odor, or damp drywall around a joint compound repair.
Possible Causes
- highMoisture intrusion from leaks or condensation behind drywall
- mediumInadequate ventilation and high indoor humidity
- lowImproper drying or contamination during previous repairs
Fixes
- easyIdentify and repair the moisture source (leaks, plumbing, roof, or condensation)
- easyDry the area thoroughly using dehumidifiers and air movers, ensuring RH remains below 50%
- mediumRemove mold-contaminated joint compound and affected drywall; replace with mold-resistant products
- mediumSeal with mold-resistant primer and finish with mold-resistant paint; consider professional post-remediation testing
FAQ
Is it safe to live in a home with moldy joint compound?
No. Mold grows where moisture is present, and disturbed mold can spread spores. Correct the moisture problem first and consider professional assistance for larger affected areas.
No. Moldy joint compound indicates moisture issues; fix the source and consider a pro for bigger patches.
Can I salvage small patches of moldy joint compound?
For tiny, isolated spots with no deeper contamination, removal and replacement may be possible when the area is thoroughly dried and treated. If doubt remains, replace rather than salvage.
Small patches might be salvageable if the area is completely dry and clean, but when in doubt, replace.
What are the best practices to prevent mold in future repairs?
Control moisture, use mold-resistant products, ensure proper ventilation, and perform regular checks for leaks or condensation after repairs.
Keep moisture down, use mold-resistant materials, and inspect after repairs to prevent future mold.
What signs indicate more extensive mold beyond joint compound?
Persistent musty odors, visible black or green patches beyond mud, discoloration on studs, or repeated moisture incidents suggest broader contamination.
If you smell a persistent musty odor or see widespread patches, there may be more mold than just the mud.
Which products resist mold during drywall repair?
Choose mold-resistant drywall, anti-microbial primers, and mold-resistant joint compounds. Pair with proper ventilation for best results.
Use mold-resistant drywall and primers, along with good ventilation, for durable repairs.
Watch Video
The Essentials
- Do not reuse moldy joint compound.
- Eliminate moisture before rebuilding.
- Use mold-resistant materials for repairs.
- Ventilate effectively and monitor humidity.
- Consult a pro for large or persistent mold growth.