How to Remove Mold from Blow Mold Santa and Reindeer Safely
Learn a practical, step-by-step method to cleaning mold from blow mold Santa and reindeer safely. PPE, cleaners, drying, and storage tips help prevent recurrence and keep holiday decor safe.

According to Mold Removal Lab, you can safely remove mold from blow mold santa and reindeer using non-bleach cleaners, proper PPE, and thorough drying. Begin with a gentle inspection, then clean with mild soap and warm water. Treat any spots with hydrogen peroxide, rinse, and dry completely before storage. Ensure good ventilation and avoid harsh heat that could warp plastic.
Understanding the mold risk on blow mold Santa and Reindeer
Holiday decorations like blow mold Santa and Reindeer are iconic, but their hollow plastic bodies can trap moisture in seams and crevices. Over time, humidity, condensation, and dust create a hospitable environment for mold growth. If you own blow mold Santa and Reindeer, mold may appear as fuzzy colonies, discoloration, or a musty odor. While it can look unsightly, mold poses health risks, particularly in homes with allergies or children. Addressing mold promptly keeps your festive décor safe and preserved for years. In this guide, we’ll walk through practical steps to clean, dry, and store these pieces after mold exposure. The goal is to restore safe use of blow mold Santa and Reindeer while reducing moisture buildup that invites future growth.
Factors that promote mold growth on blow mold decor
Several conditions increase the chance of mold on blow mold Santa and Reindeer: high humidity, poor ventilation, and temperature swings. Outdoor displays collect rain and dew; indoor storage with damp boxes fosters mold spores. The plastic used for blow mold is durable but not immune to moisture; seams, closures, and textured surfaces can trap moisture and dust. Mold thrives where condensation settles on cool nights and warm days, especially in basements, garages, or attics. According to Mold Removal Lab, humidity management is a key factor in preventing future issues with blow mold Santa and Reindeer and similar holiday decor. Regularly inspecting for moisture and cleaning promptly helps keep this issue in check.
Safety gear and PPE before cleaning
Before touching any moldy holiday decor, put on proper PPE. Wear an N95 mask or respirator to filter spores, disposable nitrile gloves, and splash-proof eye protection. Work in a well-ventilated area with a fan that moves air away from your face. Keep pets and kids away from the cleaning area. Do not reuse contaminated clothes. This gear reduces the risk of exposure and makes cleaning more comfortable, especially when dealing with multiple pieces like blow mold Santa and Reindeer.
Inspecting for colorfastness and material integrity
Blow mold decorations can be colored or painted; some cleaners can remove pigment or decals. Start by inspecting a hidden area for colorfastness: dampen a small cloth and wipe a corner. If color transfers, stop and choose a gentler method. Check seams for cracks or warping; if structural damage exists, plan for replacement rather than aggressive cleaning. If the item is fragile, handle it with extra care to avoid creating new cracks that harbor mold.
Cleaning options: soap, peroxide, vinegar and cautions
Begin with mild soap and warm water to remove surface dirt. For light mold spots on blow mold Santa and Reindeer, apply a small amount of 3% hydrogen peroxide to a microfiber cloth and dab gently. Let it sit for 5–10 minutes, then wipe clean. White vinegar can be used as a mild disinfectant; spray lightly and wipe dry. Avoid bleach on colored or porous plastic, which can fade or weaken the surface. If you choose vinegar, test first in a hidden area. For stubborn spots, repeat steps with gentleness to prevent damage to delicate decals or paint.
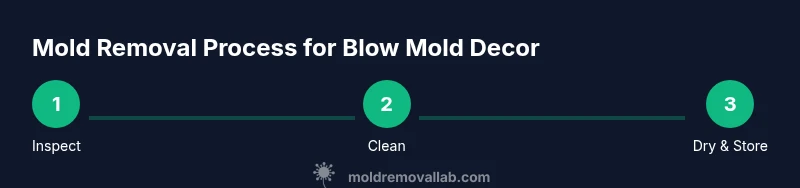
Step-by-step cleaning workflow overview
This section provides a concise workflow to guide you through cleaning without duplicating every detail. Assess and prepare the display space, position blow mold Santa and Reindeer so you can reach all surfaces, and ensure there is nothing nearby that could reintroduce moisture. Put on your PPE, then perform a colorfastness test in a discreet spot. Clean with mild soap and water, followed by targeted mold treatment with hydrogen peroxide if needed. Rinse lightly, dry thoroughly, and finish with a light sanitizing wipe if desired. Finally, inspect one last time for moisture pockets and store in a dry area.
Drying and moisture control after cleaning
Mold can return if moisture remains. After cleaning, place blow mold Santa and Reindeer on a dry towel in a warm, dry area. Use fans to circulate air but avoid direct heat that could warp plastic. If the humidity is high, a dehumidifier or air exchanger helps. Ensure the item is completely dry inside and out before returning to storage. For best results, keep it in a dry closet or a container with a desiccant pack to minimize future moisture exposure.
Sanitizing and odor control after mold
After drying, you can provide an extra layer of sanitizing with isopropyl alcohol on a clean cloth, if decals and paint tolerate it. Do not saturate the piece; a light wipe is enough. If odor lingers, place the decor in fresh air with a mild ozone-free odor absorber nearby or add a sachet of baking soda inside a closed container when not on display. Always test any sanitizer on a small hidden area first to avoid discoloration on blow mold Santa and Reindeer.
Storage and prevention after cleaning
Store blow mold Santa and Reindeer in a dry, well-ventilated area. Use breathable covers or bags that allow air flow and avoid plastic wrapping that traps moisture. Consider silica gel packets or desiccants to absorb residual humidity. Maintain a stable environment with humidity around 40–50% when possible. Regularly check stored pieces for signs of moisture, especially after seasonal transitions.
When to discard damaged pieces and replacement tips
If the plastic shows deep cracks, structural weakness, or persistent mold that returns after cleaning attempts, replacement is safer than repeated remediation. Damaged blow mold Santa and Reindeer can harbor hidden mold pockets and may shed spores even after cleaning. Consider replacing with a similar, well-sealed piece or storing the damaged item in a sealed bag if it cannot be repaired. Using durable, mold-resistant storage solutions during the off-season helps prevent future problems.
Authority sources and additional reading
For authoritative guidance on mold handling and indoor air safety, consult these resources:
- https://www.cdc.gov/mold/dampness.html
- https://www.epa.gov/mold/brief-guide-mold-moisture-and-your-home
- https://www.osha.gov/mold These references provide foundational safety considerations and best practices to complement the steps outlined for blow mold Santa and Reindeer care. They reinforce the importance of ventilation, moisture control, and careful cleaning methods to protect household health.
Tools & Materials
- N95 mask or respirator(Protects against inhaling mold spores)
- Nitrile gloves(Chemical resistance and dexterity)
- Safety goggles or face shield(Protects eyes from splashes)
- Soft-bristled brush(Non-abrasive for delicate plastic)
- Mild dish soap or gentle cleaner(Used with warm water for surface cleaning)
- Warm water(For dilution and rinsing)
- 3% hydrogen peroxide(Spot treatment for mold)
- Isopropyl alcohol (70%)(Sanitizing wipe on surfaces)
- Microfiber cloths(Gentle wiping without scratching)
- Fan or dehumidifier(Aids fast drying)
- Breathable storage container or bag(Allows air flow and moisture control)
Steps
Estimated time: 1-2 hours
- 1
Inspect and prep workspace
Move the decor to a clean, ventilated area and assess overall condition. Look for cracks, decals, and areas that hold moisture. This helps determine cleaning approach and whether to proceed.
Tip: Take photos for reference before cleaning. - 2
Put on PPE and gather materials
Don PPE first, then assemble all cleaning supplies within reach. Proper protection minimizes exposure to mold spores during handling.
Tip: Set up a dedicated cleaning zone away from living spaces. - 3
Test colorfastness in a hidden area
Dampen a cloth and wipe a small, inconspicuous spot. If dye or decals transfer, avoid aggressive cleaners that could damage decoration.
Tip: If color transfers, stop and adjust cleaning approach. - 4
Clean with mild soap and water
Gently scrub surfaces with a soft brush and warm soapy water to remove surface grime. Avoid soaking; moisture can seep into seams and promote mold growth.
Tip: Rinse debris away with a damp cloth instead of a full rinse. - 5
Spot-treat mold with hydrogen peroxide
Apply 3% hydrogen peroxide to moldy spots using a microfiber cloth. Let sit 5–10 minutes, then wipe clean. Do not saturate the piece.
Tip: Test again after treatment to ensure color integrity. - 6
Rinse and dry thoroughly
Wipe away residue with a clean damp cloth, then dry surfaces with a microfiber towel. Use air flow to ensure complete drying.
Tip: Dry the interior cavities first if accessible. - 7
Sanitize and inspect again
Optionally wipe with isopropyl alcohol on non-painted surfaces. Inspect for remaining moisture pockets and re-dry as needed.
Tip: A final wipe helps reduce lingering odors. - 8
Store in a dry environment
Place the decor in a breathable container with desiccant packs to maintain a dry microclimate.
Tip: Avoid plastic wrap that traps humidity. - 9
Evaluate for replacement needs
If there are deep cracks or recurring mold despite cleaning, consider replacing the piece to prevent exposure to spores.
Tip: Keep a log of mold incidents to guide future purchases.
FAQ
Is it safe to clean mold on blow mold Santa and reindeer at home?
Yes, with proper PPE and careful steps. Use mild cleaners and avoid harsh chemicals that could damage the plastic. If mold coverage is extensive or the piece is fragile, consider professional remediation or replacement.
Yes, you can clean it at home if you wear PPE and follow gentle methods. If the item is very damaged, consult a professional.
Can I use bleach on blow mold plastic?
Bleach can fade or weaken colored blow mold decorations. Prefer milder cleaners like soap and water or hydrogen peroxide for spot treatment. Always test first in a hidden area.
Bleach is usually not recommended for colored plastic; test a hidden spot first and avoid repeated use.
What cleaner works best for preserving decals and paint on blow mold decor?
Mild soap and warm water are safest for decals. For spots, 3% hydrogen peroxide can be used cautiously. Avoid aggressive scrubbing that could peel paint or decals.
For decals, start with soap and water, and use hydrogen peroxide only on stubborn spots with care.
How long does it take to dry after cleaning?
Drying times vary with humidity and airflow. In a dry, well-ventilated area, expect several hours; in humid spaces, it may take longer. Ensure interiors are fully dry before storage.
It usually takes several hours, depending on humidity; make sure everything is completely dry before storing.
Should I discard pieces with cracks if mold returns after cleaning?
If there are deep or persistent mold pockets and structural cracks, replacement is safer to avoid exposure to spores. Salvage only if the piece is structurally sound after professional assessment.
If the piece is cracked and mold keeps returning, it's safer to replace it.
Are there quick fixes I can use to prevent mold after cleaning?
Yes. Store in a dry, ventilated space with desiccants, avoid sealing moisture inside storage, and regularly check seasonal decor for moisture buildup.
Keep decor in a dry spot with moisture absorbers and inspect it before next season.
Watch Video
The Essentials
- Inspect and prepare before cleaning.
- Use mild cleaners and test colorfastness.
- Dry thoroughly to prevent recurrence.
- Ventilate and store in a moisture-controlled space.
- Replace damaged pieces when necessary.