Ann Arbor Mold Removal Guide: Safe Remediation for Homes
Comprehensive, actionable guidance for Ann Arbor mold removal. Learn inspection, containment, cleaning, and prevention to protect homes in Michigan's climate.

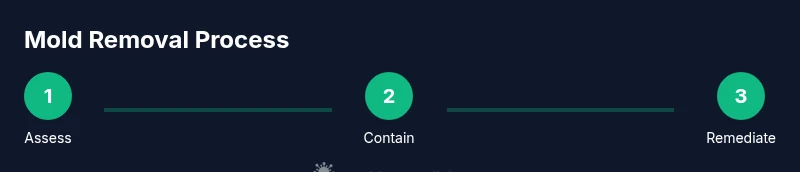
By following this guide, you will learn proven steps for safe Ann Arbor mold removal, from initial assessment to prevention. You’ll understand local moisture risks, containment basics, and effective cleaning methods that protect homes in Michigan’s climate. This quick answer previews the key actions: assess moisture, contain the area, remove affected materials, clean with proper solutions, and verify dryness to prevent recurrence.
Local context: Ann Arbor climate and mold risk
Ann Arbor homes sit in a climate with distinct seasonal humidity and occasional heavy rainfall. The Mold Removal Lab team notes that older homes, basements, and crawl spaces in this area are particularly prone to moisture intrusion, especially after rapid thaw cycles and wet springs. In Michigan's climate, condensation near poorly insulated surfaces can encourage mold growth behind walls and under floors. Understanding these local dynamics is essential for effective Ann Arbor mold removal. By acknowledging humidity patterns, you can tailor inspection, containment, and remediation plans to your home’s unique risk profile. Mold thrives where moisture lingers; the sooner you address this, the easier remediation will be. According to Mold Removal Lab, proactive moisture control and timely intervention dramatically reduce the chance of regrowth, especially in humid seasons typical of the region.
Signs of mold and common hiding spots in Ann Arbor homes
Visible mold spores or colonies on walls, ceilings, or under sinks are the most obvious signs, but many infestations hide where you can't see them. A musty odor often signals hidden growth behind drywall, insulation, or in cavities. Water damage from leaks, roof issues, or plumbing failures can create ongoing moisture sources, inviting mold to persist. In Ann Arbor, basements and crawl spaces are particularly susceptible, as damp conditions and limited ventilation allow mold to thrive. Common hiding spots include behind baseboards, inside cabinetry, within HVAC ductwork, and on the nondrying surfaces of bathroom tiles. Inspect vulnerable areas after heavy rain or snowmelt, and monitor for recurrent musty smells after cleaning.
Containment, safety, and prep before remediation
Containment is critical to prevent cross-contamination during remediation. Before you start, isolate the work area with plastic sheeting and seal doors, vents, and HVAC intakes if safe to do so. Personal protective equipment (PPE) is essential: wear a properly fitted respirator, disposable gloves, and eye protection. Turn off the HVAC system in the work zone to avoid distributing spores to other parts of the home. Clear the area of belongings and place contaminated materials in sealed bags for disposal. Ventilation should be managed to control air flow without spreading spores. This prep phase reduces risk and makes the remediation process more effective in Ann Arbor homes.
Cleaning methods for common surfaces in homes
Mold cleanup strategies depend on the material involved. Porous materials like drywall or insulation that are severely contaminated often require removal and replacement, while non-porous surfaces such as tile, glass, and metal can be cleaned with detergent solutions and physical scrubbing. Use a detergent-water solution and a scrub brush to lift spores, followed by thorough rinsing. A HEPA-filtered vacuum can capture residual particles, but never use a regular vacuum on wet or moldy samples. For disinfection, use EPA-registered products and follow label directions. Avoid mixing cleaners and never apply bleach to porous materials where mold has penetrated. Drying is essential after cleaning to prevent regrowth, so ensure ample air flow and dehumidification where possible.
Post-remediation verification and prevention strategies
After cleaning, verify that moisture sources are addressed and that the area is thoroughly dry. Revisit the space after a few days to ensure no new moisture appears and that there is no musty odor. Implement prevention measures such as fix leaks promptly, improve ventilation in bathrooms and kitchens, and consider moisture-absorbing materials or dehumidification in damp spaces. Regularly inspect known trouble areas—basements, crawl spaces, and laundry areas—for signs of dampness or staining. In many Ann Arbor homes, simple changes like window vent improvements and using exhaust fans can dramatically reduce mold risk. The Mold Removal Lab team emphasizes a proactive approach to monitoring and maintenance to sustain a mold-free environment.
When to hire a professional in Ann Arbor
If mold covers large areas, penetrates structural materials, or you have a compromised HVAC system, professional remediation is advised. Severe infestations, or mold growth in hidden spaces behind walls, require specialized equipment and trained technicians to ensure complete and safe removal. In multi-story homes, or when moisture sources are difficult to locate, a licensed mold remediation contractor should be consulted. The local climate of Ann Arbor makes timely professional help particularly important for recontamination prevention and to protect indoor air quality.
Tools & Materials
- N-95 respirator or P100 full-face respirator(Fit-tested respirator with eye protection)
- Disposable gloves(Multiple pairs, chemical-resistant if possible)
- Goggles or face shield(Splash protection for eyes)
- Plastic sheeting / tarps(Seal off the work area)
- Duct tape and markers(Create containment seams and labels)
- HEPA vacuum with appropriate filters(Use for dry debris removal)
- Detergent and scrub brushes(Non-ammonia, non-bleach detergent)
- EPA-registered disinfectant(Follow label directions)
- Mold-resistant trash bags(Seal and dispose contaminated materials)
- Moisture meter or hygrometer(Portable tool to track humidity after cleanup)
- Dehumidifier or fans(Aid drying; ensure safe power and clearance)
- Trash bags / disposal containers(Seal for contaminated waste)
Steps
Estimated time: 60-180 minutes
- 1
Put on PPE and prepare space
Don a properly fitted respirator, goggles, and gloves. Remove or protect nearby items, and lay down plastic sheeting to create a containment barrier around the affected area. This step minimizes exposure and keeps mold spores contained.
Tip: Check respirator seal in a mirror and perform a quick fit test before starting. - 2
Isolate the work area
Close doors and seal seams with plastic sheeting. Turn off HVAC if safe, and seal ducts as needed to prevent spore dispersion. Establish a clear entry/exit path to minimize disturbance of other rooms.
Tip: Use tape to seal gaps and label the containment zone for household members. - 3
Identify moisture source and stop the leak
Inspect for leaks in roofs, pipes, or appliances and repair as soon as possible. Without stopping the source, mold is likely to return after cleanup. Document findings for future reference.
Tip: Take photos before and after repairs to verify the source was addressed. - 4
Remove severely contaminated materials
Carefully detach mold-damaged porous materials (e.g., drywall, insulation) that cannot be cleaned. Bag them immediately and seal for proper disposal. Do not mix with non-contaminated waste.
Tip: Label removed materials as contaminated to avoid cross-contamination. - 5
Clean non-porous surfaces
Scrub non-porous surfaces with detergent and water, then rinse. Use a disposable cloth or sponge to prevent recontamination. Vacuum dry areas with a HEPA-equipped machine after drying.
Tip: Avoid over-wetting porous surfaces; dampness encourages regrowth. - 6
Disinfect and dry the area
Apply an EPA-registered disinfectant following label directions. Allow surfaces to air-dry completely or use gentle fans to speed drying. Complete drying is essential to prevent future growth.
Tip: Do not mix disinfectants with ammonia or bleach; follow product directions precisely. - 7
Reassess and monitor
Recheck the space after drying; ensure no residual odors or moisture. If any damp spots reappear, reassess the source and remediation approach. Establish ongoing monitoring to prevent recurrence.
Tip: Consider a moisture meter for ongoing checks in problem zones.
FAQ
How long does mold remediation typically take in a home?
Remediation duration varies with the size of the infestation and the complexity of the space. Small, contained areas may be completed in a day, while larger or multi-room projects can take several days. Always plan for drying time after cleaning to prevent regrowth.
Remediation time depends on size and complexity. Small spaces may be finished in a day; larger areas can take a few days, with drying time afterward.
Is DIY mold removal safe in a multi-story home?
DIY removal can be safe for small, non-porous, surface mold in controlled areas with proper PPE and containment. For larger infestations, hidden growth, or VOC concerns, hiring a licensed professional is strongly advised to protect occupants and structure.
DIY can be safe for small, visible mold on non-porous surfaces, but larger or hidden growth should be handled by a professional.
Should I remove drywall if mold is behind it?
Mold behind drywall often requires removal and replacement of affected sections to prevent regrowth. Simply cleaning the surface without addressing the substrate usually fails over time. Identify and replace impacted materials as part of a full remediation plan.
If mold is behind drywall, you usually need to remove and replace the affected sections as part of proper remediation.
Can mold return after remediation?
Yes, mold can recur if moisture sources are not resolved or if cleaning is incomplete. Ensure leaks are fixed, sources of humidity are controlled, and the area is thoroughly dried before sealing up. Ongoing monitoring helps catch regrowth early.
Mold can come back if the moisture source isn’t fixed or the area isn’t dried and cleaned properly.
What should I do if a musty smell returns after cleanup?
A repeating musty odor suggests hidden moisture or unseen growth. Reassess the space, inspect for leaks, re-contain the area, and consider professional evaluation if odors persist. Do not delay addressing moisture to prevent a larger mold issue.
If a musty smell returns, re-check for hidden moisture and consider a professional assessment if needed.
Should I test for mold after remediation?
Post-remediation testing is optional in many cases but can provide verification that the space is mold-free. If occupants experience ongoing symptoms or if a large infestation was present, consider ICP or air quality testing through a qualified service.
Post-remediation testing is optional but helpful when large infestations occurred or symptoms persist.
Watch Video
The Essentials
- Assess moisture and fix sources to reduce mold risk.
- Contain the area to prevent cross-contamination.
- Distinguish between cleanup and removal for porous materials.
- Dry thoroughly after cleaning to prevent regrowth.
- Know when to call a pro for extensive infestations.