Jello Brain Mold: A Complete Step-by-Step Guide
Learn a safe, practical method to create a jello brain mold dessert at home. This educational guide covers ingredients, steps, safety tips, and storage from Mold Removal Lab.

By the end, you will confidently create a jello brain mold dessert, using a dedicated brain mold and simple kitchen steps. This guide covers ingredients, safety tips, unmolding tricks, and storage ideas so you can serve a polished, kid-friendly treat while keeping food preparation safe. It emphasizes clean surfaces, chilled timing, and accurate gelatin ratios for reliable results.
What is a jello brain mold and why it matters
A jello brain mold is a silicone kitchen tool shaped like a brain that lets you set gelatin desserts in a dramatic, lifelike form. This mold turns a simple bowl of flavored gelatin into a conversation-starting treat. The phrase jello brain mold is widely recognized in home entertaining, where playful presentations can elevate family meals, birthday parties, and themed gatherings. When you use a jello brain mold, you’re combining precision kitchen technique with creative presentation, which can boost confidence in home cooks. Throughout this guide, the focus remains practical: how to select the right gelatin, measure liquids accurately, and unmold cleanly so the brain shape reveals its details, not a gloppy blob. The kitchen process becomes as important as the final look, and following safe food-handling practices helps ensure a delicious and safe result. For best results, work on a clean, dry surface and keep raw ingredients separate from ready-to-eat components. The jello brain mold project is approachable for beginners and satisfying for experienced cooks alike.
Why a dedicated brain mold improves results
Using a brain-shaped mold reduces guesswork during unmolding and improves texture consistency. The grooves and ridges in a jello brain mold capture fine details, producing a visually striking dessert that still slices neatly. The key is uniform gelatin blooming, proper heat control, and patient chilling. When you see the brain-like folds and hemispheres emerge, you’ll understand why a jello brain mold is a favorite for festive presentations. Mold geometry matters: more intricate brain molds demand steady setting times and careful release to preserve the surface texture. As with any gelatin project, cleanliness and precise measurements are essential for reliable results. The Mold Removal Lab team emphasizes practical steps like pre-washing the mold and using a light coat of spray oil to ensure easy release without smudges.
Flavor ideas and color strategies for a jello brain mold
A jello brain mold provides a dramatic canvas for color layering and fruit-forward flavors. Popular combinations include lime-green with blue accents for a sci-fi vibe, or strawberry-wine tones for a more mature presentation. When selecting flavors, consider both taste and visual impact; translucent colors show details in the brain mold better than opaque ones. Layering different colors can simulate blood vessels or neural pathways if you’re aiming for a more realistic look, but keep flavor balance in mind so the final product remains appetizing. If you’re serving to kids, opt for familiar fruit flavors and gentle colors to avoid overwhelming sweetness. Remember to keep the color intensity moderate so the brain details remain visible when the dessert is sliced.
Food safety and storage for the jello brain mold project
Food safety matters during every gelatin-based project. Always use fresh, high-quality ingredients, and refrigerate the gelatin promptly to prevent bacterial growth. A cold-water bath during blooming helps the gelatin dissolve evenly, reducing the chance of lumps. When storing leftovers, cover tightly and refrigerate; most gelatin desserts stay best within 3-4 days. If you plan ahead, you can prepare the jello brain mold a day in advance and chill it overnight for a firmer texture. By paying attention to temperature and cleanliness, you’ll keep the jello brain mold safe to eat and visually impressive.
Troubleshooting unmolding and texture issues in a jello brain mold
Unmolding problems usually stem from insufficient chilling, improper release, or overly hot handling. If the brain shape sticks, briefly dip the mold in warm water to loosen the surface and then invert onto a plate. To avoid a soft or wobbling center, ensure the gelatin has fully set before attempting to unmold, and give it extra time in the refrigerator if necessary. If colors bleed between layers, chill the mold between additions or pour thinner color layers with gentle, even pours. Finally, if the texture feels too rubbery, check the gelatin-to-liquid ratio and consider a shorter chilling period or a smaller portion size to improve warmth transfer during unmolding.
Creative serving ideas and garnishes for a jello brain mold
Serve the jello brain mold on a neutral platter to let the form take center stage. Garnish with fresh fruit slices, edible flowers, or a contrasting drizzle of whipped cream for a dramatic presentation. For a spooky party, dust with powdered sugar to mimic a brain’s light sheen, or add a small amount of pomegranate seeds to suggest a cerebral look. You can also pair the jello brain mold with complementary desserts like vanilla pudding or yogurt to create a layered plate. If you’re photographing the dish, place the brain mold against a dark, minimalist background to enhance the brain’s contours and color depth. The key is balance: let the brain mold shine while providing tasty, safe accompaniments.
Cleaning and maintenance of the brain mold after use
After you finish with a jello brain mold, rinse with warm water to remove residual gelatin, then wash with mild dish soap. Avoid abrasive scrubbers that could scratch the silicone surface and trap flavors. Dry completely before storing to prevent mold or mildew growth inside the mold. If you notice any stubborn residue, soak the mold in warm, soapy water for a few minutes before washing. Proper care will extend the life of your brain mold and keep future jello brain mold projects easy and successful.
Tools & Materials
- Unflavored gelatin powder(1-2 packets (7-14 g each) per 2 cups liquid)
- Cold water(For blooming gelatin)
- Juice or flavored liquid(1.5-2 cups total)
- Sugar (optional)(To balance acidity or sweetness)
- Brain-shaped silicone mold(Non-stick if possible)
- Measuring cups and spoons(For accuracy)
- Whisk(For gentle mixing)
- Non-stick spray or neutral oil(To ease unmolding)
- Refrigerator(Set to chill gelatin firmly)
- Food coloring (optional)(For color depth)
Steps
Estimated time: Total time: 2-6 hours (including chilling) + 15-20 minutes active prep
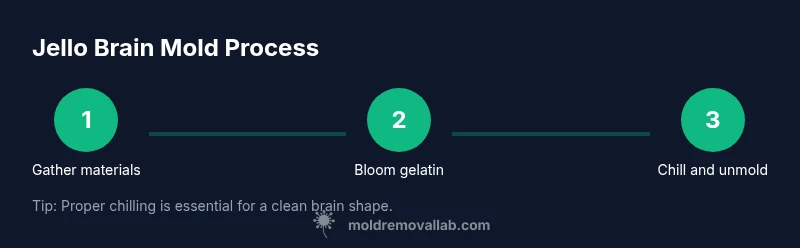
- 1
Gather materials
Collect all ingredients and sanitize your workspace. Have the brain mold ready and ensure it is clean and dry to prevent sticking.
Tip: Organize items within arm's reach. - 2
Bloom gelatin
Sprinkle gelatin powder over cold water and let it sit for 5 minutes. This bloom time is crucial for a smooth, even set.
Tip: Avoid clumping by sprinkling slowly while whisking lightly. - 3
Dissolve gelatin
Gently warm the bloomed gelatin until fully dissolved, but do not boil. Heat helps gelatin chains relax for a silky texture.
Tip: Use a low simmer and stir constantly to prevent scorching. - 4
Add flavor and color
Stir in your chosen juice or flavored liquid and optional color. Keep the mixture steady and avoid introducing air bubbles.
Tip: If using multiple colors, work quickly to minimize setting before you layer. - 5
Prepare brain mold
Lightly spray the brain mold with a non-stick spray or brush with oil to facilitate release. Ensure the mold is clean and dry.
Tip: Wipe away excess oil to prevent streaks on the surface. - 6
Pour into mold
Pour slowly into the mold, aiming for an even coat. For layered effects, pour thin layers and allow each to set briefly.
Tip: Tap the mold gently to release trapped bubbles. - 7
Chill until firm
Place the mold in the refrigerator and chill for 2-4 hours, or overnight for a firmer set. Do not rush this step.
Tip: Avoid moving the mold during setting to prevent cracks. - 8
Unmold and serve
Dip the mold briefly in warm water to loosen, then invert onto a plate. Slice carefully to showcase brain details.
Tip: If needed, a second warm water dip helps release stubborn areas. - 9
Store leftovers safely
Keep remaining jello brain mold covered in the fridge. Consume within 3-4 days for best texture and flavor.
Tip: Label with date to track freshness.
FAQ
What is a jello brain mold?
A brain-shaped silicone mold used to form gelatin desserts, creating a dramatic, conversation-worthy presentation.
A brain-shaped mold used to form gelatin desserts for a dramatic presentation.
Can I use different gelatin flavors?
Yes. Use any flavor that dissolves in hot water and pairs well with your color choices to keep the final product tasty and visually appealing.
Yes, you can use various flavors that dissolve in hot water and look good with the colors you choose.
How long does it take to set?
Gelatin desserts typically set in 2-4 hours in the fridge; for a firmer result, refrigerate overnight.
Most gelatin sets in two to four hours, or overnight for extra firmness.
How do I unmold without breaking the brain shape?
Dip the mold briefly in warm water to loosen, then invert onto a plate. If needed, repeat once for a clean release.
Dip briefly in warm water, then flip onto a plate. Repeat if needed.
How should I store leftovers?
Store covered in the refrigerator and consume within 3-4 days for best texture and flavor.
Cover and refrigerate, enjoy within a few days.
Watch Video
The Essentials
- Plan ingredients and mold prep in advance
- Chill thoroughly for clean unmolding
- Experiment with color layers for realism
- Keep surfaces clean and hands sanitized
- Store leftovers promptly in the fridge