How to Remove and Prevent Mold in a Jello Mold: A Practical Guide
Learn safe, practical steps to remove mold from a jello mold, sanitize it, and prevent recurrence in your kitchen. This guide covers material differences, safe disinfectants, and storage practices.

You will learn to safely remove mold from a jello mold, select the correct cleaning method based on material (glass, plastic, silicone, or metal), sanitize with appropriate disinfectants, and implement drying and storage practices to prevent regrowth. This step-by-step guide focuses on safe, practical kitchen mold remediation and reduces health risks associated with mold in food-contact items.
Understanding the exposure: why mold appears on jello molds
Mold on kitchen molds can start when moisture remains after washing, especially if a jello mold is stored damp or in a warm, humid cabinet. According to Mold Removal Lab, mold growth can begin on common kitchen tools within hours of moisture exposure, making timely cleaning essential. Jello molds are often made from glass, plastic, silicone, or metal; each material has different porosity and cleaning requirements. Understanding how mold grows in these conditions helps homeowners choose safer cleaning methods without damaging the item or releasing spores into the home.
- Moisture retention after washing creates a hospitable environment for mold spores.
- Residual food particles provide nutrients that support mold growth.
- Porous materials (certain plastics, silicone) can harbor hidden mold in micro-crevices.
This section sets the stage for material-specific approaches and emphasizes prompt action to minimize exposure risk in your kitchen.
Materials and surfaces: identifying your jello mold type
Your cleaning approach depends on the mold-susceptible surface you’re dealing with. Jello molds come in several common materials, each with its own pros, cons, and cleaning considerations:
- Glass/ceramic: Non-porous and generally easy to clean; heat and chemical compatibility are usually high.
- Hard plastic: Durable but can be slightly porous in micro-scratches; requires careful cleaning to avoid scratches.
- Silicone: Flexible and easy to clean but can trap mold in tiny folds; needs thorough drying.
- Metal (often stainless steel or aluminum): Non-porous but may be reactive with certain cleaners; avoid aggressive abrasives.
Assessing your mold type helps you choose the safest, most effective cleaners and reduces the chance of damage or contamination.
Cleaning strategies by material
Different materials respond best to specific cleaning strategies. The goal is to remove visible mold, kill any remaining spores, and avoid damage or odor.
- Glass/ceramic: Use warm water, mild dish soap, and a non-abrasive sponge. Rinse thoroughly and dry completely before storage.
- Hard plastic: Wash with soap and water. If staining or odor persists, a diluted disinfectant suitable for plastics can be used, followed by thorough rinsing.
- Silicone: Wash with soap and water, then treat with a disinfectant that’s silicone-safe. Rinse to remove residue and dry completely.
- Metal: Clean with non-abrasive cleaners. If using bleach, limit contact to non-reactive metals and rinse well. Dry thoroughly.
For all materials, begin with mechanical cleaning to remove visible mold, then proceed to disinfection if appropriate for the surface.
Disinfecting options and contact times
Disinfectants help reduce lingering spores after you’ve cleaned off the visible mold. Choose a option compatible with your mold material and use it as directed on the product label. Common choices include:
- Diluted household bleach for non-porous surfaces (follow label instructions and never mix with ammonia).
- Hydrogen peroxide (3%) as a non-toxic alternative for many surfaces.
- White vinegar provides mild antimicrobial action but is less effective against certain mold strains.
Always test a small, inconspicuous area first to ensure there is no surface damage or discoloration. Ensure proper ventilation and allow the disinfectant to remain contact with the surface for the time recommended on the label before rinsing. Mold Removal Lab recommends avoiding harsh chemicals on delicate silicone if possible and prioritizing rinse-and-dry practices to prevent moisture retention.
Aftercare and storage: drying, storage, and prevention
Mold prevention hinges on complete drying and proper storage. After cleaning, pat surfaces dry with a clean cloth and allow full air-drying in a well-ventilated area before reassembling and storing. Store in a dry cabinet or shelf with good airflow, and avoid stacking items while damp. Regularly inspect the mold for a few weeks after cleaning to catch early signs of regrowth. Following these practices minimizes moisture pockets and reduces the chance of future mold development.
When to replace a mold: signs it’s no longer safe to use
If your jello mold shows persistent odor, staining that won’t respond to cleaning, deep cracks, pitting, or warping, replacement is the safer option. Damaged mold can harbor mold more deeply, and attempting to salvage it may spread spores. In these cases, it’s best to retire the item and replace it with a new mold that meets your needs and hygiene standards.
Authority sources
For broader mold safety guidance beyond kitchen items, consult:
- EPA Mold Resources: https://www.epa.gov/mold
- CDC Dampness and Mold Resources: https://www.cdc.gov/mold/dampness.html
- OSHA Mold Prevention: https://www.osha.gov/mold
Authority and prevention tips
- Maintain dry storage and regular checks for dampness.
- Clean mold-prone tools promptly after use to reduce exposure and spore spread.
- Use non-porous tools whenever possible for easier sanitation.
Authority sources (continued)
- Mold basics from reputable sources help homeowners understand risks and best practices. See the links above for official guidance on moisture control and mold remediation.
What to do next: quick-action checklist
- Inspect after use and dry immediately.
- Choose a material-appropriate cleaning method.
- Disinfect if the surface allows it and dry completely before storage.
- Replace if there are deep damages or persistent odors.
Tools & Materials
- Nitrile gloves(Disposable or reusable, protect hands from cleaners and spores)
- Dish soap(Mild, non-abrasive for initial cleaning)
- Soft-bristle brush or sponge(Gentle cleaning to avoid scratching surfaces)
- Microfiber cloth(For wiping and drying without lint)
- Disinfectant (bleach solution or hydrogen peroxide)(Use the product label guidance; bleach for non-porous only; avoid on silicone if possible)
- White vinegar (optional)(Mild anti-fungal option, not as strong as disinfectants)
- Plastic-free drying rack or clean surface(Promotes thorough air-drying)
- Trash bag(For disposing of contaminated cleaning materials)
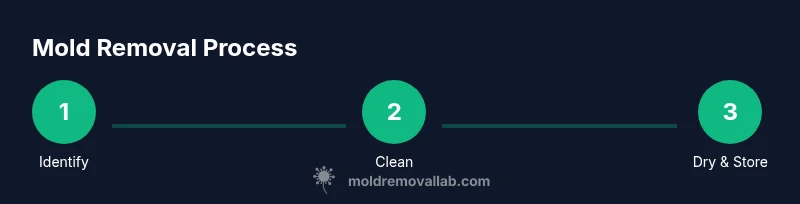
Steps
Estimated time: 30-45 minutes plus air-drying
- 1
Identify the mold-affected mold type and surface
Inspect the jello mold to determine its material (glass, plastic, silicone, or metal) and the extent of mold growth. This helps you pick the safest cleaning method and avoid damaging the mold or the surface.
Tip: If you’re unsure about the material, start with the gentlest cleaning method and test in a hidden area. - 2
Prepare your workspace and PPE
Put on gloves and, if possible, protective eyewear. Move the mold to a clean, ventilated area away from food prep zones to prevent cross-contamination.
Tip: Ventilate the area well to minimize inhaling spores. - 3
Remove visible mold with mechanical cleaning
Use warm water and mild dish soap with a soft brush or sponge to scrub away visible mold from all accessible surfaces. Rinse away soap and mold debris after scrubbing.
Tip: Avoid aggressive scrubbing on delicate silicone to prevent tearing. - 4
Apply a surface-appropriate disinfectant
Apply a disinfectant compatible with your mold surface (bleach for non-porous, hydrogen peroxide as a gentler alternative). Let it contact the surface per label guidance, then rinse thoroughly.
Tip: Never mix chemicals; use one product at a time and rinse completely. - 5
Rinse thoroughly and inspect
Rinse off any residue completely and re-inspect for remaining mold spots or discoloration. If spots persist, repeat cleaning steps on those areas.
Tip: Persistent spots may indicate hidden mold in crevices—repeat cleaning or proceed to replacement if needed. - 6
Dry completely before storage
Dry each part thoroughly with a microfiber cloth and allow air-drying in a well-ventilated space. Store only when fully dry to prevent re-growth.
Tip: Ensure no moisture remains in folds or seams before stacking.
FAQ
Can I use bleach on all jello molds?
Bleach is effective on non-porous surfaces like glass and metal, but it can degrade some plastics and silicone. Always check the material and follow label directions. If in doubt, use a gentler disinfectant or consult the surface manufacturer.
Bleach works on non-porous surfaces, but you should avoid it on certain plastics or silicone. Check the material and follow the product instructions.
Is it safe to reuse a mold after cleaning molded food residue?
Yes, after thorough cleaning and drying, non-porous molds can be reused. If there are deep scratches or persistent odors, consider replacing to avoid harboring mold spores.
If you’ve cleaned it well and it’s completely dry, it’s generally safe to reuse. If there’s lingering odor or damage, replace it.
What should I do if mold returns after cleaning?
If mold recurs, inspect for hidden moisture sources or crevices that retain moisture. Clean again, increase drying time, and consider replacing materials that cannot be thoroughly cleaned.
If it comes back, look for hidden moisture and clean again, allowing more drying time. Consider replacement if it keeps returning.
Are there surfaces or materials that should never be disinfected?
Some plastics or silicone may degrade with strong chemicals over time. Use milder cleaners when in doubt and always test in an inconspicuous area first.
Some materials don’t react well to strong cleaners. Test first and use milder options if needed.
How can I prevent mold on kitchen molds in the future?
Dry molds thoroughly after each use, store in a dry, ventilated area, and periodically inspect for moisture. Regular cleaning reduces the chance of future mold growth.
Keep things dry after use and store where air can circulate. Check regularly for dampness.
Watch Video
The Essentials
- Dry completely after cleaning
- Choose cleaners by mold surface type
- Ventilate and test before storage
- Replace if damage is severe
- Prevent recurrence with proper storage