How Often to Clean Shower to Prevent Mold
Discover how often to clean your shower to prevent mold. This practical guide covers routines, moisture control, safe cleaners, and maintenance tips for a healthier bathroom.

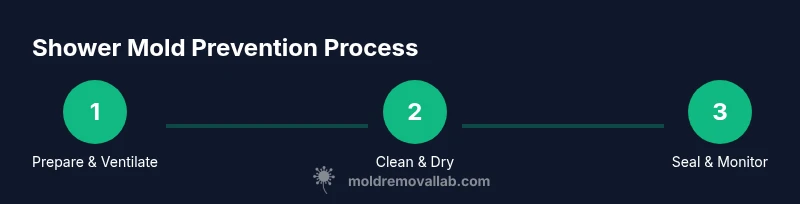
If you’re wondering how often to clean shower to prevent mold, adopt a simple, repeatable routine: wipe down after each use, perform a deeper clean weekly, and address moisture and ventilation promptly. Use a proven bathroom cleaner, dry surfaces thoroughly, and inspect grout monthly for wear. This cadence keeps surfaces dry and mold-free without heavy remediation.
Why frequency matters for shower mold prevention
If you’re asking how often to clean shower to prevent mold, the short answer is: implement a simple, repeatable routine that targets moisture control as well as surface cleanliness. Mold thrives in damp, warm spaces, and showers are a constant source of humidity and mineral buildup. The Mold Removal Lab team found that consistent cleaning, combined with good ventilation and prompt moisture mitigation, dramatically reduces mold risk over time. By establishing a practical cadence—wipe down surfaces after each use, perform a deeper clean weekly, and address leaks or condensation promptly—you keep mold spores from establishing a foothold on tile, grout, and caulk. In practice, frequency isn’t about ticking off a calendar; it’s about staying ahead of moisture cycles and material wear. This approach also minimizes the need for costly remediation later. For renters, this habit can be easier to maintain by using a simple checklist and integrating it into regular bathroom maintenance.
The science behind mold growth in showers
Mold growth requires three things: moisture, warmth, and a food source (like soap scum or mineral deposits on tile). In showers, humidity lingers after use, and grout and caulk provide porous surfaces where mold spores can take hold. Even with a small leak, or if a shower door doesn’t seal well, tiny amounts of moisture can accumulate behind tiles or in corners. Mold can appear as black, green, or gray patches and may release musty odors. According to Mold Removal Lab, maintaining airflow and reducing surface moisture are the most effective defenses. That means turning on the exhaust fan during and after showers, keeping a window ajar if possible, and drying walls and glass promptly. By recognizing the environmental cues that feed mold—wet surfaces, poor ventilation, and porous materials—you can tailor your cleaning cadence to interrupt growth before it becomes visible.
Recommended cleaning cadence for most homes
Shower cleaning frequency should be aligned with moisture exposure. A practical rule of thumb is to wipe surfaces after every shower, perform a deeper weekly clean, and check grout or caulk for wear on a monthly basis. If you notice persistent condensation, small leaks, or discoloration, increase the cadence. In spaces with limited ventilation or high humidity, daily quick-wipe sessions and more frequent deep cleans are advisable. The goal is to keep surfaces dry and to stop soap scum and biology from accumulating. Mold Removal Lab analysis shows that updating moisture control practices—like using a fan and keeping doors or windows open during showers—can materially reduce mold risk when paired with regular cleaning. Use a gentle, non-abrasive cleaner on ceramic, glass, and enamel; for grout, a stiff brush helps remove buildup that harbors mold.
Step-by-step routine you can follow
- Prepare and protect: Open the bathroom window or turn on the exhaust fan; gather tools and put on gloves and a mask. This prevents inhaling spores and protects surfaces. 2) Pre-clean: Rinse the shower to remove loose soap scum; apply cleaner to tiles, grout, and caulk. 3) Scrub: Use a grout brush on grout lines and a non-scratch sponge on glass or enamel surfaces. Focus on corners, seams, and behind door tracks where moisture collects. 4) Rinse and dry: Rinse away cleaner completely and wipe surfaces dry with microfiber towels. 5) Treat and seal: If grout is cracking, apply a grout sealer after it’s dry. 6) Ventilate and monitor: Leave the fan running for 20–30 minutes and monitor humidity. 7) Schedule follow-up: mark a weekly reminder for deep cleaning. 8) When to escalate: if you still see mold growth, consider remediation steps.
Ventilation and moisture control
Effective moisture management is often more powerful than scrubbing alone. Keep a functioning exhaust fan running during showers and for a while after, or open a window to promote air exchange. If possible, maintain lower humidity levels in the bathroom with a dehumidifier or humidity monitor. Regular airflow prevents condensation from lingering on grout and glass, reducing the time mold spores have to settle and grow.
Cleaning products and safety
Choose cleaners that are safe for bathroom surfaces and mold-prone areas. Non-abrasive cleaners work well on tile and glass, while a stiff brush helps with grout buildup. When using any mold-targeting cleaner, always follow the label, wear gloves and a mask, and ensure the space is well-ventilated. Avoid mixing cleaners, which can release hazardous fumes. If you prefer non-bleach options, look for products with hydrogen peroxide or vinegar-based formulas; these can be effective against surface mold when used properly.
Grout, caulk, and surface maintenance
Grout and caulk degrade over time, especially in high-humidity zones. Inspect annually and reseal grout or recaulk where you see cracks or gaps. Sealing creates a barrier to moisture infiltration and helps keep mold from taking root in seams. After any resealing, allow the area to dry completely before exposure to moisture and follow product instructions for cure times.
When to call a professional
If mold covers large areas, returns after routine cleaning, or appears to be growing behind walls or under fixtures, professional remediation is recommended. A licensed mold specialist can identify hidden moisture sources and provide safe removal strategies. Document the growth with photos and dates to assist any assessment and to track progress over time.
Common mistakes and quick-start checklist
Common mistakes include using the wrong cleaner for grout, ignoring hidden moisture sources, and failing to dry surfaces completely after cleaning. Quick-start checklist: 1) Wet surface wipe after use; 2) Weekly deep clean; 3) Dry all surfaces; 4) Check for cracks; 5) Improve ventilation; 6) Schedule monthly grout checks.
Tools & Materials
- Microfiber cloths(For wiping and drying; lint-free and highly absorbent)
- Sponge(Non-abrasive for glass and enamel)
- Grout brush(Stiff-bristled angled brush)
- Soft scrub brush(Helpful for textured surfaces)
- Spray bottle(Dilute cleaners as needed)
- All-purpose bathroom cleaner(Look for mildew-fighting formulas and low fumes)
- Mold-killing cleaner (non-chlorine or bleach per label)(Follow label; ensure ventilation)
- Gloves(Nitrile or latex; protect skin)
- Mask (N95 or respirator)(Protect from mold spores)
- Ventilation fan or dehumidifier(Reduces humidity during cleaning)
- Humidity meter(Optional to monitor RH by area)
- Old towels(Absorb excess moisture during drying)
Steps
Estimated time: 60-90 minutes
- 1
Prepare the space and safety gear
Ventilate the bathroom, remove items, and put on gloves and a mask. This protects you from spores and keeps surfaces dry for cleaning.
Tip: Ensure the fan runs during the entire process. - 2
Inspect and plan
Check grout, caulk, and seals for wear or cracks. Plan cleaning actions based on surface type and any stubborn spots.
Tip: Take photos to document conditions and track improvements. - 3
Pre-treat surfaces with cleaner
Spray cleaner on tiles, grout, and glass; let it sit 5–10 minutes to loosen grime and biofilm.
Tip: Do not mix cleaners; follow label directions and keep ventilation up. - 4
Scrub grout and surfaces
Scrub grout lines with a stiff brush; use a non-scratch sponge on glass and enamel surfaces. Focus on corners and behind tracks.
Tip: Use even, circular motions to avoid damaging grout. - 5
Rinse thoroughly
Rinse away cleaner residue completely; use a spray head or handheld nozzle for targeted sections.
Tip: Rinse top-to-bottom to prevent dirty water running onto cleaned areas. - 6
Dry surfaces completely
Dry tiles, grout, and doors with microfiber towels; run the exhaust fan or open a window afterward.
Tip: Drying is the most critical step to prevent regrowth. - 7
Seal cracks or re-seal grout
If you see cracks or gaps, seal or re-seal after surfaces are fully dry. This blocks moisture pathways for mold.
Tip: Follow product instructions and allow sufficient cure time. - 8
Set a maintenance schedule
Create a weekly wipe-down plus monthly deep-clean plan. Use reminders and adjust cadence for humidity levels.
Tip: Place reminders in a shared calendar or phone calendar. - 9
Escalation steps
If mold persists after routine cleaning, reassess moisture sources and consider professional assessment or remediation.
Tip: Document growth with photos and dates before seeking help.
FAQ
Do I need to use bleach to kill mold in a shower?
Bleach can be effective on non-porous surfaces, but it isn’t always necessary. Safer cleaners or hydrogen peroxide formulations can work well on tile and glass when used as directed. Always ventilate and avoid mixing cleaners.
Bleach can work on non-porous surfaces, but safer cleaners often suffice; ventilate and follow label directions.
How often should I deep-clean my shower?
A practical approach is a weekly wipe-down plus a deeper clean every one to two weeks, depending on humidity and usage. Increase frequency if you notice condensation or growth.
Deep-clean weekly, more often if humidity is high or you see condensation.
What signs indicate I should call a professional?
Persistent mold growth after cleaning, hidden mold behind walls, or moisture that won’t resolve with ventilation warrants a professional assessment. They can identify moisture sources and perform safe remediation.
If mold keeps coming back or you suspect hidden mold, call a professional.
Can I prevent mold with safer cleaners?
Safer cleaners can reduce buildup and be effective when used consistently, but moisture control remains the key. Combine cleaning with ventilation and drying to prevent mold.
Yes, safer cleaners help, but moisture control is the real prevention.
How does humidity affect shower mold risk?
Higher humidity increases mold risk by keeping surfaces damp longer. Use ventilation and dehumidification to maintain lower humidity levels.
More humidity means more mold risk; ventilate and dry surfaces to keep it in check.
Watch Video
The Essentials
- Establish a moisture-focused cleaning cadence
- Ventilate during and after cleaning
- Dry all surfaces to prevent regrowth
- Inspect and seal grout regularly
- Escalate to professionals if mold persists