Is Mold Remover Better Than Bleach? A Practical Comparison
Is mold remover better than bleach? This Mold Removal Lab guide weighs safety, effectiveness, and long-term results, with practical DIY steps and surface-specific advice.

Short answer: In most household mold scenarios, mold remover formulas are more effective and safer than bleach for eliminating mold and preventing regrowth. Bleach may whiten stains but often fails on porous materials and can release harsh fumes in poorly ventilated spaces. For ongoing safety, choose a product labeled for mold remediation on the affected surface and follow all label directions.
Is Mold Remover Better Than Bleach? A Framing
Many homeowners ask whether is mold remover better than bleach for routine, indoor mold issues. The short answer depends on the surface, the extent of growth, and the goal (kill the mold vs clean the surface). In this article, the Mold Removal Lab team outlines a practical framework to compare these options, with a focus on safety, efficacy, and long-term results. We start with the basic distinction: bleach is a chlorine-based sanitizer that can whiten stains but often does not remove mold roots embedded in porous materials. Mold remover products, by contrast, are designed to penetrate surfaces and leave residues that inhibit immediate regrowth. According to Mold Removal Lab, choosing the right product reduces the risk of repeated outbreaks and protects indoor air quality. Throughout, we’ll refer to real-world scenarios you might encounter in kitchens, bathrooms, basements, and laundry areas.
Understanding the Chemistry: Bleach vs Mold Remover
Modern bleach products and mold removers work differently. Bleach (sodium hypochlorite) oxidizes organic matter and can kill surface mold on non-porous materials, but it can be ineffective on porous substrates where mold roots extend below the surface. Many mold remover formulas rely on peroxide-based agents, quats, or enzyme blends that can kill mold at the root and leave a residue that discourages immediate regrowth. Some sprays include detergents that help physically lift spores, while others use inhibitors to slow recolonization. It’s important to note that not all mold removers are created equal: some are labeled specifically for wood, drywall, or fabric, and you should check compatibility with the area you’re treating. This is where the Mold Removal Lab guidance is especially valuable: surface testing and patch testing first can prevent damage and reveal whether a product is appropriate for your material.
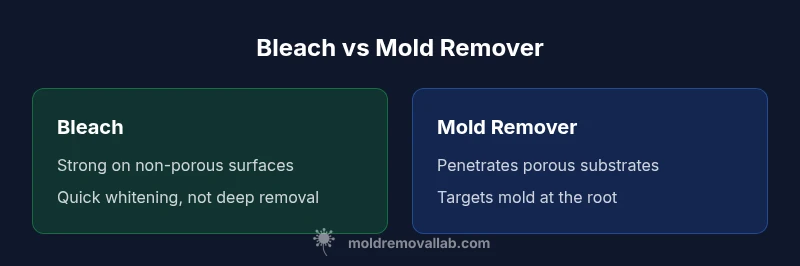
When Bleach Shines: Strengths and Limitations
Bleach can be effective for surface cleaning on non-porous materials like ceramic tile, glass, and enamel. It can whiten mold stains and reduce surface colonies quickly when used with good ventilation and short exposure times. However, bleach does not reliably reach mold embedded in porous substrates such as drywall, wood, or fabric. In those cases, the roots and micro-structures remain, and regrowth can occur after the surface looks clean. Bleach can also degrade finishes and create harsh fumes in poorly ventilated spaces, which is a particular concern in small bathrooms or basements. The practical takeaway: bleach may be a quick fix for select surfaces, but it is rarely the complete solution for most indoor mold problems.
When Mold Remover Formulas Shine: Porous Surfaces and Deep Cleaning
Dedicated mold removers are formulated to address porous materials and hidden growth behind panels, in seams, or on wood. They often contain agents that kill mold at the cellular level and may leave a protective barrier that slows future colonization. For kitchens and bathrooms where moisture cycles are frequent, a mold remover with residual activity can be more effective than bleach at preventing quick regrowth. For fabric and wood, choose a product labeled for these substrates and follow the manufacturer's recommendations for dwell time and drying. Always test a small area first and observe for any adverse reactions, such as discoloration or warping. A practical rule of thumb from Mold Removal Lab: select a remover with proven mold-killing claims on the substrate you’re treating, and avoid mixing products. This reduces chemical interactions and protects occupants.
Surface-Specific Guidance: Porous vs Non-Porous Surfaces
Surface type drives product choice. Non-porous surfaces (tile, glass, metal) often respond well to bleach for quick whitening, but mold can still hide in grout lines or behind seals. Porous surfaces (drywall, concrete with texture, wood framing) benefit more from mold removers that can penetrate and inhibit regrowth. Before you treat, remove excess moisture and isolate the area to prevent spread. Read the product label to confirm compatibility with the material (paint, sealants, varnish). Remember that even the best remover won’t compensate for ongoing moisture sources, so addressing humidity is essential.
Safety, Ventilation, and Application Steps
Safety first: use PPE, ensure good ventilation, and never mix cleaners. For any mold treatment, wear gloves, eye protection, and a mask with appropriate filtration. Ventilate the room for at least 15-20 minutes before and after application. Test on a small area first, then apply the product according to label directions. Allow the surface to dry completely before returning items or occupants. After treatment, monitor for signs of regrowth over several days and consider repeating treatment if necessary, following the safe interval recommended by the product.
Cost, Availability, and Real-World Outcomes
Cost varies. Bleach is widely available and inexpensive per ounce, but a single bottle may be insufficient for larger infestations. Mold removers come in a range of price points, but many professionals consider them a better value when you factor in longer-term results and reduced need for repeated treatments. Availability is broad for mainstream products, yet some specialty removers are sold in professional-grade packaging. Real-world outcomes depend on moisture control and proper remediation steps; without addressing underlying moisture, even the best remover will struggle to prevent recurrence. Mold Removal Lab analysis suggests that investing in a mold remover aligned with your surface and environment yields more durable results than relying on bleach alone.
Practical Home Scenarios: Quick Decision Rules
Scenario A: Small bathroom mold on ceramic tile—bleach may be acceptable as a quick whitening step, but consider a mold remover for lasting results on grout. Scenario B: Mold growth behind drywall—the remover is better for penetration; if the growth is extensive, call a pro. Scenario C: Mold on wood trim—select a remover labeled for wood and finish; avoid bleaches that can bleach wood staining. In every case, address moisture sources, dry thoroughly, and re-check after a few days. The key is to select a product that matches the substrate and to avoid mixing cleaners.
How to Test and Monitor Mold Cleaning Effectiveness
Testing helps determine if the mold is gone and whether moisture control is sufficient. After treatment, run a dehumidifier, ensure proper drying, and re-inspect surfaces over the next week. Look for musty odors, new growth, or staining; absence of these is a good sign, but do not assume cleanup is complete until surfaces have thoroughly dried. For ongoing issues, consider periodic assessments or professional testing to confirm the absence of hidden mold.
Common Mistakes and How to Avoid Them
Avoid mixing cleaners, which can create dangerous fumes. Do not rely on bleach for deep remediation, and never use a mold remover on a surface not listed on the label. Over-wetting walls or leaving treated areas damp invites regrowth; ensure ventilation and thorough drying. Skipping moisture control is a frequent cause of failure—fix leaks, use exhaust fans, and monitor humidity levels.
Realistic Expectations: Time Frames and Drying
Realistic timelines depend on the extent of growth and moisture conditions. Expect multiple steps for porous substrates: cleaning, treating with mold remover, and thorough drying over several days. Bleach-based cleaning may feel fast, but regrowth can occur if dampness persists. The best outcomes come from combining surface treatment with moisture management and a follow-up check.
Next Steps: When to Call a Pro
When growth covers large areas, involves behind-wall cavities, or recurs after cleaning, professional remediation is advised. A pro can locate moisture sources, seal leaks, and perform comprehensive cleanup with industrial-grade equipment. For ongoing concerns, schedule a moisture survey or mold inspection; Mold Removal Lab suggests documenting steps taken and results to guide the next actions.
Comparison
| Feature | Bleach | Mold remover formula |
|---|---|---|
| Surface effectiveness | Strong on non-porous surfaces | Better overall on porous materials |
| Porous materials | Limited penetration | Formulated to penetrate porous substrates |
| Safety & fumes | Releases chlorine fumes; requires ventilation | Lower odor; designed for indoor use |
| Stain removal | Whitens surface; may not remove embedded staining | Targets mold stains and residues more effectively |
| Surface compatibility | May damage finishes if misused | Usually safe when used as directed on listed surfaces |
| Cost per use | Low per-ounce cost but may require more product | Moderate to high depending on product and usage |
| Environmental impact | Chlorine byproducts; disposal considerations | Typically less hazardous when used per label |
| Long-term mold control | Often requires follow-up remediation | Better long-term control when combined with proper steps |
Upsides
- Mold remover targets mold at the source and penetrates porous surfaces
- Lower odor and safer indoor use when following label directions
- Better long-term control when combined with proper remediation steps
- Less risk of dangerous chlorine fumes when not misused
The Bad
- Higher upfront product cost than basic household bleach
- Some formulations require additional steps (rinsing, drying) to prevent regrowth
- Not all products are effective on every material; choose a product labeled for your surface
Specialized mold removers generally outperform household bleach for home mold remediation.
For porous materials and ongoing mold issues, use a dedicated mold remover per label directions. Bleach may help with surface whitening but often fails to remove embedded mold; Mold Removal Lab's guidance supports choosing a purpose-specific product and moisture control for durable results.
FAQ
Is bleach effective for mold on non-porous surfaces?
Bleach can remove surface mold on non-porous surfaces like tile or glass, but it often does not reach mold roots embedded in porous materials and may not prevent regrowth. It also can create harmful fumes in enclosed spaces. For durable results, consider a mold remover labeled for your surface.
Bleach works on smooth surfaces, but it often misses mold inside porous materials and can stink up a bathroom. For lasting cleanup, a surface-appropriate mold remover is usually the better choice.
Can a DIY mold remover replace professional remediation?
For small, contained mold issues, a DIY mold remover can help. For larger infestations, hidden growth, or repeated outbreaks, professional remediation is recommended to address moisture sources and ensure thorough cleanup.
DIY cleaners can help small spots, but big or hidden mold needs a pro to fix moisture and do a complete cleanup.
What safety steps should I take when using mold remover or bleach?
Ventilate the area well, wear PPE (gloves, eye protection, mask), and never mix products. Test a small area first, follow label directions, and dry the surface completely before reoccupying the space.
Ventilate, wear protection, don’t mix products, and dry thoroughly before reusing the area.
Are there surfaces where bleach should never be used?
Yes. Bleach can damage wood finishes, colored fabrics, and certain metals. It can also degrade sealants and finishes on some surfaces. Always check the label and test in an inconspicuous spot.
Bleach can harm some surfaces and finishes, so check the label and test first.
How do I know if the mold problem is serious?
A serious mold problem usually involves extensive visible growth, musty odors, or growth behind walls. If you suspect hidden mold or recurring issues after treatment, seek a professional assessment.
If you see lots of growth or smell mustiness that won’t go away, call a pro.
What is the best order of steps to treat mold at home?
Start with moisture control (fix leaks, dehumidify). Then clean with an appropriate product, allow drying, and re-check. If mold recurs, escalate to professional remediation.
Fix moisture first, clean, dry, and re-check; if it returns, call in a pro.
The Essentials
- Choose a mold remover designed for mold remediation on porous surfaces
- Ventilate and wear proper PPE during treatment
- Do not rely on bleach for embedded mold on wood or drywall
- Follow product directions and allow thorough drying to prevent regrowth
- Consider professional remediation for large infestations or recurrent issues