Why Mold Grows in Your Toilet and How to Stop It
Learn why mold grows in toilets, what moisture and humidity feed it, and practical, step-by-step fixes to clean, prevent, and protect your bathroom from recurring mold.

To curb toilet mold, focus on stopping moisture, cleaning surfaces, and sealing leaks. Start by identifying water sources, improving bathroom ventilation, and deep-cleaning with an approved mold cleaner. Consistent moisture control is the first line of defense, and Mold Removal Lab emphasizes routine cleaning as your best preventive measure.
Why does mold grow in my toilet
The exact question, 'why does mold grow in my toilet,' captures a common bathroom concern. In short, mold thrives where moisture lingers and organic material is present. The Mold Removal Lab team found that bathrooms with persistent humidity, drips, and damp surfaces create ideal conditions for mold to establish in the toilet bowl, under the rim, and along caulk seams. According to Mold Removal Lab, even minimal ongoing moisture from a slow leak or condensation can sustain fungal growth over time. This is why you’ll often notice mold along the toilet base, behind the tank, and near poorly sealed edges. By prioritizing moisture control, regular cleaning, and dry surfaces, you reduce the opportunities mold needs to take hold.
From a health perspective, persistent bathroom mold can irritate eyes, skin, and the respiratory system, especially for sensitive individuals. The Mold Removal Lab team also notes that some molds release spores that can become airborne during cleaning if done aggressively without protection. Start with gentle, label-safe cleaners and ensure good ventilation during any procedure. Recognize that mold growth is a process driven by moisture, time, and accessible nutrients, not a single event.
Common sources of bathroom mold
Mold in bathrooms usually starts where moisture is most frequent: the shower, sink, toilet sealants, and ventilation gaps. Leaky connections behind the toilet or under the vanity allow water to accumulate, while condensation on cold surfaces provides a constant damp environment. Organic debris like soap scum, mineral deposits, and hair also offer a food source for mold spores. Inadequate air exchange worsens the issue, allowing humidity to linger after showers. Regular inspections of seals, caulk lines, and plumbing fixtures help catch problems before they lead to visible growth. Moisture control remains the most reliable defense against recurring mold in the bathroom environment.
The role of moisture, humidity, and ventilation
Humidity is the primary driver of bathroom mold. When a bathroom lacks effective ventilation, moisture stays trapped, allowing spores to settle and colonize. An exhaust fan that vents to the outside, a window that opens during and after showers, and even a dehumidifier can dramatically reduce indoor humidity. Surface condensation on toilet surfaces during cool mornings is another sign of high moisture levels. The Mold Removal Lab team highlights that maintaining low humidity combined with thorough drying after use is a practical strategy for reducing mold risk. Small habits—like wiping down the toilet and surrounding tiles after baths—can have a meaningful impact over weeks and months.
Prevention: moisture control and cleaning routines
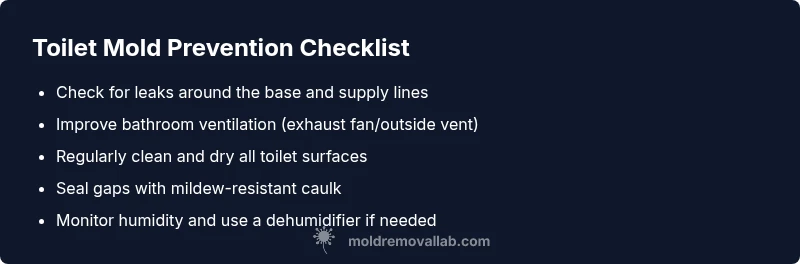
Effective prevention blends moisture control with consistent cleaning. Start with a leak check around the toilet base and supply lines; fix any drips promptly. Increase ventilation during and after showers or baths, and consider running the exhaust fan for longer periods. Use a mold-safe cleaner on all toilet surfaces weekly and after use where water can dwell. Re-seal caulk around the base if you notice gaps that trap moisture. Regularly dry the area with a microfiber cloth and store damp towels away from the bathroom to minimize lingering humidity. The goal is to make damp conditions rare rather than occasional, which dramatically reduces mold growth opportunities.
Inspecting for hidden mold and testing options
Hidden mold can reside behind walls or under tile grout, where it is not always visible from a quick peek. If you notice persistent odor, recurring spots after cleaning, or water staining that reappears, consider a professional inspection. Tools like moisture meters and borescopes can reveal concealed growth, and professional testing can distinguish between common bathroom molds and more concerning varieties. While DIY testing exists, Mold Removal Lab cautions that improper sampling can lead to misinterpretation of results. When in doubt, schedule a professional assessment to map the extent of growth and identify moisture sources.
Safe cleaning methods and products
Choose products labeled for bathroom mold removal and follow the manufacturer’s directions. Common options include products designed to kill mold on non-porous surfaces and safer alternatives like hydrogen peroxide or vinegar with cautions. Never mix cleaners with bleach or ammonia, and wear gloves, eye protection, and a mask during cleaning. Ventilate the area well to minimize inhaling mold spores. Focus cleaning on seals, grout lines, and under the rim, then rinse and dry thoroughly. After cleaning, re-check these areas in 24–48 hours to ensure growth did not re-emerge. Mold Removal Lab recommends documenting progress with photos for reference.
When to call a professional and what to expect
If mold keeps returning after cleaning, or you suspect structural moisture problems or hidden growth behind walls, contact a qualified mold remediation specialist. Professionals can identify moisture sources, seal leaks, and perform more thorough remediation that reduces the risk of re-growth. Expect a visit to include a visual inspection, moisture readings, containment measures to prevent spore spread, and a plan to address the root cause. The Mold Removal Lab Team emphasizes that prevention and professional guidance are key to lasting results.
Quick DIY fixes you can implement today
Start with a moisture audit in the bathroom: check for leaks, improve airflow, and wipe down damp surfaces after use. Refresh caulk around the toilet base and seal any visible gaps. Clean with a mold-safe cleaner and ensure the bathroom dries quickly after showers. If you can, open a window or run the exhaust fan longer to lower humidity. Record your results with a photo log to monitor progress over time. These small steps can prevent mold from gaining a foothold in the first place.
Real-world lessons: case notes and prevention tips
Real-world bathroom mold stories emphasize moisture control and routine maintenance. Readers often report success after fixing leaks, adding ventilation, and cleaning on a regular schedule. Keep a calendar reminder for monthly bathroom maintenance tasks and a quick-drying routine after showers. In cases where mold recurs despite these efforts, it’s wise to seek a professional assessment to uncover hidden moisture issues or design flaws that contribute to ongoing moisture retention.
Steps
Estimated time: 60-90 minutes
- 1
Shut off water and prepare the area
Locate the shut-off valve and stop the toilet water flow. Remove personal items and lay down protective coverings to catch drips. This helps create a clean workspace before you address the mold. Safety note: wear gloves and eye protection.
Tip: Have paper towels, a bucket, and a mask handy to manage debris safely. - 2
Identify moisture sources
Inspect the base of the toilet, supply lines, and under the tank for drips or condensation. Resolve obvious leaks first, as they feed ongoing mold growth. Document findings with photos for your records.
Tip: Take photos to track improvements after repairs. - 3
Ventilate the area
Open windows or run an exhaust fan to reduce humidity during cleaning. If possible, keep the bathroom ventilated for several hours after work to help surfaces dry completely.
Tip: Use a dehumidifier if your bathroom stays humid after ventilation. - 4
Clean non-porous surfaces
Apply a mold-safe cleaner to the toilet bowl, rim, and surrounding tiles. Scrub with a stiff brush and rinse thoroughly. Avoid harsh mixing of cleaners to prevent fumes.
Tip: Wear a mask and goggles to protect against spores. - 5
Seal and reseal edges
Re-seal cracked caulk around the base and along joints where moisture collects. Use a mildew-resistant sealant and allow it to cure per manufacturer directions.
Tip: Check caulk annually and replace if you see gaps. - 6
Dry completely and re-test
Dry all surfaces with a microfiber cloth. Re-check the area in 24–48 hours for any signs of re-growth. If mold returns, consider professional remediation.
Tip: Keep a log of moisture levels and mold observations. - 7
Consider professional assessment
If growth persists or you suspect hidden mold behind walls, contact a certified mold remediation specialist. They will assess moisture sources and perform targeted remediation.
Tip: Professional guidance can prevent repeated cycles of cleaning and regrowth.
Diagnosis: Visible mold growth around toilet, on caulk, or within the tank and bowl surfaces
Possible Causes
- highExcess moisture from leaks or condensation
- highPoor bathroom ventilation
- mediumStanding water or damp surfaces due to plumbing issues
- lowAccumulated soap scum or organic debris feeding mold
Fixes
- easyRepair leaks, replace worn seals, and dry areas thoroughly
- easyImprove ventilation with an exhaust fan or cracked window airing
- mediumCall a plumber to inspect behind-wall plumbing and under the base
- mediumDeep clean with mold-safe products and re-seal caulk lines
FAQ
Why does mold grow in my toilet?
Mold grows in toilets where moisture, warmth, and organic debris exist. Bathrooms are prime habitats because humidity and damp surfaces persist. Controlling moisture and improving airflow dramatically reduce growth, while regular cleaning helps prevent spores from taking hold.
Mold grows in bathrooms when moisture sticks around. Improve airflow and clean regularly to reduce growth; seek professional help for persistent issues.
Is toilet mold dangerous to my health?
Most bathroom mold is not immediately dangerous, but some molds can trigger allergies or irritate the lungs, especially in sensitive individuals. Take precautions during cleaning, wear protection, and limit exposure if you have respiratory issues.
Some bathroom mold can affect people with allergies or asthma. Protect yourself during cleaning and reduce exposure when possible.
Can I clean toilet mold myself, or do I need a pro?
Small, surface mold can be cleaned with appropriate cleaners and good ventilation. If mold persists after cleaning, or if you suspect hidden growth behind walls, hire a professional remediator. Always address the moisture source first.
You can handle small spots, but ongoing or hidden mold needs a pro.
What cleaners are safe for toilet mold?
Use products labeled for mold removal and always follow label directions. Avoid mixing cleaners and ensure proper ventilation and PPE during use. For mild cases, some bathroom cleaners or hydrogen peroxide can help, but check product guidance.
Use labeled mold cleaners, ventilate the area, and wear protective gear.
When should I call a professional mold remediation service?
Call a professional if mold keeps returning after cleaning, you suspect hidden growth, or moisture sources you cannot fix yourself persist. Professionals identify moisture sources, contain the mold, and perform targeted remediation to prevent recurrence.
If mold returns or is hidden, get a professional assessment.
Watch Video
The Essentials
- Address moisture first to stop mold.
- Ventilation is essential for prevention.
- Use mold-safe cleaners and proper PPE.
- Call a pro for hidden or recurring growth.