Mold Mites in Bathroom: Urgent Remediation Guide
Urgent guide on mold mites in bathroom from Mold Removal Lab. Identify sources, stop spread, and safely remediate with practical steps for homeowners and renters.

Within minutes of noticing tiny pests, the quickest fix is to stop the spread and begin targeted cleaning. According to Mold Removal Lab, mold mites in bathroom thrive on humidity and damp surfaces, so act now: isolate the area, dry and vent, then scrub affected surfaces with a detergent solution, and dispose of infested materials. If infestation persists, call a professional.
What are mold mites in bathroom and why they appear
Mold mites in bathroom are tiny arthropods that feed on mold and organic debris found in damp areas. They thrive in spaces with standing humidity, such as shower stalls, behind tiles, and under sinks. The Mold Removal Lab team notes that these pests are indicators of excess moisture more than dangerous biting insects; the real risk is the mold itself and the allergic reactions it can trigger. To homeowners, the key takeaway is that moisture control is your first defense. This means fixing leaks, improving ventilation, and drying surfaces promptly after use. Understanding their lifecycle helps you interrupt their population growth and reduce recurring sightings. By addressing both the pests and the moisture sources, you create a safer bathroom environment for your family.
Where mold mites come from in the bathroom environment
Most bathroom mite problems start with humidity and mold growth. Common sources include steam from hot showers that condenses on walls, poorly sealed grout, leaks behind tiles, and towels left damp overnight. The Mold Removal Lab analysis shows that bathrooms with inadequate ventilation experience more frequent mite sightings because mold provides a steady food source. Reducing moisture not only slows mite reproduction but also limits other mold species that irritate eyes and airways. Practical sources to inspect include exhaust fans that fail to vent, windows that stay closed in humid weather, and hidden leaks under sinks. Regular checks of seals around tubs and around fixtures help you spot trouble early, before mites become a bigger issue.
Signs and practical methods to identify bathroom mite activity
Mold mites themselves are tiny and often go unnoticed by the naked eye, but you can spot signs of their presence. Look for a persistent musty odor, visible mold growth, brownish dust near mold colonies, and increased allergy symptoms in household members. You may also notice tiny specks moving along grout lines when you shine a bright light. The presence of moisture + mold is a strong predictor of mite activity, so focus on reducing humidity and eliminating mold. Keep a small notebook of areas that stay damp after showers and track improvements after cleaning and ventilation changes.
Immediate actions to take within the first 24 hours of noticing mites
Act quickly to minimize spread. Open windows or run the exhaust fan to improve air exchange, and use a dehumidifier if available. Wear gloves, a mask, and eye protection to reduce exposure to mold spores and mite particles. Isolate affected zones as much as possible by closing doors or sealing off cabinets if you suspect under-sink mold growth. Remove damp towels and absorbent items from the bathroom and launder them with hot water. Clean hard surfaces with a detergent solution and dry thoroughly before reintroducing items.
Step-by-step cleaning and remediation for common bathroom mold mites
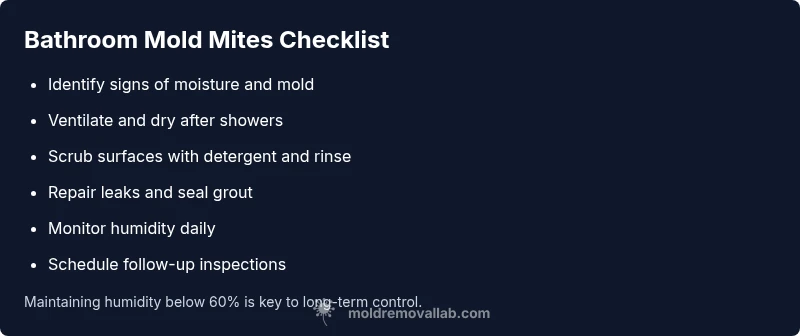
- Gather PPE and cleaning supplies: gloves, mask, goggles, detergent, scrub brush, microfiber cloths, and sealed trash bags. 2) Ventilate and dry the area: run the exhaust, open a window, and use a dehumidifier if you have one. 3) Remove easily discardable contaminated items: damp towels, rags, or porous materials that can’t be cleaned effectively should be discarded in sealed bags. 4) Clean surfaces: scrub grout lines and tiles with a detergent solution; for non-porous surfaces, an EPA-approved cleaner or hydrogen peroxide can be used with caution. 5) Rinse and dry: wipe surfaces dry and ensure no moisture remains behind tiles or in hidden cracks. 6) Disinfect and seal: apply a mold-inhibiting sealant to prevent reseaming and re-mold, if appropriate. 7) Monitor humidity: aim to keep relative humidity below 50-60% and inspect weekly.
Prevention and long-term control to keep bathrooms mite-free
Create a moisture budget and enforce it daily: run exhaust fans during showers, install or repair dehumidifiers, and fix leaks promptly. Regular cleaning with a mold-inhibiting cleaner can prevent mold growth, especially in shower corners and grout. Use mold-resistant paint on painted walls to slow moisture absorption. Keep bathroom surfaces dry with squeegees after showers and wipe down windows to reduce condensation. Consider upgrading ventilation with a larger exhaust fan or a ceiling vent if needed. Regular inspections help you catch issues before they become active infestations.
When to escalate and what to expect from professional remediation
If you see mold growth behind walls, under cabinets, or if moisture problems persist despite your best efforts, professional remediation is warranted. A Mold Removal Lab expert would typically perform a moisture assessment, identify hidden water sources, contain the area to prevent cross-contamination, and use specialized equipment to remove mold and restore ventilation. Expect a staged process: assessment, containment, cleanup, and post-remediation verification. Professionals may recommend replacing porous materials and re-sealing grout to prevent recurrence.
Common myths and misconceptions about bathroom mold mites
Some homeowners believe drying alone will eliminate mites; however, moisture is the root cause, and comprehensive removal must address both pests and mold. Others think bleach sterilizes everything; bleach can damage porous surfaces and release fumes. Remember that proper PPE and following label directions is essential for safety. This guide from Mold Removal Lab emphasizes practical steps, not quick fixes, and stresses ongoing humidity control to prevent relapse.
Steps
Estimated time: 1-2 hours (plus drying time)
- 1
Prepare and protect yourself
Put on PPE (gloves, mask, goggles) and gather cleaning supplies. Plan to keep others away from the area to minimize exposure.
Tip: Always work in a well-ventilated space and dispose of contaminated items safely. - 2
Ventilate and dry thoroughly
Open windows or run exhaust fans to exchange air. Use a dehumidifier if available and keep humidity readings in check.
Tip: Target a humidity level below 60%. Monitor readings with a simple meter. - 3
Identify moisture sources
Inspect for leaks under sinks, behind tiles, and around fixtures. Address any water intrusion promptly to prevent re-growth.
Tip: Repairing the source is as important as cleaning the surface. - 4
Clean and scrub surfaces
Scrub grout lines and tiles with detergent solution. Rinse and dry thoroughly; avoid porous materials that can harbor mold.
Tip: Use non-porous tools and avoid cross-contamination to other rooms. - 5
Disposal and treatment
Discard damp, porous materials when cleaning fails to remove mold. Sanitize treated surfaces and spray a mold-inhibiting sealant if appropriate.
Tip: Seal porous surfaces only after they are fully dry. - 6
Re-test and monitor
Recheck humidity and mold levels after a few days. Maintain a regular cleaning and ventilation schedule to prevent relapse.
Tip: Keep a maintenance log for moisture, cleaning, and repairs.
Diagnosis: Visible tiny pests or persistent musty odor after humidity spikes
Possible Causes
- highHigh humidity and moisture accumulation
- mediumLeaking plumbing or hidden moisture behind tiles
- lowVentilation gaps and poor air exchange
Fixes
- easyIncrease ventilation and reduce humidity using exhaust fan or dehumidifier
- mediumRepair leaks and address hidden moisture sources
- hardProfessional assessment and remediation for extensive mold growth
FAQ
What are mold mites in the bathroom and should I worry?
Mold mites are tiny pests that feed on mold in damp spaces. They signal moisture problems, and while not typically dangerous, the mold they indicate can affect health. Address both pests and mold for effective relief.
Mold mites feed on bathroom mold and show moisture problems. Address the mold and the mites together for real relief.
Are mold mites dangerous to health or allergies?
They can worsen allergic reactions and asthma in sensitive individuals. The primary risk comes from mold exposure rather than the mites themselves, so controlling moisture reduces both.
They can aggravate allergies, mainly because of mold exposure, so controlling moisture helps a lot.
Can I remove mold mites myself, or do I need a pro?
Many bathrooms can be treated with diligent cleaning and moisture control. However, if mold growth is behind walls or recurrence persists, professional remediation is advised.
You can start with cleaning and drying, but call a professional if mold grows behind walls or keeps coming back.
How long does bathroom mold remediation take?
Time varies with extent. Small cleanups can be completed in hours; larger or hidden mold may require days and follow-up testing.
It depends on how extensive the mold is; small jobs may be done in a day, larger ones take longer.
Should I use bleach to treat bathroom mold mites?
Bleach can help on non-porous surfaces, but it is not a cure-all and can damage materials. Use it cautiously and follow label directions.
Bleach is not a magic fix and can damage surfaces; use it only as directed and on appropriate surfaces.
What long-term steps prevent recurrence?
Keep humidity low, fix leaks promptly, clean regularly, and seal areas prone to moisture. A routine inspection schedule helps catch issues early.
Keep humidity low, fix leaks fast, and clean regularly to prevent returning mold mites.
Watch Video
The Essentials
- Ventilate and dry to stop mold mite growth
- Identify and fix moisture sources promptly
- Clean surfaces with appropriate cleaners and dry completely
- Monitor humidity to prevent recurrence
- Know when to call a professional for hidden mold