Can You Use Mold-Resistant Drywall in a Shower? A Practical Guide
Learn whether mold-resistant drywall belongs in shower walls, how it compares to cement backer board, and safe installation practices. Includes alternatives, step-by-step guidance, and maintenance tips from Mold Removal Lab.

Can you use mold resistant drywall in a shower? Generally no. Mold-resistant drywall (MRD) helps reduce mold in interior walls away from direct water, but showers are high-moisture environments where tile, waterproof membranes, and cement backer boards perform best. For shower walls, install cement backer board or fiber-cement board behind a continuous waterproof membrane, then tile.
What mold-resistant drywall is and isn’t
Mold-resistant drywall, often labeled MRD, is designed to resist mold growth in interior walls that are not continually wet. It uses a moisture-resistant core and a more resistant paper facing, which can delay mold growth when humidity is elevated. However, MRD is not a substitute for a proper moisture barrier in high-moisture zones such as showers. In shower walls, continuous water exposure, splashing, and leaks can saturate MRD over time, compromising its performance. According to Mold Removal Lab, relying on MRD alone in a shower increases the risk of hidden mold behind tiles if the substrate is compromised. The most reliable approach for shower enclosures remains a cement backer board (or fiber-cement board) installed behind a full waterproof membrane, regardless of MRD availability. This setup is paired with proper substrate preparation, high-quality waterproofing, and meticulous tile installation to prevent water intrusion.
tipTitle":null,
Tools & Materials
- Cement backer board (cementitious board)(Waterproofing requires a solid, non-porous backer in all wet zones)
- Mold-resistant drywall (MRD)(Only consider for dry walls adjacent to shower if codes allow; not for direct wet areas)
- Waterproof membrane (sheet or liquid-applied)(Full coverage with appropriate overlaps and seals)
- Thinset mortar (for tile)(Choose polymer-modified thinset suited for showers)
- Waterproofing tape and sealant(Used at joints and around penetrations)
- Tile, grout, and tile spacers(High-quality products designed for wet areas)
- Screws/nails appropriate for backer board(Corrosion-resistant fasteners for bathroom environments)
- Safety gear (gloves, goggles, mask)(Protective equipment during demolition and installation)
- Primer and mold-inhibiting sealant (optional)(Optional pre-sealant for edges before tiling)
Steps
Estimated time: 6-10 hours (plus curing times for mortar and grout)
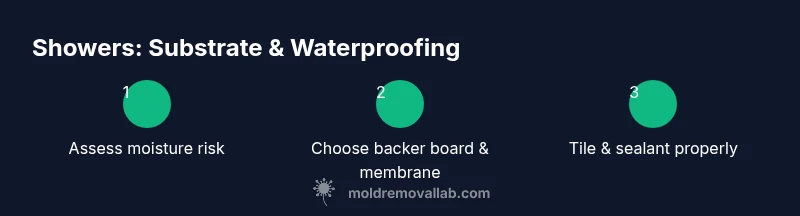
- 1
Assess moisture risk and substrate options
Inspect the shower area for existing water damage, efflorescence, or soft spots. Document any leaks and consider whether future renovations will add moisture exposure. If the wall will be directly splash-exposed, MRD is not the right substrate choice and should be replaced with cement backer board behind a waterproof membrane.
Tip: Address leaks before starting; water damage hides behind tiles and can worsen with time. - 2
Choose the correct backer board and membrane
Select cement backer board or fiber-cement board for all wet zones. Plan a continuous waterproof membrane over the backer board with properly sealed seams and penetrations. MRD may be used only where codes permit on non-wet walls; never behind direct shower tiles.
Tip: If in doubt, consult local building codes or a licensed pro for your municipality. - 3
Prepare the surface
Remove old tile, grout, and damaged drywall. Clean dust and debris, ensure studs are sound, and cut backer board to fit around niches and valances. Dry-fit panels before attaching to confirm alignment and plumbness.
Tip: Use a straightedge to verify plumb walls and plan screw locations to avoid hitting studs. - 4
Install backer board and fasten securely
Cut backer board to size, fasten with corrosion-resistant screws at 6-8 inch intervals along framing. Stagger joints to maximize strength. Leave space for the waterproof membrane at transitions (walls-to-ceiling, shelves, and niches).
Tip: Do not over-tighten screws; allow the board to sit flat without warping. - 5
Apply waterproof membrane and seal joints
Install a continuous waterproof membrane per manufacturer instructions. Seal all seams with compatible tape and sealant at corners, corners of niches, and around fixtures. Allow to cure per product guidelines before tiling.
Tip: Pay attention to corners and transitions—these are common leak points. - 6
Tile installation and grouting
Set tiles with polymer-modified thinset. Maintain level courses and consistent grout joints. Use epoxy grout in high-moisture zones if possible for better water resistance and easier maintenance.
Tip: Back-buttering tiles helps ensure full contact and reduces hollow spots. - 7
Cure, seal, and verify waterproofing
Allow adhesives and grout to cure fully. Apply a sealant or grout sealer if recommended by the manufacturer. Inspect for any gaps or breaches in the membrane and repair before use.
Tip: Test for leaks by running water over the surface and checking for moisture behind the tile after a short period. - 8
Maintenance plan and periodic checks
Set up a routine to monitor for leaks, re-seal grout and stone, and ensure ventilation remains effective. Address mildew odors promptly and keep humidity levels low in bathrooms.
Tip: Use a hygrometer to monitor humidity and run an exhaust fan during and after showers.
FAQ
Can mold resistant drywall be used behind tile in a shower?
In most cases, MRD should not be used as the substrate behind direct shower tile. Cement backer boards are the recommended base in wet areas, paired with a waterproof membrane. MRD may be acceptable on non-wet walls or behind non-shower components where code allows.
Usually not. Cement backer boards with waterproofing are the safer choice for shower walls.
What is the best backer board for showers?
The best backer boards for showers are cement backer boards or fiber-cement boards installed behind a waterproof membrane. They resist water, are stable, and hold tile well over time.
Cement or fiber-cement boards with proper waterproofing are the top pick for showers.
Is MRD waterproof on its own?
MRD resists mold but is not waterproof on its own. It must be covered with a waterproof membrane and appropriate tiling to prevent water intrusion.
MRD isn’t waterproof by itself; use a membrane underneath.
How can I prevent mold in a tiled shower long-term?
Maintain ventilation, control humidity, seal grout and edges regularly, and fix leaks promptly. Use a membrane system behind tiles and inspect for signs of moisture behind the tile.
Ensure good ventilation and seal grout to keep mold away.
Should I replace MRD if it gets wet?
If MRD has been exposed to direct water or signs of damage appear, replace that section and re-seal with a proper waterproof membrane. Do not wait for visible mold to appear, as hidden mold can spread.
If MRD gets wet or damaged, replace it and waterproof the area properly.
Are there products that work well with MRD in bathrooms?
If MRD is allowed by code for a particular area, ensure compatible sealants, tapes, and waterproof membranes are used. Always follow manufacturer recommendations and local codes.
Only use products approved for MRD and the bathroom environment.
Watch Video
The Essentials
- Always use proper backing for wet areas
- MRD is not a substitute for cement board in showers
- Use a reliable waterproof membrane with correct sealing
- Follow manufacturer guidelines for curing and sealing
- Maintain good bathroom ventilation to reduce moisture