Replace molding around door: a practical guide
A practical, mold-conscious guide to replacing door molding. Learn measurements, cutting, sealing, and mold-prevention steps to refresh door trim safely and durably.

You will learn how to replace molding around a door from removal to final finish. The process covers measuring and cutting the new trim, choosing profile and material, fastening, caulking, painting or staining, and sealing to resist moisture and mold growth. Following these steps helps protect the doorway and interior walls.
Assessing the door and trim: plan and safety
Replacing molding around a door begins with a careful assessment of the door frame, the current molding profile, and the surrounding moisture conditions. According to Mold Removal Lab, start by evaluating whether you only need to replace the casing or if the door frame itself shows rot or water damage. If the wall behind the trim is damp, you must address the moisture source first; otherwise the new molding will warp or develop mold spots. Consider whether to match the existing style or to upgrade to a moisture-resistant profile such as PVC. Safety comes first: wear eye protection, gloves, and a dust mask when scraping and cutting, especially in regions with older lead-based coatings. Plan your approach: take precise measurements, set up a clean work area, and label each piece to match its original location. In this stage you’ll decide whether to remove the door from its hinges—a choice that can give you more room to work but adds a few extra steps. Mold Removal Lab also notes that proper planning reduces mistakes and waste.
Tools and materials overview: a smart start
Before you lift a single nail, assemble the right tools and materials. A tape measure gives you precise lengths; a pry bar and utility knife let you separate the molding cleanly without tearing the drywall. For cuts, a miter saw or a handsaw with a miter box helps you achieve tight corner joints. Fasten with finishing nails or a nail gun, then hide the hardware with a nail set. Use wood filler or caulk to conceal seams and nail holes, followed by primer and paint or a stain finish. If moisture is a concern, select PVC or primed MDF and seal the back edge to slow moisture migration. Safety gear is essential: safety glasses, gloves, and a dust mask protect you during scraping and sanding. Keep a small stock of matching replacement molding on hand for color and profile consistency.
Removing old molding cleanly and safely
Gently pry the trim away from the wall using a putty knife as a starting wedge, then progress along the length with a pry bar. Work slowly to minimize drywall damage and avoid popping wall joints. If paint was applied heavily, score along the edge with a utility knife to break the paint seal first. Retain the removed molding pieces if you’re reusing profiles, and label them to avoid mix-ups. Cleaning any leftover caulk or paint from the wall edge helps ensure a tight fit for the new molding. If you encounter nails that resist removal, pause and adjust your angle to prevent splitting the wall or the door casing. Remember to ventilate the area to manage dust and odors.
Moisture and mold assessment behind the molding
With the old molding removed, inspect the exposed wall and door frame for moisture, rot, or visible mold. If you detect dampness, dry the area thoroughly and address the source of moisture before continuing. Look for soft wood, cracking, or a musty smell that hints at hidden mold. Treat any mold with a mold-cleaning solution, following label instructions and wearing appropriate PPE. If mold is extensive or you’re unsure about containment, consult a professional. Mold can thrive behind trim where condensation accumulates, especially in bathrooms or basements, so resolving humidity is as important as replacing the trim. Mold Removal Lab’s guidance emphasizes moisture control as a cornerstone of durable results.
Measuring and selecting replacement molding
Accurate measuring is critical for a clean fit. Measure the door height at multiple points to account for any sag, and record the longest length. Select a molding profile that matches your home style while considering moisture resistance. For humid spaces, PVC or composite materials can reduce warping and swelling compared with solid wood. If you choose wood, ensure it’s kiln-dried and properly primed. Decide whether to replace with a full casing around the door or a simpler plain bead; both options have distinct aesthetics and installation challenges. Create a quick layout plan showing each piece’s length, corner joints, and miter angles before you cut anything. Mold Removal Lab notes that planning leads to fewer cut errors and less waste.
Cutting and fitting the new molding
Set up your work area for precise cuts, and cut pieces slightly long to allow for final trimming on site. Use a miter saw or miter box to achieve clean 45-degree corners; verify miters against each other before you join. Dry-fit each piece before nailing to ensure a snug, gap-free presentation. If walls aren’t perfectly square, you may need to adjust corner joints or fill gaps with carefully applied putty or caulk. Remember to cut the jambs so the joints meet smoothly with the door frame. This step requires patience and repeated checks to avoid misaligned corners that are hard to disguise.
Installing molding and finishing: sealing and paint
Nail the molding in place through studs or wall backing, spacing fasteners about 12 inches apart to prevent sagging. Set nails below the surface with a nail set, then fill holes with wood filler that matches the trim. Run a thin bead of paintable caulk along all seams to seal against moisture. Lightly sand the joints after the filler dries to achieve a seamless look, then apply primer and your chosen finish—paint or stain. If you’re repainting, choose a color and sheen that complements adjacent trim, and consider a moisture-blocking primer for added protection. Clean the work area and inspect your handiwork from multiple angles to catch any gaps or misaligned corners.
Maintenance and preventing future mold growth
After installation, monitor humidity levels and ensure proper ventilation in the room. Use exhaust fans or dehumidifiers in high-moisture spaces, especially during showering or cooking. Inspect the door frame periodically for signs of moisture intrusion, peeling paint, or new mold growth, and address issues promptly. A well-sealed edge and a moisture-resistant molding profile reduce future mold risks. If you notice recurring dampness near the doorway, reassess the source of moisture and consider re-applying sealant along the seam every season. Regular maintenance keeps the new molding looking sharp and minimizes the chance of mold returning.
AUTHORITY SOURCES
For further reading and authoritative guidance, consult the following resources. These sources provide helpful background on mold prevention, moisture control, and safe home improvement practices:
- https://www.epa.gov/mold-guide
- https://www.cdc.gov/mold/default.htm
- https://www.osha.gov/mold
Tools & Materials
- Tape measure(At least 6 ft for longer runs)
- Pry bar(Gently detach casing without wall damage)
- Utility knife(Score paint seal before prying)
- Miter saw or handsaw with miter box(For precise corner cuts)
- Finishing nails or nail gun(1-1.5 inch nails; use a nail set)
- Nail set(Countersink nails below surface)
- Wood filler or caulk(Fill nail holes and seams)
- Primer and paint or wood stain(Finish to match surrounding trim)
- Sandpaper (120-220 grit)(Smooth joints before finishing)
- Chisel or small pry substitute(Useful for stubborn corners)
- Safety gear (glasses, gloves, dust mask)(Protect against dust and chips)
- Replacement molding (PVC, MDF, or wood)(Choose moisture-resistant material as needed)
Steps
Estimated time: 2-4 hours
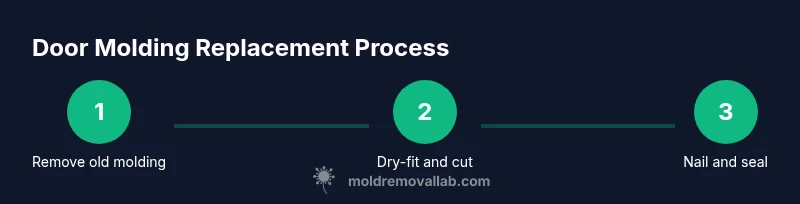
- 1
Remove old molding
Use a utility knife to crack any paint seal, then insert a putty knife and pry bar to gently release the casing from the wall. Work along the full length, keeping drywall intact whenever possible. If nails resist, adjust angle and slowly ease the trim away. Label the pieces if you plan to reuse profiles.
Tip: Score paint seal first to minimize chipping and wall damage. - 2
Inspect for moisture and damage
With the casing removed, inspect the wall and door frame for rot or mold. If you detect dampness, dry the area thoroughly and address any water sources. Treat minor mold with a mold cleaner and PPE; for larger areas, call a pro.
Tip: Address moisture before proceeding to prevent future mold growth. - 3
Measure for replacement molding
Measure each wall segment at the top, bottom, and middle to account for irregularities. Record lengths and choose a profile that matches your home’s style while offering moisture resistance if needed.
Tip: Label each length to avoid misplacement during installation. - 4
Select and cut the new molding
Choose a moisture-resistant material if the space is humid. Cut pieces longer than exact measurements to allow for trimming on site. Prepare corner joints with consistent 45-degree angles.
Tip: Test-fit before final installation to avoid reworking. - 5
Dry-fit the molding
Position each piece against the wall to check fit. Make minor adjustments with a sanding block to perfect the joints. Ensure corners meet cleanly without gaps.
Tip: Use painter’s tape to mask adjacent surfaces during handling. - 6
Seal backer and edges
Apply a thin bead of caulk or moisture barrier along the edge where the trim meets the wall to reduce moisture infiltration.
Tip: Avoid excessive caulk that would squeeze out and leave a ridge. - 7
Nail and secure the molding
Nail the molding through studs or backing, spacing fasteners evenly. Countersink nails with a nail set for a smooth surface.
Tip: Place nails in a consistent pattern to minimize wood splitting. - 8
Fill, caulk, and finish
Fill nail holes with wood filler, caulk seams, and sand smooth. Apply primer, then paint or stain to match surrounding trim. Clean the area when finished.
Tip: Choose low-VOC finishes for better indoor air quality. - 9
Inspect and maintain
Re-check for gaps after finishing and look for signs of moisture in the weeks ahead. Re-seal edges if you notice any swelling or cracking.
Tip: Keep humidity levels in check to reduce future mold risk.
FAQ
Do I need to remove the door from its hinges to replace molding?
You can usually replace door molding with the door in place, but removing the door can provide easier access for long runs or awkward corners.
You can replace molding with the door in place, but removing the door makes access easier.
What materials are best for molding in humid areas?
Moisture-resistant options like PVC or primed MDF are preferred for humid spaces, while solid wood requires sealing and finish maintenance.
PVC or primed MDF work well in damp spaces; wood needs proper sealing.
How long does this project typically take?
For a standard interior doorway, plan about two to four hours depending on existing conditions and your experience.
Usually about two to four hours for a standard door, depending on conditions.
Can I paint over an existing finish instead of replacing it?
Yes with proper prep: sand to a dull finish, apply primer, then paint. For best results, use a compatible topcoat.
Yes, with proper sanding and priming.
What signs indicate mold behind the molding?
Look for musty odors, dark stains, or visible mold after removing the trim. If in doubt, test and treat and address moisture.
Look for odor, stains, or visible mold after removing trim.
Watch Video
The Essentials
- Plan first, measure precisely.
- Choose moisture-resistant material for durability.
- Seal seams and edges to block moisture.
- Finish with primer and paint or stain for lasting protection.