Plastic Injection Mold: A Practical Guide for Designers and Manufacturers
Learn practical plastic injection mold design, material choices, and maintenance to create consistent, high-quality molded parts. A Mold Removal Lab guide tailored for homeowners and manufacturers seeking actionable steps and safe practices.

Plastic injection mold design and manufacturing explain how molten polymer is shaped into precise parts. A mold is a precision tool with cavities, cores, gates, runners, and ejectors that must withstand repeated cycles. This guide covers fundamentals, material choices, design for manufacturability, quality control, maintenance, and safe handling to help designers and manufacturers achieve consistent part quality.
What is a plastic injection mold?
According to Mold Removal Lab, a plastic injection mold is a precision tool used to shape molten plastic into final parts by forming cavities and cores within a hardened base. The mold includes several critical zones: the cavity insert (the negative of the part), the core (the opposite side), gates and runners that channel plastic into the cavities, cooling channels to control heat, and an ejector system to push parts out safely. The Mold Removal Lab team found that reliable molds balance strength, cooling efficiency, and ease of maintenance to achieve consistent cycle times and dimensional accuracy. Understanding these fundamentals helps engineers select appropriate materials, design robust cavities, and foresee manufacturing challenges before production begins.
How injection molding works
Injection molding is a cycle-driven process. Pellets are heated and melted in a barrel; the molten plastic is injected under pressure into the mold via the sprue and runners. The material fills the cavities, cools and solidifies, then the mold opens and ejector pins push the part out. Core and cavity surfaces define the final geometry, while gates control flow and phase separation. A well-designed mold minimizes shear, reduces air traps, and provides uniform cooling to avoid warpage. The Mold Removal Lab analysis shows that consistent process control—proper injection speed, packing pressure, and cooling—yields parts with fewer dimensional variations and better surface finish.
Key components of a mold
A mold comprises several essential components:
- Mold base: the frame that holds all parts together and resists pressure.
- Core and cavity inserts: form the part geometry.
- Gates and runners: channels that deliver molten plastic to the cavities.
- Ejector system: pins or plates that release the finished part.
- Cooling channels: regulate temperature to speed up cycle times and stabilize dimensions.
- Lift/slide mechanisms: enable undercuts or complex geometry. Each component must be carefully specified for material, tolerance, and heat resistance to ensure durability across thousands of cycles.
Design considerations for manufacturability
Design for manufacturability (DfM) is critical. Key principles include:
- Draft angles to facilitate part release and reduce sticking.
- Radii and fillets to minimize stress concentrations and improve flow.
- Gate position and size to balance material flow and cosmetic quality.
- Uniform wall thickness to prevent warping and sink marks.
- Venting to prevent air traps at the parting line.
- Proper ejection system placement to avoid part damage during removal. A well-planned mold reduces tooling iterations and leads to more predictable production results.
Mold materials and heat treatment
Tool steels and aluminum alloys are common choices for injection molds, chosen for wear resistance, rigidity, and thermal conductivity. High-strength steels endure repeated cycles with good dimensional stability, while aluminum can reduce cost and cycle time for lower-volume runs. Heat treatment and tempering improve hardness and reduce wear on critical surfaces like the cavities and cores. The selection depends on part complexity, surface finish requirements, and expected production volume. Routine inspections help catch surface wear, corrosion, or misalignment before defects accumulate.
Quality control and testing
Effective QC involves dimensional inspection, surface finish checks, and functional testing. Use gauging methods and coordinate measuring machines (CMMs) to verify critical features and tolerances against CAD data. Run trial cycles to observe fill balance, drainage, and cooling efficiency. Look for dimensional drift across the mold life and adjust processes or tooling as needed. Documentation of each test creates a traceable quality history, which is essential for high-volume programs and customer audits. Mold Removal Lab analysis shows that disciplined process control correlates with improved dimensional accuracy and part consistency.
Maintenance and lifecycle management
Mold maintenance is a continuous activity. Regular cleaning, lubrication of moving parts, inspection of cooling channels, and timely replacement of wear-prone inserts extend tool life. Establish a preventive maintenance schedule that includes non-destructive testing, alignment checks, and surface refurbishment when necessary. Store molds properly to prevent corrosion and ensure consistent coining and stroke lengths. A well-maintained mold not only reduces downtime but also preserves part quality over many production runs.
Cost considerations and planning
Costs for plastic injection molds vary with complexity, size, cavity count, and material choice. While exact prices depend on your design and manufacturing approach, it helps to plan for a spectrum of tooling budgets—from simpler, single-cavity inserts to multi-cavity, high-tolerance molds. Consider total cost of ownership, including maintenance, potential mold resharpening, and long-term reliability. Collaborate with reputable tooling shops to obtain consistent quotes and clear scope definitions. The key is to balance initial capital with expected production demand and part quality requirements.
Tools & Materials
- CAD software or CAD data(For part and mold geometry design (e.g., cavities, cores, gates))
- Mold base and inserts(Standardized bases plus custom inserts for cavities)
- Steel stock or pre-hardened plates(Material selection based on wear and heat needs)
- Gauges and micrometers(For dimensional checks and tolerances)
- Calipers and height gauges(Quick checks during setup and assembly)
- Runoff tools for gates and ejectors(Optional but helpful for precision gates)
- Coolant system components(Pumps, hoses, and fittings as needed)
- Soft jaws and alignment fixtures(Assist during assembly and testing)
- Inspection fixtures or CMM access(Critical for high-precision parts)
- Lubricants and corrosion inhibitors(For moving parts and post-storage protection)
- Non-destructive testing tools(If applicable to quality program)
Steps
Estimated time: 4-8 weeks
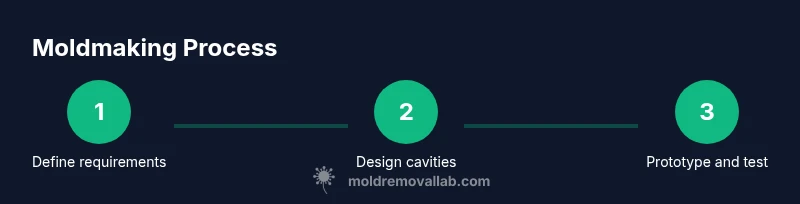
- 1
Define requirements and part analysis
Gather part specifications, material choices, tolerances, and expected production volume. Translate these into mold features such as number of cavities, gate types, and cooling needs. This step sets the trajectory for tool complexity and cost.
Tip: Document all constraints early to avoid rework later. - 2
Choose mold type and size
Select the mold family and base size that accommodate the part geometry and expected output. Consider multi-cavity configurations if high volume is anticipated, balancing cycle time with maintenance access.
Tip: Favor modular inserts to simplify future changes. - 3
Design cavities, cores, and gating
Create the negative geometry with precise tolerances. Position gates for optimal fill and surface quality, and design runners to minimize material waste and cycle time.
Tip: Run a flow analysis early to identify potential fill issues. - 4
Prepare mold base and steel selection
Choose base materials and inserts that tolerate heat and wear. Ensure surface finishes meet cosmetic and functional requirements.
Tip: Specify surface hardening only where needed to control cost. - 5
Machining and tooling setup
Manufacture cavities, cores, and cooling channels with precision. Align and assemble the mold base components, then perform preliminary dry runs.
Tip: Use fixtures to maintain alignment during assembly. - 6
Assembly, testing, and debugging
Install ejectors, sensors, and cooling lines. Run test cycles to assess fill, cooling, and ejection behavior; adjust as necessary.
Tip: Keep a log of every defect and correlate it with process changes.
FAQ
What is an injection mold and why is it essential?
An injection mold is a durable tool used to shape molten plastic into precise parts. It defines the part geometry via cavities and cores and is central to consistent production quality. A well-designed mold reduces defects and improves cycle times.
An injection mold shapes melted plastic into precise parts and is key to consistent production quality.
How long does mold fabrication typically take?
Mold fabrication varies with complexity and tooling capacity. Simple molds may take weeks, while complex multi-cavity molds can take longer. Plan for debugging and potential design iterations before first production runs.
Mold fabrication varies in time depending on complexity and tooling capacity; expect some weeks to months for complex molds.
What is the difference between gates and runners?
Runners are channels that guide molten plastic from the sprue to the cavities; gates are openings that allow material into the cavities. Gate size and placement affect fill behavior and surface quality.
Runners guide material; gates control entry into cavities and impact quality.
Can I design a mold myself without a shop?
Basic designs may be prototyped, but for production-ready molds, collaboration with experienced mold makers is advised. Complex features like cooling channels and ejection systems require specialized tools and expertise.
DIY design is possible at a simple level, but for production-ready molds you should work with an experienced mold shop.
What maintenance is essential for injection molds?
Regular cleaning, lubrication of moving parts, inspection of cooling channels, and timely replacement of worn inserts are essential. Establish a preventive maintenance schedule to avoid unexpected downtime.
Keep the mold clean, lubricate moving parts, and inspect cooling channels regularly.
Watch Video
The Essentials
- Understand mold components and their roles.
- Design for manufacturability to minimize iterations.
- Plan maintenance upfront to extend mold life.
- Balance cost with expected volume and quality targets.