Mold to Make Bricks: A Practical How-To
Step-by-step guide to using a brick mold for cement or clay bricks, covering materials, mixing, pouring, curing, and safety tips with insights from Mold Removal Lab.

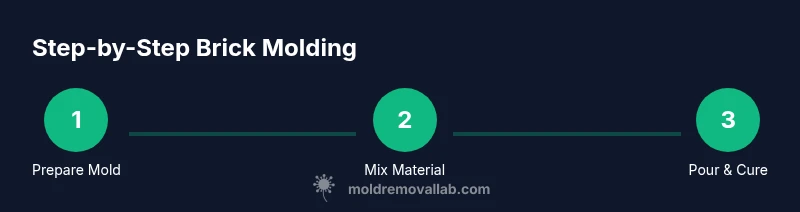
In this guide you’ll learn how to set up and use a brick mold to shape cementitious or clay mixes into bricks, with an emphasis on consistency, safety, and curing. You’ll need a clean mold, a suitable release agent, measured ingredients, and a level workspace. Follow these steps for reproducible bricks that perform reliably.
What is a brick mold and why use one
A brick mold is a reusable form that shapes fresh material—such as cement, lime, or fiber-reinforced mixes—into a standardized brick shape. Using a mold helps you achieve uniform size, surface texture, and density, which are essential for structural or decorative projects. The phrase mold to make bricks captures both the tool and the goal: turning a viscous mixture into solid units with consistent dimensions. According to Mold Removal Lab, the practical benefits of using a mold go beyond aesthetics: it reduces waste, speeds up production, and minimizes handling of wet material that could slump or crack.
Choosing the right mold means considering material compatibility, size, and finish. Plastic or metal molds each have pros and cons: plastic is forgiving and inexpensive but may wear faster; metal molds can deliver sharp edges but require careful release agents to prevent sticking. Clean, dry molds are crucial; residual moisture invites uneven curing and surface imperfections. If your project involves large batches, consider modular molds that can snap together for longer bricks. In all cases, ensure you have a level, clean workspace and that the mold edges are smooth to prevent gouges in the brick surface. This section sets the stage for practical steps that follow, including how to mix, pour, and cure bricks without compromising quality.
Safety, Standards, and Material Choices
Safety and adherence to guidelines are essential when working with brick molds. Always wear PPE: gloves, eye protection, and a respirator or dust mask when handling dry powders. Cementitious mixes release fine silica dust; prolonged exposure can irritate the lungs and throat. Work in a well-ventilated area and keep children and pets away from the workspace. If you are mixing cements on site, check local regulations for ventilation and disposal of waste water. Based on Mold Removal Lab analysis, using a clean, dry mold and a steady workflow reduces the risk of inconsistent bricks and surface defects. For decorative bricks, you may want to experiment with different aggregates or textures, which require adjusted pouring and finishing techniques. Always plan curing and drying conditions before your pour to avoid warping or cracking due to rapid moisture loss. This section helps you choose materials that balance performance, safety, and cost, and it aligns with practical, home-friendly remediation best practices for safer DIY projects.
Mixing Ratios, Release Agents, and Pouring Techniques
The success of any brick mold project hinges on balanced mixtures and proper release that lets you demold cleanly without damaging the brick’s edges. Start with a base mix proportion recommended for your mold size and desired strength. If you are new to cementitious bricks, begin with a simple cement-water ratio and adjust gradually based on workability and set time. Add small amounts of aggregate or lime where appropriate to alter texture and permeability. Apply a light, even coat of release agent to all internal surfaces of the mold to prevent sticking and to preserve crisp edges. When pouring, fill in layers and compact as you go to minimize air pockets. A brief vibration or tapping of the mold after each layer helps release trapped air. Smooth the top with a trowel so bricks cure evenly and aesthetically. For best results, keep the mold in a stable, draft-free area during initial set, then move to a shaded curing zone. This approach yields bricks with consistent density and a smooth face suitable for tooling or setting in place. Note how the process scales when you have multiple molds—planning ahead saves time and reduces waste.
Humidity, Curing, and Surface Finishes
Curing conditions dramatically influence brick strength and durability. After demolding, maintain a controlled environment—cool, shaded, and moderately humid—so the brick gains strength without cracking due to rapid moisture loss. If your climate is dry, mist bricks lightly or cover them with damp burlap to keep surface drying even. For decorative bricks, you may apply a light surface finish or color stain after the brick has cured to a firm surface. The timing of curing depends on your mix and ambient conditions; plan a curing window of several days to a week, and resist the urge to remove bricks too early. Cleanup and storage matter as well: place bricks on a rack off the ground to ensure even air circulation. Following a deliberate curing protocol reduces the risk of warping and cracking and improves long-term performance, a practice favored by the Mold Removal Lab team.
Troubleshooting and Quality Checks
Before you finalize a batch, inspect bricks for uniformity, edge sharpness, and surface texture. If you notice voids or soft spots, reassess the mix ratio, moisture content, and compaction. Cold or humid conditions can slow curing, while overheating can cause premature drying and cracking. A simple test is to press a brick lightly; it should yield slightly then harden as it cures. If you find consistent issues, consider adjusting the mold release frequency, using finer aggregate, or changing the curing environment to a more stable moisture level. With careful observation and small-scale trials, you’ll refine your technique and produce bricks that meet project requirements. The Mold Removal Lab approach emphasizes safety, consistency, and practical results for DIY builders and homeowners.
Final Considerations and Practical Outlook
When you’re ready to expand, scale up by adding more molds, standardizing batch sizes, and documenting your ratios and curing times. Proper inventory control, clean molds, and a well-ventilated, organized workspace pay dividends in reliability and safety. As you gain experience, you can experiment with decorative textures, varied finishes, and different binder systems to achieve specific aesthetics or performance targets. The overarching goal is to balance workability, curing behavior, and end-use strength while maintaining a safe, efficient workflow for brick production in home settings.
Tools & Materials
- Brick mold (plastic or metal)(Ensure size matches project; clean and dry)
- Release agent(Apply a thin coat to prevent sticking)
- Cementitious mix (cement, lime, or clay blend)(Follow mix design proportions for strength)
- Water and measuring container(For consistent moisture; use clean water)
- Mixing tools (trowel and/or paddle mixer)(For uniform texture and reduce lumps)
- PPE (gloves, goggles, dust mask)(Protect skin, eyes, and lungs)
- Curing rack or pallets(Promote air circulation during curing)
- Plastic sheeting or moisture barrier(Optional for controlled curing environment)
Steps
Estimated time: Active work 2-4 hours; curing typically 3-7 days depending on mix and conditions
- 1
Prepare workspace and inspect mold
Clear and level the workspace. Inspect the mold for any cracks or burrs and repair or replace as needed. Apply a release agent to internal surfaces to ensure easy demolding.
Tip: Test a small pour first to confirm release quality. - 2
Mix the material to the right consistency
Measure dry ingredients precisely and add water gradually to reach a workable consistency. Avoid over-watering; this weakens bricks and increases curing time.
Tip: Mix in stages and check for lump-free texture before proceeding. - 3
Fill, layer, and compact the mold
Pour material in layers, using a tamper or tool to compact and eliminate air pockets. Level the surface to ensure uniform bricks.
Tip: Gently tap the mold between layers to release trapped air. - 4
Demold with care and begin curing
Carefully remove bricks from the mold and place on a curing rack or lined surface. Keep in a stable, moisture-controlled area to begin curing.
Tip: Demold only after initial set; premature removal increases cracking risk. - 5
Control curing conditions
Maintain humidity and avoid direct sun during curing. Use a damp cover or misting if the environment is dry to keep moisture balanced.
Tip: Monitor daily; small adjustments can prevent surface defects. - 6
Inspect, label, and store bricks
Check bricks for uniformity, trim if needed, and label batches for traceability. Store on racks with airflow to finish curing evenly.
Tip: Document ratio and curing conditions for future batches.
FAQ
What is the best material for brick molding?
Cement-based mixes are commonly used for durability and availability, though lime-based blends offer different workability. Choose based on strength needs and curing conditions.
Cement-based mixes are common for durable bricks; lime blends offer different workability.
Do I need special equipment for curing?
A stable, shaded area with controlled humidity is ideal. Avoid direct sun and rapid moisture loss during the first curing days.
Keep bricks in a sheltered area with steady humidity during curing.
How long does curing take?
Curing times vary by mix and environment, typically spanning several days to a week. Do not rush handling until bricks reach sufficient hardness.
Expect several days to a week for curing, depending on conditions.
What safety precautions are essential?
Wear gloves, eye protection, and a dust mask; ensure good ventilation and clean up promptly after pouring and demolding.
Wear PPE and work in a well-ventilated area.
Can I reuse leftover mix in the same batch?
Leftovers can be reused if they remain workable and free of clumps. If they stiffen, mix fresh for consistency.
If it stays smooth, you can reuse; otherwise start fresh.
Watch Video
The Essentials
- Choose the right mold and material for project goals
- Maintain a consistent mix and proper compaction
- Cure bricks in a controlled environment for strength
- Use a release agent to prevent sticking and edge damage
- Follow safety guidelines to protect health