Mold for Wax: Cleaning, Prevention, and Storage Practices
Learn to safely identify, clean, and prevent mold on wax molds used in candle making. Mold Removal Lab guides you through cleaning steps, sanitizing, moisture control, and proper storage to prevent mold for wax from returning.

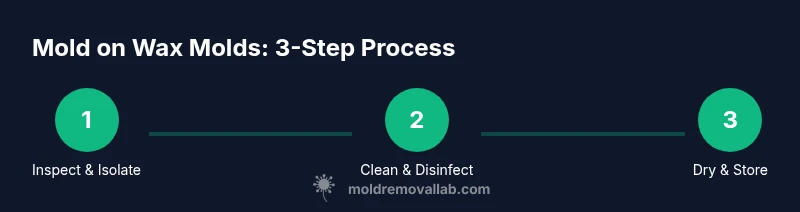
Inspect all mold for wax items for visible mold growth, then follow a 5-step routine: 1) isolate affected pieces, 2) scrub with warm soapy water, 3) disinfect with 70% isopropyl alcohol, 4) dry completely, 5) store in a humidity-controlled area. This Mold Removal Lab guide explains safe removal, moisture control, and prevention for mold on wax mold items.
What is mold for wax and why it matters
Mold for wax refers to fungal growth on the surfaces and within the molds used for wax crafts such as candles. This is a concern for homeowners and hobbyists because wax can trap moisture, providing a warm, moist environment that supports mold growth. According to Mold Removal Lab, mold on wax molds isn't just an aesthetic problem; it can signal hidden moisture issues that may affect indoor air quality if left unaddressed. Early detection and proper handling are essential to prevent spread to other household items or to finished candles. In addition, mold can degrade the mold material itself, especially if the mold is porous, leading to tiny particles entering the wax. This guide helps you distinguish between surface mold on wax and contamination within porous molds, and explains practical steps you can take without specialized equipment. For most candle makers, a clean workspace, paired with straightforward cleaning, is enough to keep molds safe and free of mold growth.
Tools & Materials
- Latex or nitrile gloves(Protect hands from mold and cleaners)
- Safety goggles(Shield eyes from splashes and spores)
- Warm water(Base for cleaning residues)
- Mild dish soap(Gentle removal of wax residues)
- Soft brush or microfiber cloth(Reach crevices without scratching)
- 70% isopropyl alcohol(Disinfectant for non-porous surfaces)
- Lint-free towels(Dry surfaces completely)
- Silica gel packs or dehumidifier(Keep drying area low humidity)
- Sealed storage containers(Prevent re-exposure after drying)
Steps
Estimated time: 60-90 minutes
- 1
Inspect and isolate
Begin by visually inspecting all wax molds for mold growth, discoloration, or fuzzy patches. Separate any moldy items from clean ones to prevent cross-contamination. Label contaminated pieces and place them in a dedicated bin until you complete cleaning.
Tip: Handle moldy items gently to minimize aerosolizing spores. Use a dedicated bag or container labeled 'contaminated'. - 2
Remove wax residues
Wipe away loose wax residues with warm water and a small amount of mild soap. Use a soft brush to dislodge particles from crevices, then rinse with clean water. Dry the molded surfaces with a lint-free towel before proceeding.
Tip: Do not use aggressive scrubbing that could scratch fragile molds. - 3
Clean with soap and water
Wash non-porous molds thoroughly using mild dish soap and warm water. Rinse completely to remove soap residues, which can attract dust and moisture. Repeat if you notice any film or remaining residue.
Tip: Always test cleaning on a small area first to ensure compatibility with the mold material. - 4
Disinfect the surface
Apply a 70% isopropyl alcohol solution to the mold's surface and wipe away with a clean cloth. Allow the surface to air dry in a well-ventilated area. For stubborn spots, repeat the disinfection step once more after drying.
Tip: Avoid saturating porous materials; alcohol is best for non-porous surfaces. - 5
Rinse and dry thoroughly
Rinse the mold again if any alcohol residue remains and dry completely with towels. Place the mold in a warm, low-humidity area or use a fan to circulate air. Ensure every seam, cavity, and label area is completely dry before storage.
Tip: Never store a damp mold; residual moisture invites rapid mold return. - 6
Store properly
Once dry, store molds in a sealed container with desiccant or in a dry, ventilated cabinet away from heat sources. Keep a moisture monitor in storage if possible. Regularly inspect storage conditions for signs of dampness or mustiness.
Tip: Label storage with the date of cleaning to monitor mold-prone items over time. - 7
Evaluate and rotate
Periodically re-check molds for any signs of recurring mold. Retire items that show persistent mold or material degradation to prevent contamination of future wax batches.
Tip: Adopt a rotation system so older molds are cleaned or retired before new projects begin.
FAQ
Is mold on a wax mold dangerous to health?
Mold on wax molds can release spores and VOCs, which may affect air quality if inhaled over time. Wear PPE and address contamination promptly. If mold persists, consider replacing the mold to avoid ongoing exposure.
Mold on wax molds can release spores; use protective gear and clean or replace the mold to minimize exposure.
Can I use bleach to clean mold from wax molds?
Bleach is generally not recommended for porous wax molds, as it can degrade the material and leave residues. Prefer soap, water, and 70% isopropyl alcohol, followed by thorough drying.
Bleach isn't recommended for wax molds; clean with soap and alcohol, then dry completely.
What storage humidity level is best to prevent mold on wax molds?
Aim for a dry, well-ventilated storage area and avoid damp basements or bathrooms. Use desiccants or a dehumidifier to help keep humidity low during storage.
Keep storage dry with good airflow and desiccants to prevent mold growth.
Are silicone molds safe for mold remediation cleaning?
Yes, silicone molds are generally easier to clean and sanitize; verify compatibility with your cleaning agents and ensure they are fully dry before reuse.
Silicone molds are usually easy to clean and dry; just ensure they're dry before using again.
When should I discard a wax mold due to mold?
Discard molds showing persistent mold, cracks, or pitting after cleaning. Contaminated porous bases can harbor mold even after treatment and may affect future wax batches.
If mold keeps returning or the mold is damaged, it's best to discard it.
Should I hire a professional for mold on wax molds?
For extensive contamination, porous bases, or if you’re unsure about safety, consider consulting a professional remediation service to prevent indoor air quality issues.
If in doubt or the mold is extensive, a professional can help ensure safety.
Watch Video
The Essentials
- Inspect and isolate moldy items promptly
- Clean with soap, water, and alcohol, then dry thoroughly
- Use proper storage to prevent recurrence
- Avoid abrasive cleaners on delicate molds
- Replace deeply contaminated or degraded molds