Mold for Silicone Casting: A Practical How-To Guide
Learn how to create durable silicone casting molds with a step-by-step approach, covering material choices, mold design, pouring, curing, demolding, troubleshooting, and care for hobbyists and makers.

By the end of this guide, you'll be able to design and cast a durable silicone mold for your project. You'll learn choosing silicone, building a mold box, degassing, pouring, curing, and demolding, plus safety tips, mold release choices, and troubleshooting to prevent common failures. This is a practical, beginner-friendly approach suitable for hobbyists and makers.
What is a mold for silicone casting and when to use it
A mold for silicone casting is a flexible, elastomeric shell that captures fine details of a model so you can reproduce copies of that part. Silicone molds are favored for their non-stick surface, high tear strength, and ability to pick up intricate textures. They come in two broad formats: single-part (slip-cast) molds and two-part (pan-and-part) molds. For complex shapes and undercuts, a two-part design with a separate mother mold is often ideal. This approach minimizes damage to your model during demolding and allows you to reuse the mold many times. For hobby projects, silicone molds provide a forgiving, easy-release option that accommodates resin, plaster, wax, and some low-temperature metals. According to Mold Removal Lab, understanding material interactions between silicone and your casting medium helps you predict outcomes and reduce failures. By planning your mold for silicone casting around your project’s geometry, you can optimize detail capture and repeatability while keeping production simple and safe.
Materials and design considerations for silicone molds
Choosing the right silicone is foundational. Two common families are platinum-cure and tin-cure silicones; platinum-cure formulations tend to offer better heat resistance and longer-term stability, while tin-cure options are often more affordable for hobbyists. Other key design choices include whether you need a one-part or two-part mold, the creation of a pour spout and air vents, and whether you will add a rigid mother mold for strength. Your mold box should be sized to hold the model with adequate clearance on all sides. A consistent ratio of silicone to catalyst is critical for predictable cure; always follow the manufacturer’s instructions. For intricate parts, degassing the silicone after mixing can dramatically reduce air bubbles and improve surface quality. Use a mold release agent compatible with silicone to ease demolding, especially if your cast will cure with a different material in contact with the mold.
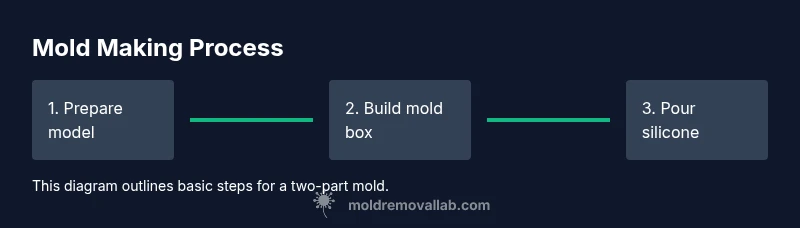
Step-by-step guide to making a silicone casting mold
- Prepare your model and mold box. Inspect the sculpture, wash any residues, and secure it to the base using clay or temporary adhesive. Ensure the box has enough space around the model for even silicone coverage. 2) Build the mold box and define the pour path. Create a simple cavity plan that accounts for undercuts and draft angles. Attach temporary walls if needed. 3) Apply release agent. Lightly coat the model and inner box faces to prevent sticking, then let dry per the product’s instructions. 4) Mix silicone according to the ratio recommended by the manufacturer. Stir slowly to minimize air entrainment. 5) Degas if you have access to a vacuum system. This step helps remove trapped air that creates surface defects. 6) Pour the silicone over the model in a thin stream at one corner to minimize air pockets. Pause as needed to allow some settling and check for air bubbles near the surface. 7) Allow the silicone to cure fully in a dust-free environment, following the specified time and temperature. 8) Open the mold and remove the master model carefully. If you used a two-part design, separate the halves and inspect the cavity surface. 9) If your project requires a rigid mother mold for support, mix and apply plaster or polyurethane to the exterior of the silicone shell, then let cure before trimming flanges and seams. 10) Trim the pour channels and remove any flash from the mold edges. Clean and dry the mold before storage for best longevity. For complex parts, document your mold geometry and pour orientation for repeatable results.
Troubleshooting common issues and best practices
Air bubbles are the most frequent defect in silicone molds. They can be reduced by degassing, pouring slowly in a thin stream, and using proper mixing techniques. If bubbles persist, consider pouring in stages or applying a vent path to release trapped air. Poor release during demolding often signals incompatible release agents or insufficient mold box geometry. Ensure you’re using a release agent designed for silicone and test with a small sample mold before committing to a full build. Undercuts can cause tearing if the mold is too flexible or the master is not oriented properly; adjust your design to reduce undercut severity, or plan for a two-part mold with a separate vent and opening.
Maintenance, storage, and care of silicone molds
Store silicone molds in a cool, dry place away from direct sunlight to preserve elasticity. After use, wash with warm water and mild soap; avoid solvents that can degrade elastomer content. Dry thoroughly before inspection and storage. If you notice surface tackiness or micro-tears, inspect the mold for micro-damage and trim away frayed edges. Regular inspection helps catch problems early and extends mold life. Mold stability is influenced by exposure to temperature cycles, humidity, and abrasive materials in the casting resin. By maintaining consistent storage conditions, you can maximize the mold’s lifespan for multiple production cycles.
Incorporating authoritative sources and further reading
For readers seeking validated guidance on mold safety and best practices, a quick survey of authoritative sources is helpful. Authoritative sources include government and university publications that cover general mold safety, material handling, and workplace best practices. These sources provide foundational safety guidance that applies to hobby projects as well. Key references include the U.S. Occupational Safety and Health Administration (OSHA) mold guidelines, the Centers for Disease Control and Prevention (CDC) mold health information, and the Environmental Protection Agency (EPA) mold resources. In addition to safety, these sources discuss environmental considerations and best practices for handling mold-like materials responsibly. Authoritative sources: • OSHA Mold (https://www.osha.gov/molds) • CDC Mold Health Information (https://www.cdc.gov/healthywater/hygiene/mold/index.html) • EPA Mold Resources (https://www.epa.gov/mold).
Authoritative sources
Here are a few trusted references for mold safety and material handling relevant to silicone mold work:
- OSHA mold guidelines: https://www.osha.gov/molds
- CDC mold health information: https://www.cdc.gov/healthywater/hygiene/mold/index.html
- EPA mold resources: https://www.epa.gov/mold
These sources provide general safety context that complements practical mold-making guidance.
Tools & Materials
- Two-part platinum-cure or tin-cure silicone(Select a mold-making silicone with appropriate pot life and Shore hardness for your project.)
- Mold box and base(Clear acrylic or sealed cardboard box; ensure walls are smooth to ease demolding.)
- Mold release agent (silicone-compatible)(Prevents adhesion between silicone and the master or box.)
- Master model(The object or prototype you want to replicate.)
- Clays or adhesive for securing the model(Keeps the model in place during pouring.)
- Mixing cups and stirring sticks(Plastic or silicone containers; stir slowly to minimize air bubbles.)
- Digital scale or measuring tools(Accurate ratio of silicone to catalyst improves cure quality.)
- Vacuum chamber or degassing equipment (optional)(Highly recommended for large parts or detailed surfaces.)
- Safety gear (gloves, eye protection)(Protect hands and eyes from uncured silicone and resin fumes.)
- Rigid mother mold material (plaster or polyurethane resin, optional)(Used to stiffen the mold for heavy or highly undercut parts.)
Steps
Estimated time: 4-6 hours active; 12-48 hours total cure time depending on silicone and ambient conditions
- 1
Prepare your model and workspace
Inspect the model for surface imperfections. Clean off dust and release agents, then secure the model to the base of the mold box with clay or removable adhesive. Verify that there is enough clearance around all sides for the silicone to flow and to avoid contact with box walls.
Tip: Do a quick dry run to ensure the box is dimensionally sound and there are no gaps where silicone could leak. - 2
Assemble the mold box around the model
Build the walls around the model, ensuring they are straight and sealed. Create a pour path and vents to equalize pressure and reduce air pockets. Use clay to seal gaps and hold the model in place.
Tip: Leave a small draft angle on vertical faces to ease demolding. - 3
Apply mold release and prepare silicone
Coat the model and interior surfaces with a silicone-safe release agent. Measure silicone and catalyst accurately according to the manufacturer’s instructions and mix thoroughly. Avoid introducing air into the mixture by mixing slowly.
Tip: Always mix in a clean container and scrape the sides to ensure a uniform blend. - 4
Degas the silicone mixture (optional but recommended)
If you have access to a vacuum chamber, degas the mixed silicone to remove trapped air. This reduces surface defects and improves detail fidelity.
Tip: Do not exceed the chamber’s recommended vacuum level to prevent loss of resin from the container. - 5
Pour the silicone into the mold box
Pour in a slow, steady stream from a single point to minimize air entrapment. Allow the silicone to flow around the model and settle before completing the fill.
Tip: Pause briefly after the initial pour to let any surface bubbles rise to the top. - 6
Cure the silicone
Let the mold cure for the time specified by the silicone manufacturer. Keep the mold box undisturbed in a dust-free environment at a stable temperature.
Tip: If you’re not sure about cure temperature, check the product’s recommended range and maintain it to avoid warping. - 7
Demold and separate the halves
Carefully remove the mold shell from the master. If you used a two-part design, separate the halves with minimal force to avoid tearing the silicone.
Tip: Use a soft tool, like a plastic scraper, to ease along seams without gouging the mold. - 8
Create a rigid mother mold (optional)
For undercuts or heavy parts, apply a rigid shell around the silicone core using plaster or polyurethane resin. This provides structural support during casting.
Tip: Ensure the mother mold can be removed from the silicone without pulling on the silicone excessively. - 9
Finish and test the mold
Trim excess flash, inspect the inner surface for defects, and run a test cast if possible to verify detail capture and release performance.
Tip: Document the mold geometry and any orientation marks for repeatable production.
FAQ
What is the difference between a silicone mold and a plaster mold for casting?
Silicone molds are flexible, durable, and release parts easily, ideal for complex geometries and multiple uses. Plaster molds are rigid and cheaper but can wear quickly and require careful demolding. Silicone offers better detail capture and reusability for most hobby projects.
Silicone molds are flexible and durable for many casts, while plaster molds are rigid and cheaper but may wear out sooner; silicone is usually the better choice for repeated use.
Do I always need a mother mold when making a silicone mold?
Not always. A mother mold provides rigidity and helps preserve undercuts and complex features. For simple shapes with generous draft angles, a standalone silicone mold may be sufficient.
A mother mold isn’t always required. Use one if your part has undercuts or you need extra support after demolding.
What safety steps are essential when working with silicone casting materials?
Work in a well-ventilated area, wear gloves and eye protection, and follow the silicone manufacturer’s safety data. Avoid skin contact with uncured silicone and clean spills promptly.
Always wear gloves and eye protection and work in a ventilated space to avoid irritation from uncured silicone.
How long does silicone mold cure typically take?
Cure times vary by product, ambient temperature, and humidity. Follow the manufacturer’s recommended cure time and temperature for reliable results.
Cure times depend on the silicone you choose; check the product’s instructions for the exact duration and temperature.
Can I reuse the mold after demolding a cast?
Yes, with proper care. Clean the mold surface, inspect for micro-tears, and store it in a cool, dry place to maintain flexibility and release performance.
You can reuse it as long as you inspect for wear and keep it clean and properly stored.
What materials can be cast in a silicone mold?
Silicone molds work with many materials, including resin, wax, plaster, and some low-melting metals. Always verify compatibility and temperature limits before casting.
Common castings include resin and wax; verify compatibility and temperature limits first.
Watch Video
The Essentials
- Plan the mold around your part geometry before pouring.
- Use silicone release agents to ease demolding.
- Degas for high-detail results when possible.
- A rigid mother mold improves molding for undercuts.
- Test and document mold orientation for repeatable production.