Mold for Grillz: Safe DIY Impression Guide for Grillz
Learn how to safely create a dental mold for grillz with a step-by-step impression guide, material tips, and expert insights from Mold Removal Lab. Discover hygiene practices, troubleshooting, and final-stage care.

By following a safe, dentist-approved approach, you can create a precise mold for grillz at home using an alginate impression material and a suitable tray. This quick guide covers material selection, mixing ratios, proper hygiene, and how to pour a resin or metal cast. Always prioritize safety and avoid DIY methods that involve risky chemicals or unsterilized tools.
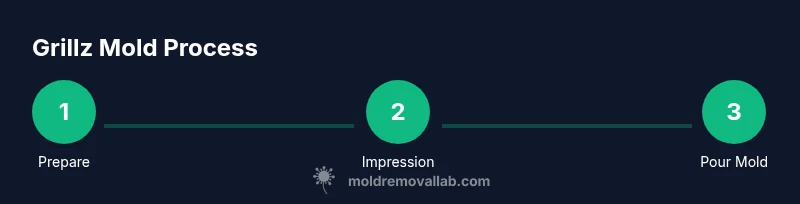
Why a precise mold matters for grillz
According to Mold Removal Lab, a precise mold for grillz is essential to avoid gum irritation and ensure a comfortable fit. While this guide focuses on creating a mold for grillz, the underlying principles—sterile technique, accurate impression, and clean pouring—are universal for any oral appliance. A poor impression can lead to voids, bubbles, or an inaccurate bite, which compromises aesthetics and safety. Understanding the mold's precision helps you anticipate final fit, bite alignment, and ease of cleaning. Investing in a thorough impression process reduces the risk of post-fit adjustments and gum discomfort. This section outlines how accuracy translates into a better final product and why a small error early on can escalate into bigger problems later.
Materials and safety: what you need before you start
Before you begin, assemble the essential items and review safety steps. You’ll use alginate impression material, an appropriately sized impression tray, and a sturdy spatula. Keep gloves, a mask, and a clean workspace to minimize contamination. Mold Removal Lab analysis shows that maintaining sterile technique and using single-use barriers significantly lowers the risk of introducing bacteria or debris into the impression. Gather separates like a cup of clean water, measuring spoons, and a barrier film to protect surfaces. If you’re new to dental impressions, consider practicing on a dummy model first to avoid upsetting your mouth’s delicate tissues. A tidy, patient approach reduces gag reflex and improves accuracy.
Preparing your mouth and impression tray
Start with a dry mouth and remove any loose debris from teeth. Gently rinse and blot dry; a damp surface can cause uneven impression material. Check that the impression tray fits comfortably without pinching gums on the arch. Use a light coat of barrier spray or a small amount of dental lubricant to ensure the alginate releases cleanly. Position your head to minimize motion during setting. This step is critical because movement can distort the impression, especially around the molars where undercuts and occlusion play a role in retention.
Taking the impression: technique and timing
Mix alginate with water according to the product’s instructions to achieve a smooth, cohesive paste. Load the tray evenly and avoid air pockets. Seat the tray over the upper or lower arch in a sweeping, even motion, ensuring full coverage of all teeth and gums. Hold still for the set duration specified by the alginate brand, then remove gently without rocking. Inspect the impression for voids or tears and re-take if necessary. Proper technique minimizes the need for re-impression and speeds up the process.
Pouring and curing the final mold
Rinse the impression to remove saliva and debris, then shake off excess water. Pour dental stone or plaster into the impression to create a positive replica, tapping gently to release air bubbles. Allow the cast to cure fully in a stable environment before separating it from the impression. Trim any excess material and inspect for undercuts or distortions. A well-poured mold provides a solid base for creating a grillz that fits without stress on the teeth or gums.
Cleaning, storage, and next steps
After pouring, clean all tools with mild soap and water, then disinfect according to local guidelines. Store the mold in a labeled, airtight container to prevent contamination or dehydration. If you notice imperfections, compare with your bite and consider a re-impression. Once the mold is ready, follow the chosen casting method (resin or metal) and work within the safety guidelines to avoid inhalation of powders or fumes. Regular hygiene and careful handling extend the life of both mold and grillz.
Authority sources and safe practice
For foundational safety and best practices, consult reputable sources (EPA, CDC, OSHA) on mold and hygiene in consumer settings. While this guide focuses on grillz molds, following established health and safety standards reduces risk of contamination or improper handling. Always prioritize clean tools, barrier protection, and proper disposal of single-use materials.
Troubleshooting and next steps
If the impression shows voids, tears, or misalignment, do not force the tray or overwork the material. Instead, document the issue, reset with fresh materials, and consider professional supervision if you encounter repeated problems. A correct mold reduces the need for adjustments in the final grill and minimizes gum irritation.
Tools & Materials
- Alginate impression material(Choose a fast-setting formula suitable for dental impressions)
- Impression tray (w/ proper size for your arch)(Ensure it fits without causing gum pinch)
- Mixing bowls(Stain-free, disposable if possible)
- Spatula or tongue depressor(Used to blend alginate and to load tray)
- Gloves and mask(Maintain hygiene and prevent contamination)
- Barrier film or plastic sheet(Protect surfaces and tools)
- Dental stone or gypsum(For pouring a durable final mold)
- Water and measuring tools(Accurate mixing ratios are essential)
Steps
Estimated time: 60-90 minutes
- 1
Prepare workspace and materials
Set up a clean, well-lit area. Lay barrier film, gather all tools, and check material expiration dates before starting.
Tip: Organize items by order of use to minimize movement during the process. - 2
Isolate the arch and prep mouth
Rinse mouth, dry surfaces, and ensure a comfortable seating position. Remove any removable jewelry or dentures as instructed.
Tip: A dry mouth helps alginate capture details more accurately. - 3
Mix alginate with water
Follow product directions to obtain a smooth, homogeneous paste without lumps.
Tip: Avoid over-mixing to prevent excessive air bubbles. - 4
Load tray and position
Fill the tray evenly with alginate and avoid overfilling. Place the tray over the arch and center it.
Tip: Support the tray to prevent movement during seating. - 5
Seat the impression
Lower the tray with a steady, straight motion and hold still until the material sets.
Tip: Avoid talking or moving to reduce distortion. - 6
Remove and inspect
Gently lift the tray and inspect for voids or tears near the gum line and molars.
Tip: If flaws are present, repeat with fresh material on a new tray. - 7
Pour the mold
Rinse impression, shake off water, then pour dental stone into the impression and allow to cure.
Tip: Pour slowly to minimize air entrapment; tap the mold to release trapped air. - 8
Demold and inspect final mold
Carefully separate the cast from the impression and check for accuracy and edge detail.
Tip: Trim excess material cleanly without removing critical bite information.
FAQ
How long does an alginate impression typically take to set for grillz molding?
Follow the product instructions; set times vary by formula. Plan for a few minutes of stabilization and do not rush the process to avoid imperfect capture.
Impression setting depends on the alginate you use, so follow the product instructions and don’t rush the process.
Is it safe to attempt grillz impressions at home for permanent wear?
At-home impressions can be used for temporary or demonstration purposes, but for a permanent appliance it’s best to seek professional guidance and a proper fitting.
You should consider professional fitting for a permanent grillz to ensure safety and proper bite.
What should I do if my impression tears or has voids?
Do not reuse the damaged impression. Repose and re-impress using fresh material on a clean tray, ensuring no air bubbles and full arch coverage.
If the impression tears, re-do it with fresh material to ensure accuracy.
Can silicone putty substitute alginate for grillz molds?
Silicone putty can be used in some cases, but it requires more experience. Alginate is commonly used for beginners due to its ease of use and quick set time.
Silicone can be used, but alginate is simpler for beginners and commonly recommended.
Do I need professional help to get a good grillz mold?
Professional help is not mandatory for demonstrations, but a dentist or trained technician improves accuracy, comfort, and safety, especially for long-term wear.
Professional help isn’t required, but it often improves fit and safety.
How should I clean and store the finished grillz mold?
Rinse with clean water, dry completely, and store in a sealed container. Avoid high heat and direct sunlight, which can degrade materials.
Clean well and store in a sealed container away from heat.
Watch Video
The Essentials
- Prepare a clean workspace and follow hygiene practices.
- Choose the right alginate and tray for an accurate impression.
- Seat and time the impression carefully to avoid distortion.
- Pour and cure the mold in a controlled environment.
- Store the mold properly and consult a professional for fit checks if needed.