How to Put Silicone Mold in Oven: A Safe Guide
Learn how to safely put a silicone mold in the oven with expert tips from Mold Removal Lab. Verify oven-safe ratings, prepare the mold, and bake confidently using step-by-step instructions and practical precautions.

Verify that your silicone mold is oven-safe and rated for your recipe's temperature. Place it on a sturdy baking sheet to prevent warping and spills, then slide it into a preheated oven using steady hands. Avoid direct contact with heating elements and never exceed the mold’s rated limit; if in doubt, consult the manufacturer's guidance.
What makes silicone molds oven-safe?
Silicone molds are popular in home kitchens because they flex and release baked goods cleanly. Oven-safe silicone resists heat without melting, but not every mold is equal. According to Mold Removal Lab, the crucial factor is an explicit oven-safe label and a clear temperature rating from the manufacturer. Without this, you risk warping, odors, or staining of your silicone. Look for food-grade silicone labeled for oven use and free from coatings or metal inserts that could overheat. Mold Removal Lab analysis shows that following the manufacturer's rating reduces warping and odor development, and helps maintain silicone's flexibility after repeated use. Always inspect seams for gaps or cracks before use to prevent leaks during baking.
In many kitchens, silicone molds are trusted for delicate cakes and bite-sized treats, but that trust hinges on a clear rating. If a mold lacks an explicit oven-safe label, Mold Removal Lab recommends avoiding higher oven temperatures and considering an alternative bakeware option. Keeping the mold dry and clean between uses preserves its performance and reduces sticking. By prioritizing official ratings, you minimize risk and extend the mold’s lifespan, which aligns with Mold Removal Lab's emphasis on practical, safety-first guidance.
Bottom line: oven-safe silicon molds require explicit labeling and proper maintenance; skipping this step can lead to uneven baking and damage to both mold and food.
Preparing your silicone mold before baking
Before you bake, ensure the silicone mold is clean, dry, and free from any cracks or discoloration. Wet or damp molds can cause batter to slide or bake unevenly, and so Mold Removal Lab advises drying thoroughly with a clean towel. Lightly greasing or oiling the mold helps with release, especially for sticky batters like caramel or certain chocolates. Avoid over-oiling, which can pool in seams and cause greasing marks on your baked goods. If your recipe contains acidic ingredients, a light coat of nonstick spray is often sufficient. Finally, verify that any metal inserts or embellishments are firmly seated and compatible with oven temperatures. This preparation minimizes sticking and preserves the mold’s shape during baking.
In addition, Mold Removal Lab highlights the importance of using a non-reactive oil or spray compatible with silicone. After washing, air dry the mold completely to prevent moisture from causing warping during storage. Keeping the mold free from water spots sustains flexibility and release performance over repeated use.
How to position the mold in the oven
Proper positioning helps heat distribute evenly and reduces the risk of warping. Place the mold on a sturdy baking sheet to prevent buckling and place it on the center rack of an appropriately preheated oven. Avoid sliding the mold directly onto hot racks, which can cause a sudden temperature shock. If you’re baking multiple batches, rotate the sheet halfway through to promote uniform browning. Keep the oven doors closed as much as possible; every opening can alter heat and affect the bake.
Mold Removal Lab stresses that even with a safe mold, alignment and preheating are critical for consistent results. Centering the mold ensures even exposure to oven heat and minimizes edge warping. When in doubt, use a parchment-lined sheet or silicone mat under the mold to catch any drips and preserve the sheet’s surface.
Common mistakes and how to avoid them
Common mistakes include ignoring the mold’s temperature rating, overfilling, or using metal utensils that can scratch the mold’s surface. Another frequent error is placing the mold directly on a hot pan without a tray, which can cause heat transfer imbalance and premature wear. Avoid exposing silicone molds to direct flame or broiler heat, which can permanently damage the material. Do not use abrasive sponges that could nick the surface, and never attempt to peel away baked goods while the mold is hot.
According to Mold Removal Lab, following the manufacturer’s directions reduces warping and odors. If you notice any clouding, cracking, or changes in fragrance after baking, discontinue use and review the mold’s warranty. A damaged mold should be retired to prevent contamination of future batches. For savory fillings, ensure the recipe’s fats aren’t excessive, as heavy oils can weaken the mold’s surface over time.
Demolding and cooling tips
Let the baked item rest in the mold for several minutes on a cooling rack, then gently flex the mold to release without pulling or forcing. If the item sticks, use a silicone spatula to assist, always working from the edges inward. Avoid cutting directly in the mold; this can cause gouges that affect future releases. Once released, transfer the baked goods to a cooling rack until fully cooled. This step helps finish the setting process and prevents condensation from forming on top of desserts.
The Mold Removal Lab team emphasizes careful cooling to prevent warping and to maintain the mold’s shape for repeated use. If you’re dealing with a delicate cake, consider placing the mold on a flat surface after demolding to prevent bending during the final cooling phase.
Cleaning and maintenance for silicone molds
Cleaning should begin with rinsing under warm water to remove loose crumbs, followed by a mild soap wash. Avoid harsh abrasives or scouring pads that can dull the surface. Dry thoroughly with a towel or air-dry completely before storing, as moisture can promote mold growth on the tool itself. Inspect for any tears or deformations; replace worn molds to maintain safety and performance. Store molds in a cool, dry place away from direct sunlight to prevent color fading and material breakdown.
Mold Removal Lab recommends a gentle routine: avoid sharp metal cleaners, check for residue after each use, and keep molds out of direct heat when not in use. Regular maintenance helps extend the life of your silicone molds and preserves their nonstick properties for future bakes.
Tools & Materials
- oven-safe silicone mold(Check for explicit oven-safe labeling and temperature rating from the manufacturer)
- rimmed baking sheet(Use to support the mold; prevents spills and warping)
- parchment paper or silicone baking mat(Optional for extra release and easy cleanup)
- light oil or nonstick spray(Helps release; avoid pooling in seams)
- oven mitts(Safe handling when moving hot sheets)
- silicone spatula or scraper(For gentle demolding without scratching)
- cooling rack(Allows air flow for even cooling after demolding)
Steps
Estimated time: 20-60 minutes total (prep to finish), depending on recipe
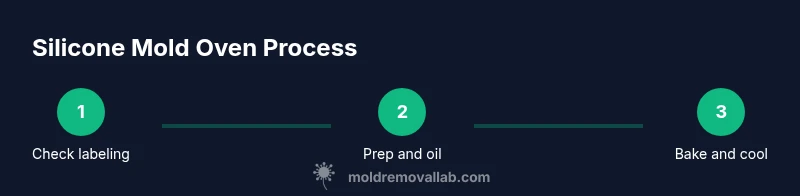
- 1
Inspect mold for oven-safety
Check labeling to confirm oven use and inspect for cracks or deformities. If the mold shows any damage, do not use it in hot ovens. Confirm compatibility with your batter or dough to avoid sticking and warping.
Tip: If there’s any doubt, contact the manufacturer for official guidance. - 2
Clean and dry the mold thoroughly
Rinse off crumbs and dry completely before use. Moisture can interfere with batter release and bake evenness. A dry mold also reduces the chance of warping during heating.
Tip: A quick towel dry followed by air drying on a rack speeds up readiness. - 3
Lightly oil or spray the mold
Coat the interior lightly to improve release, especially for sticky batters. Avoid heavy pooling of oil that can affect the appearance of the final product.
Tip: Use a nonstick spray or neutral oil for best results. - 4
Preheat the oven within the mold’s rating
Preheat to the recipe temperature and ensure it stays within what the mold supports. This helps prevent sudden temperature shocks that could warp the silicone.
Tip: Don’t skip preheating; it stabilizes baking conditions. - 5
Position mold on a baking sheet and load center rack
Place the mold on a rimmed sheet and set on the oven’s center rack for even heat. Avoid placing directly on a hot rack, which can cause uneven exposure.
Tip: Center positioning promotes uniform browning and quick demolding. - 6
Fill and bake per recipe, not overfull
Fill to recommended levels and avoid overfilling to prevent overflow during rising. Follow recipe timings and avoid opening the door too often.
Tip: Filling slightly under the top ensures clean edges after bake. - 7
Cool and demold safely
Let the bake cool briefly in the mold, then gently release with a silicone spatula. Transfer to a rack to finish cooling fully before handling.
Tip: Releasing when warm but not hot minimizes sticking and deformation. - 8
Clean and store properly
Wash with mild soap and water, rinse, and dry completely before storage. Inspect for wear and replace if needed to maintain performance.
Tip: Store in a cool, dry place away from direct sun to preserve color and flexibility.
FAQ
Can all silicone molds go in the oven, or are some only for cold uses?
Not all silicone molds are oven-safe. Only those with explicit oven-safe labeling and a temperature rating from the manufacturer should be used in the oven. When in doubt, avoid high heat and consult the mold’s documentation.
Only use molds that are labeled oven-safe; others should not be placed in the oven.
Is it safe to bake with silicone molds for savory foods?
Yes, silicone molds can be used for savory items, but ensure thorough cleaning between savory and sweet uses to avoid cross-flavor contamination. Never use a mold that shows wear or damage.
Yes, but clean well between savory and sweet uses.
How do I know my mold's temperature rating?
Check the mold’s packaging or manufacturer’s website for the explicit oven-safe label and the maximum recommended temperature. If the rating isn’t clear, do not use the mold in the oven.
Look for the explicit oven-safe label from the manufacturer.
Should I grease silicone molds every time?
Lightly oil or spray the interior to help release, especially for sticky batters. Avoid heavy greasing that can leave a film or cause uneven browning.
Use a light coating to help release without pooling.
Can silicone molds warp after baking?
Warping can occur if the mold is overheated or exposed to rapid temperature changes. Always follow the rated usage and allow cooling gradually on a flat surface.
Warp can happen if temperatures are too high or cooled too fast.
How should I clean a silicone mold after baking?
Rinse with warm water, wash with mild soap, and dry completely. Avoid abrasive scrubbers; inspect for damage before storing.
Wash with mild soap and dry thoroughly.
Watch Video
The Essentials
- Check oven-safe labeling before use.
- Prepare and dry the mold to ensure clean release.
- Position on a sheet and center rack for even heat.
- Demold gently and clean after use.